Store onboarding
Find out about how to onboard merchants via Connect
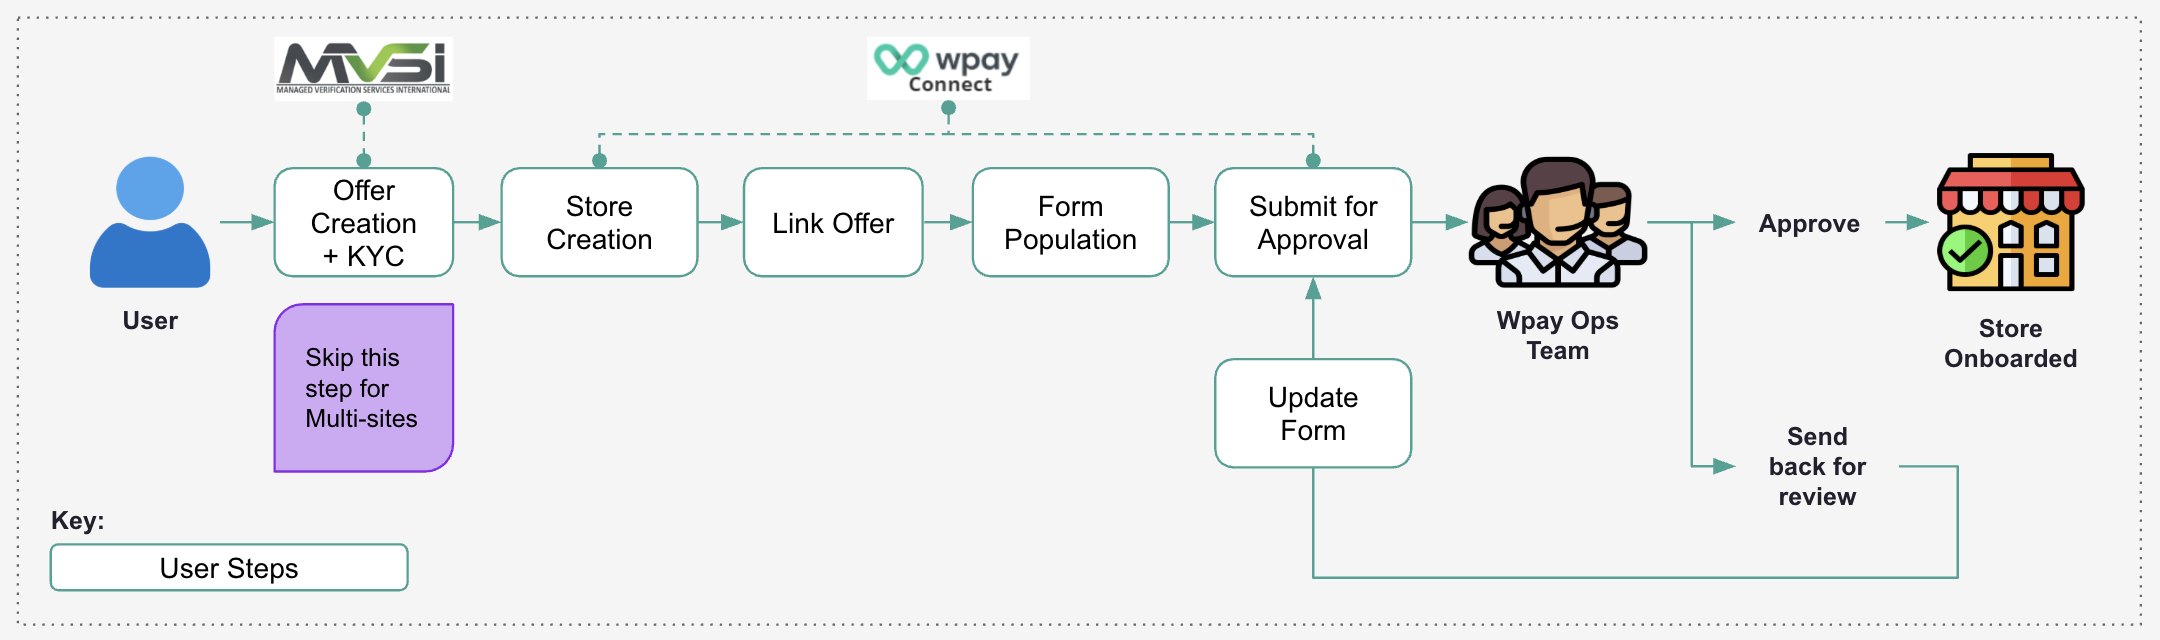
The onboarding journey through our Connect platform is a structured, 5-step process designed to ensure regulatory compliance and a seamless transition from initial application to a fully operational store.
High level onboarding process flow
New merchant store onboarding
Offer creation and Know Your Customer via MVSI
The onboarding journey begins with mandatory identity and business verification. We utilise MVSI, our dedicated third-party verification provider, to securely collect, validate, and verify the necessary Know Your Customer (KYC) documentation (e.g. business registration documents, bank statements).
Store creation
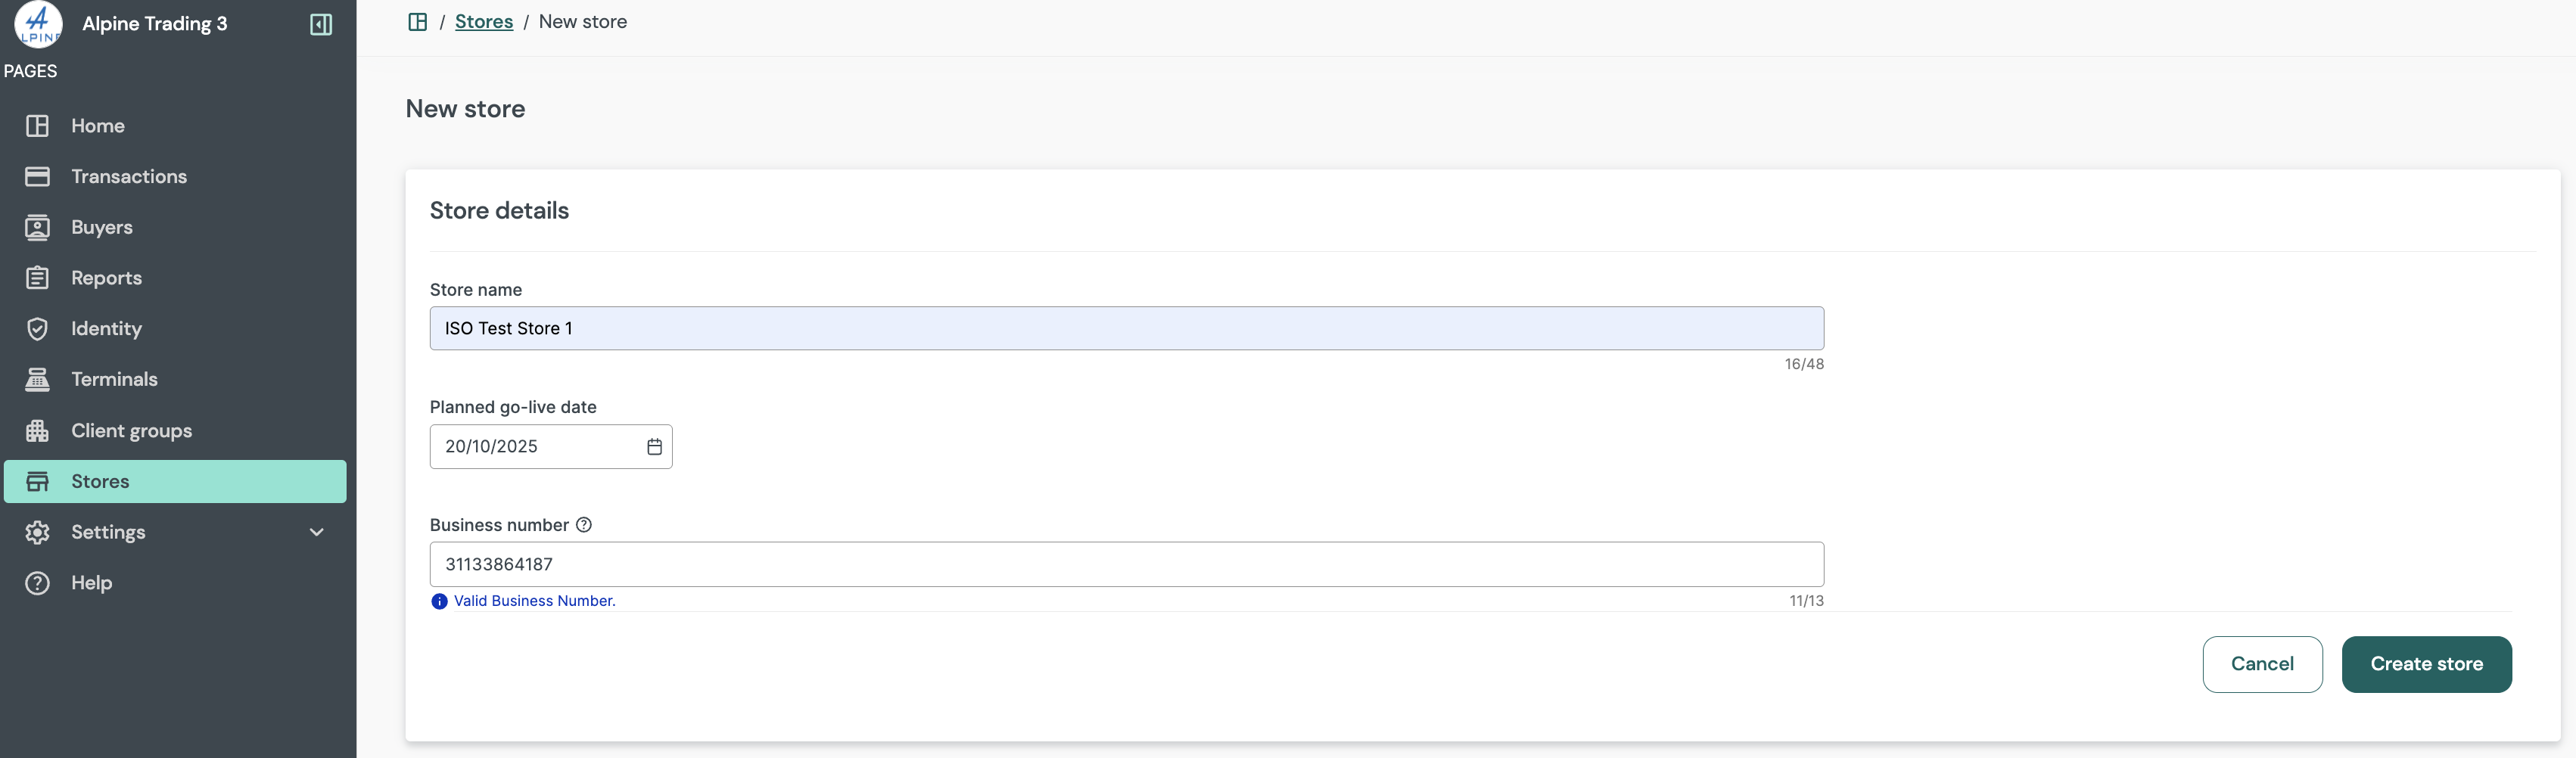
Whilst identify verification is underway, users are able to commence store creation in Connect.
| Screen name | Description |
|---|---|
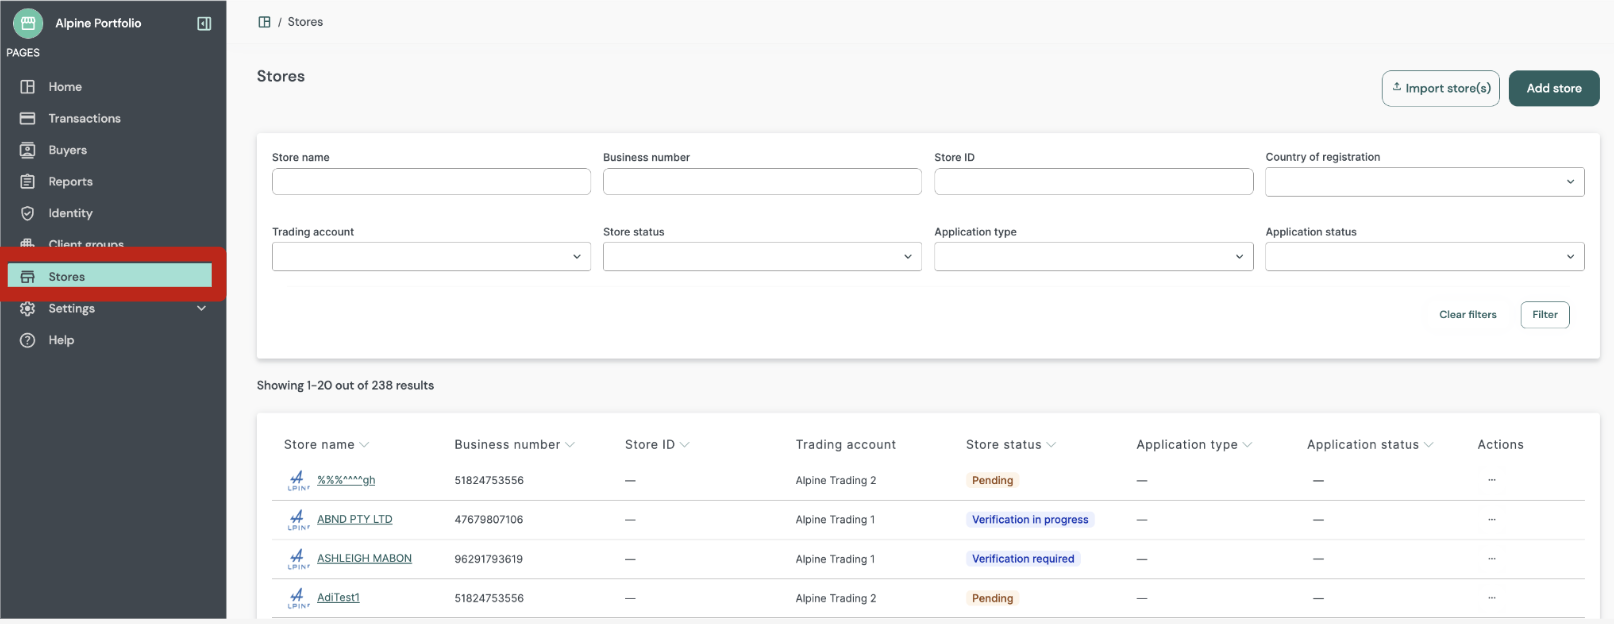
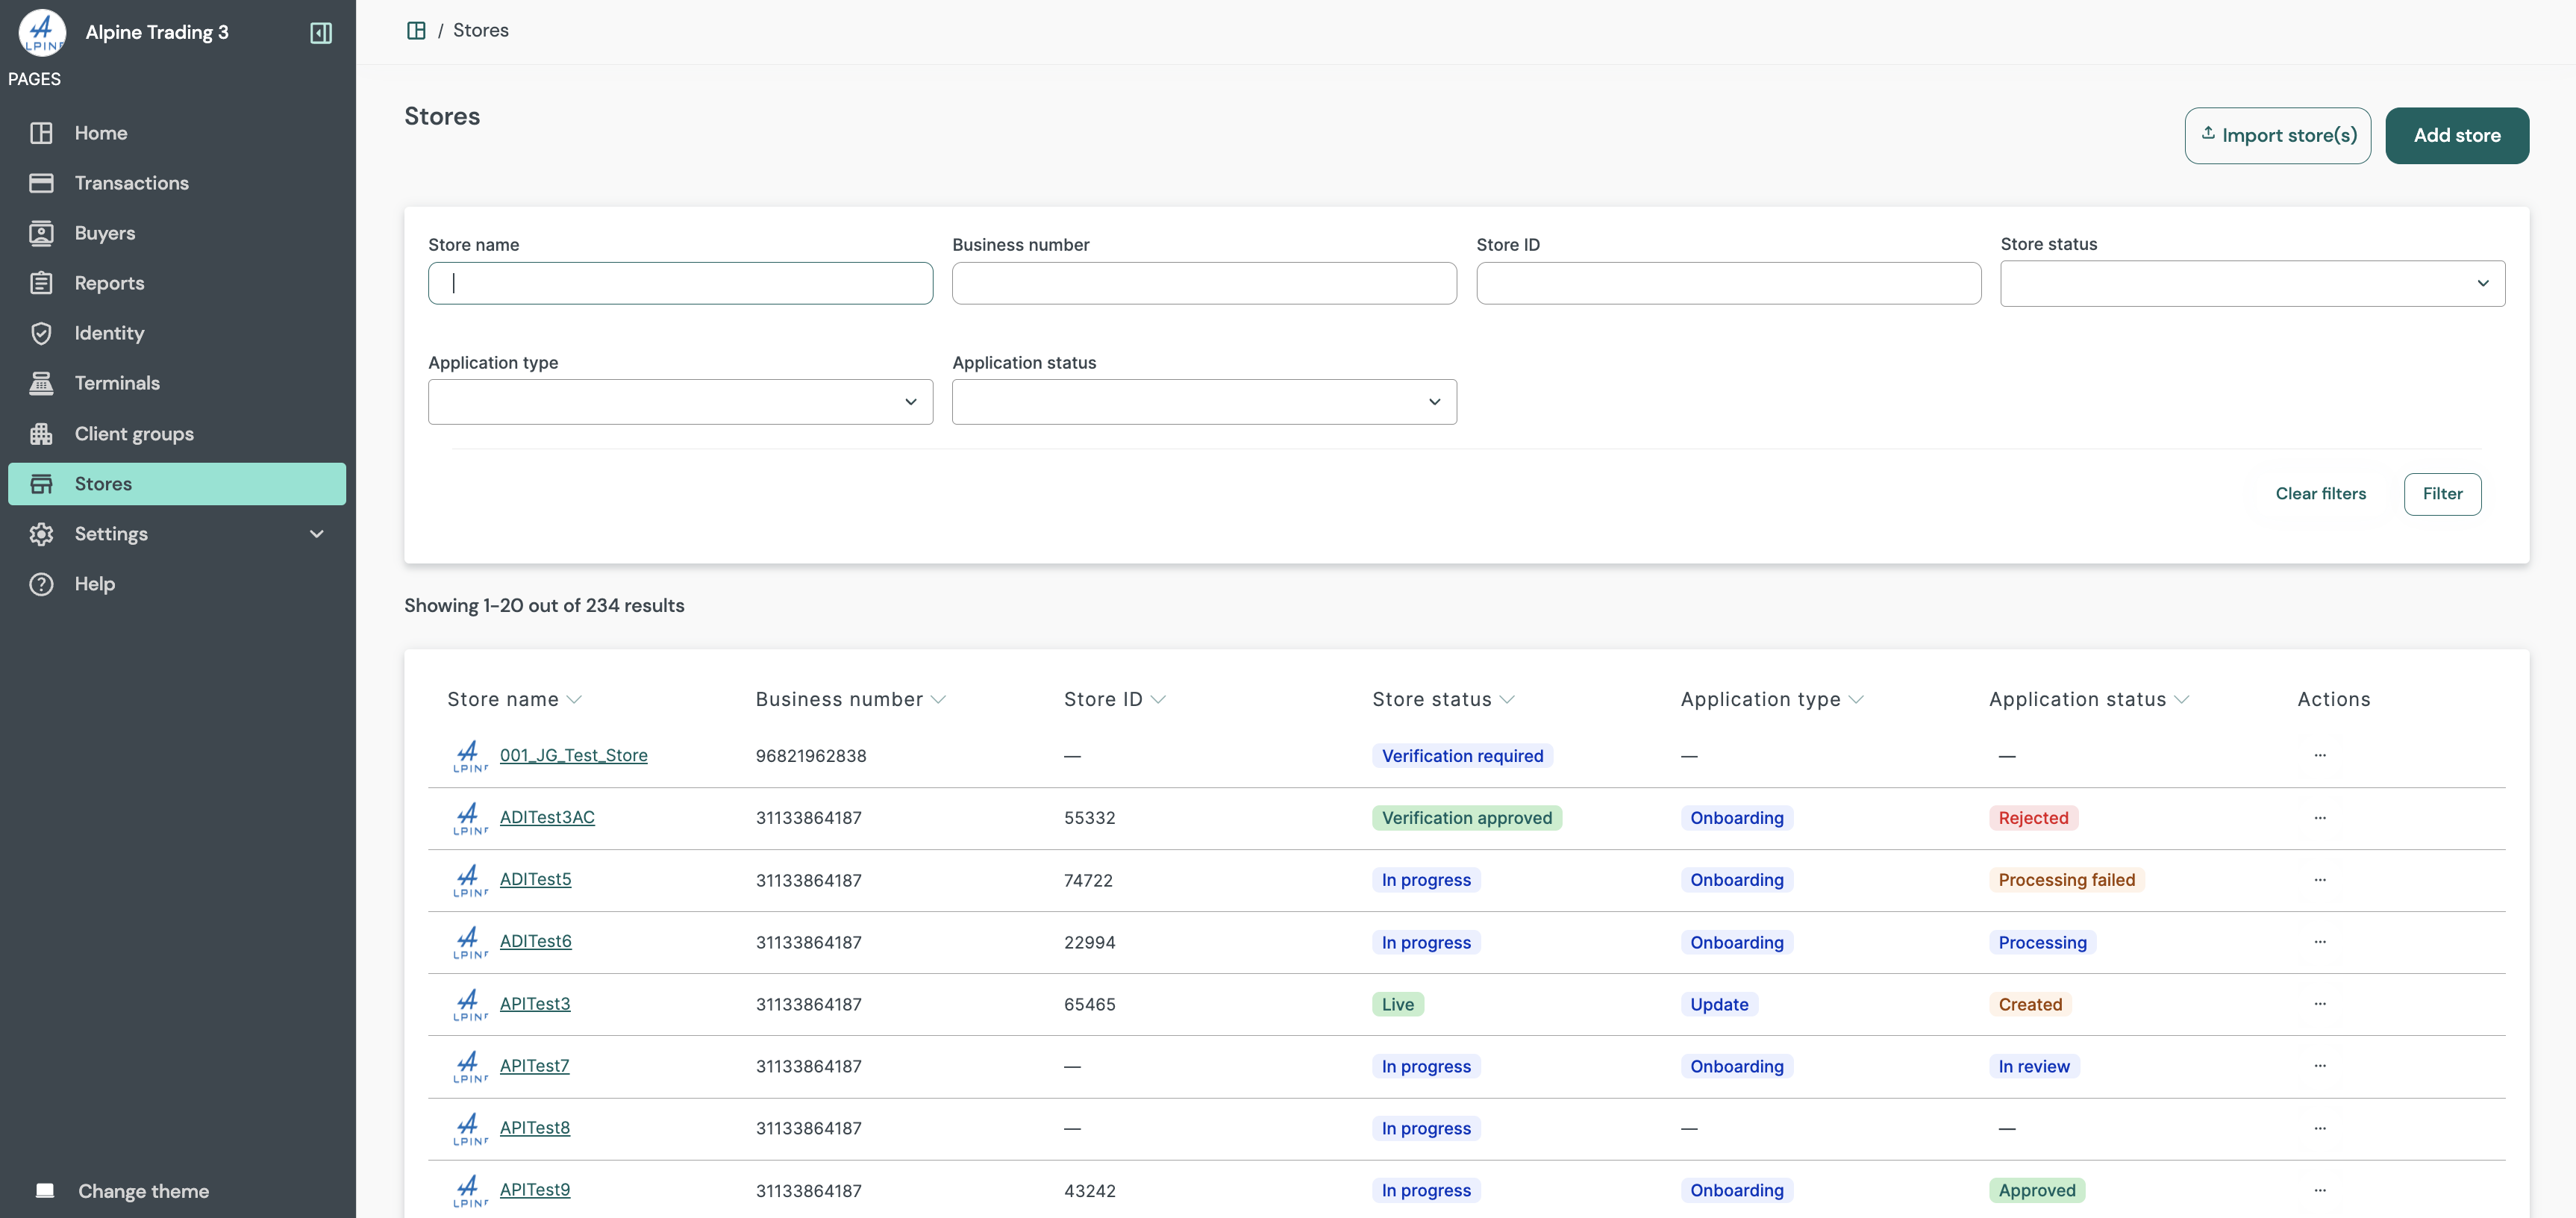
| Store listing | Upon signing in, navigate to Stores in the leftmost panel to bring up the store listing screen. The store listing screen shows all of the stores that have been created by the merchant in a single screen. In the Portfolio / Account Group view, the Trading Account filter can be used to find the stores that meet the filter criteria. Note: Portfolio and Account Groups can see the Trading Accounts a store belongs to as parents in the hierarchy can see their children. For more information about the hiearachy refer to Managing account hierarchy. |
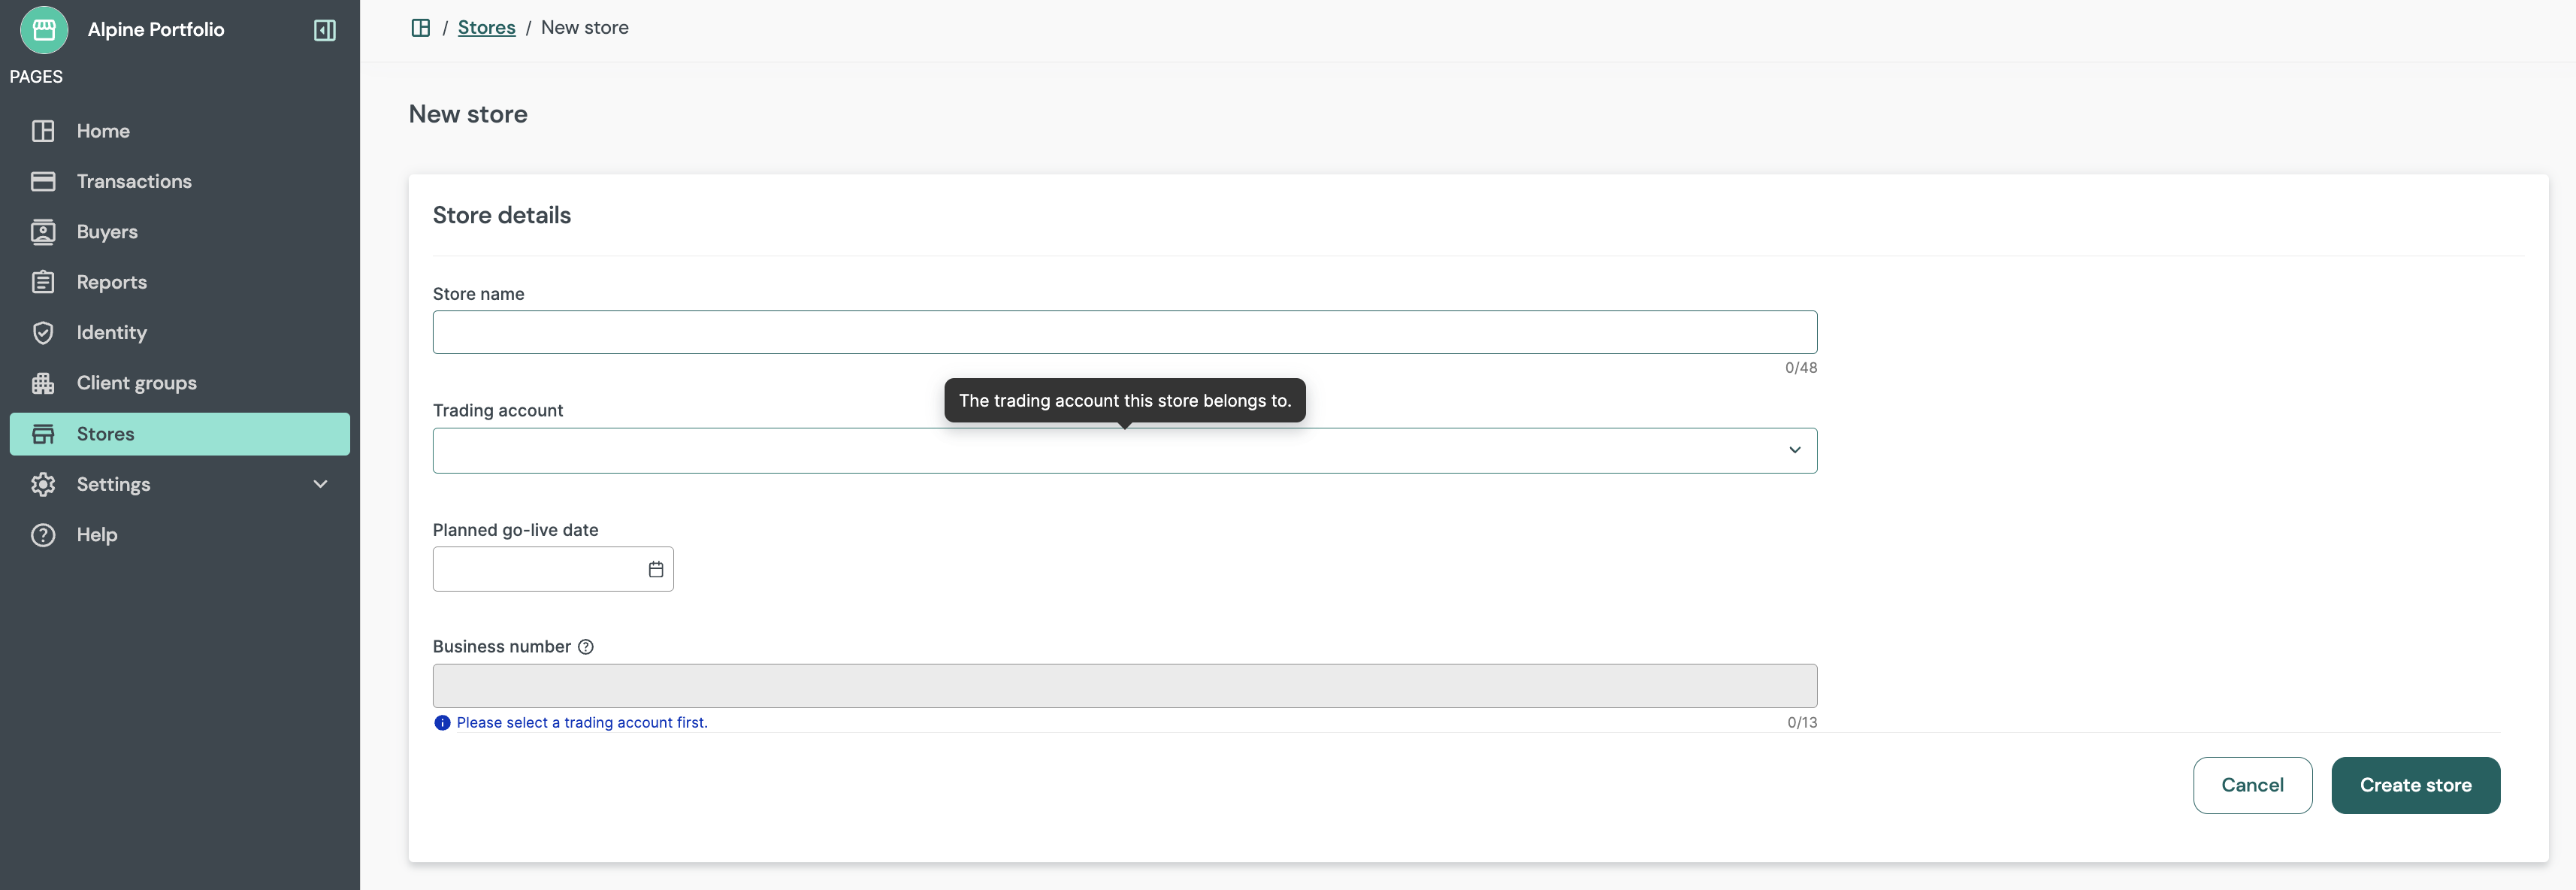
| New store | Select the ‘Add Store’ button on the store listing screen to bring up the new store screen. Complete the required fields to create the store in Wpay Connect. Once created, the store will appear in the store listing screen. Note: To ensure successful hierarchy set up, be sure to assign a Trading Account to the new store in this step. |
Store listing: Portfolio / Account Group view
Store listing: Trading Account view
New store: Portfolio / Account Group view
New store: Trading Account view
MVSI offer linkage
Upon store creation, users can review and link existing MVSI offers to the newly created store to gain visibility into their KYC lifecycle progress. For detailed information about our Identity module refer to this guide Identity.
| Screen name | Description |
|---|---|
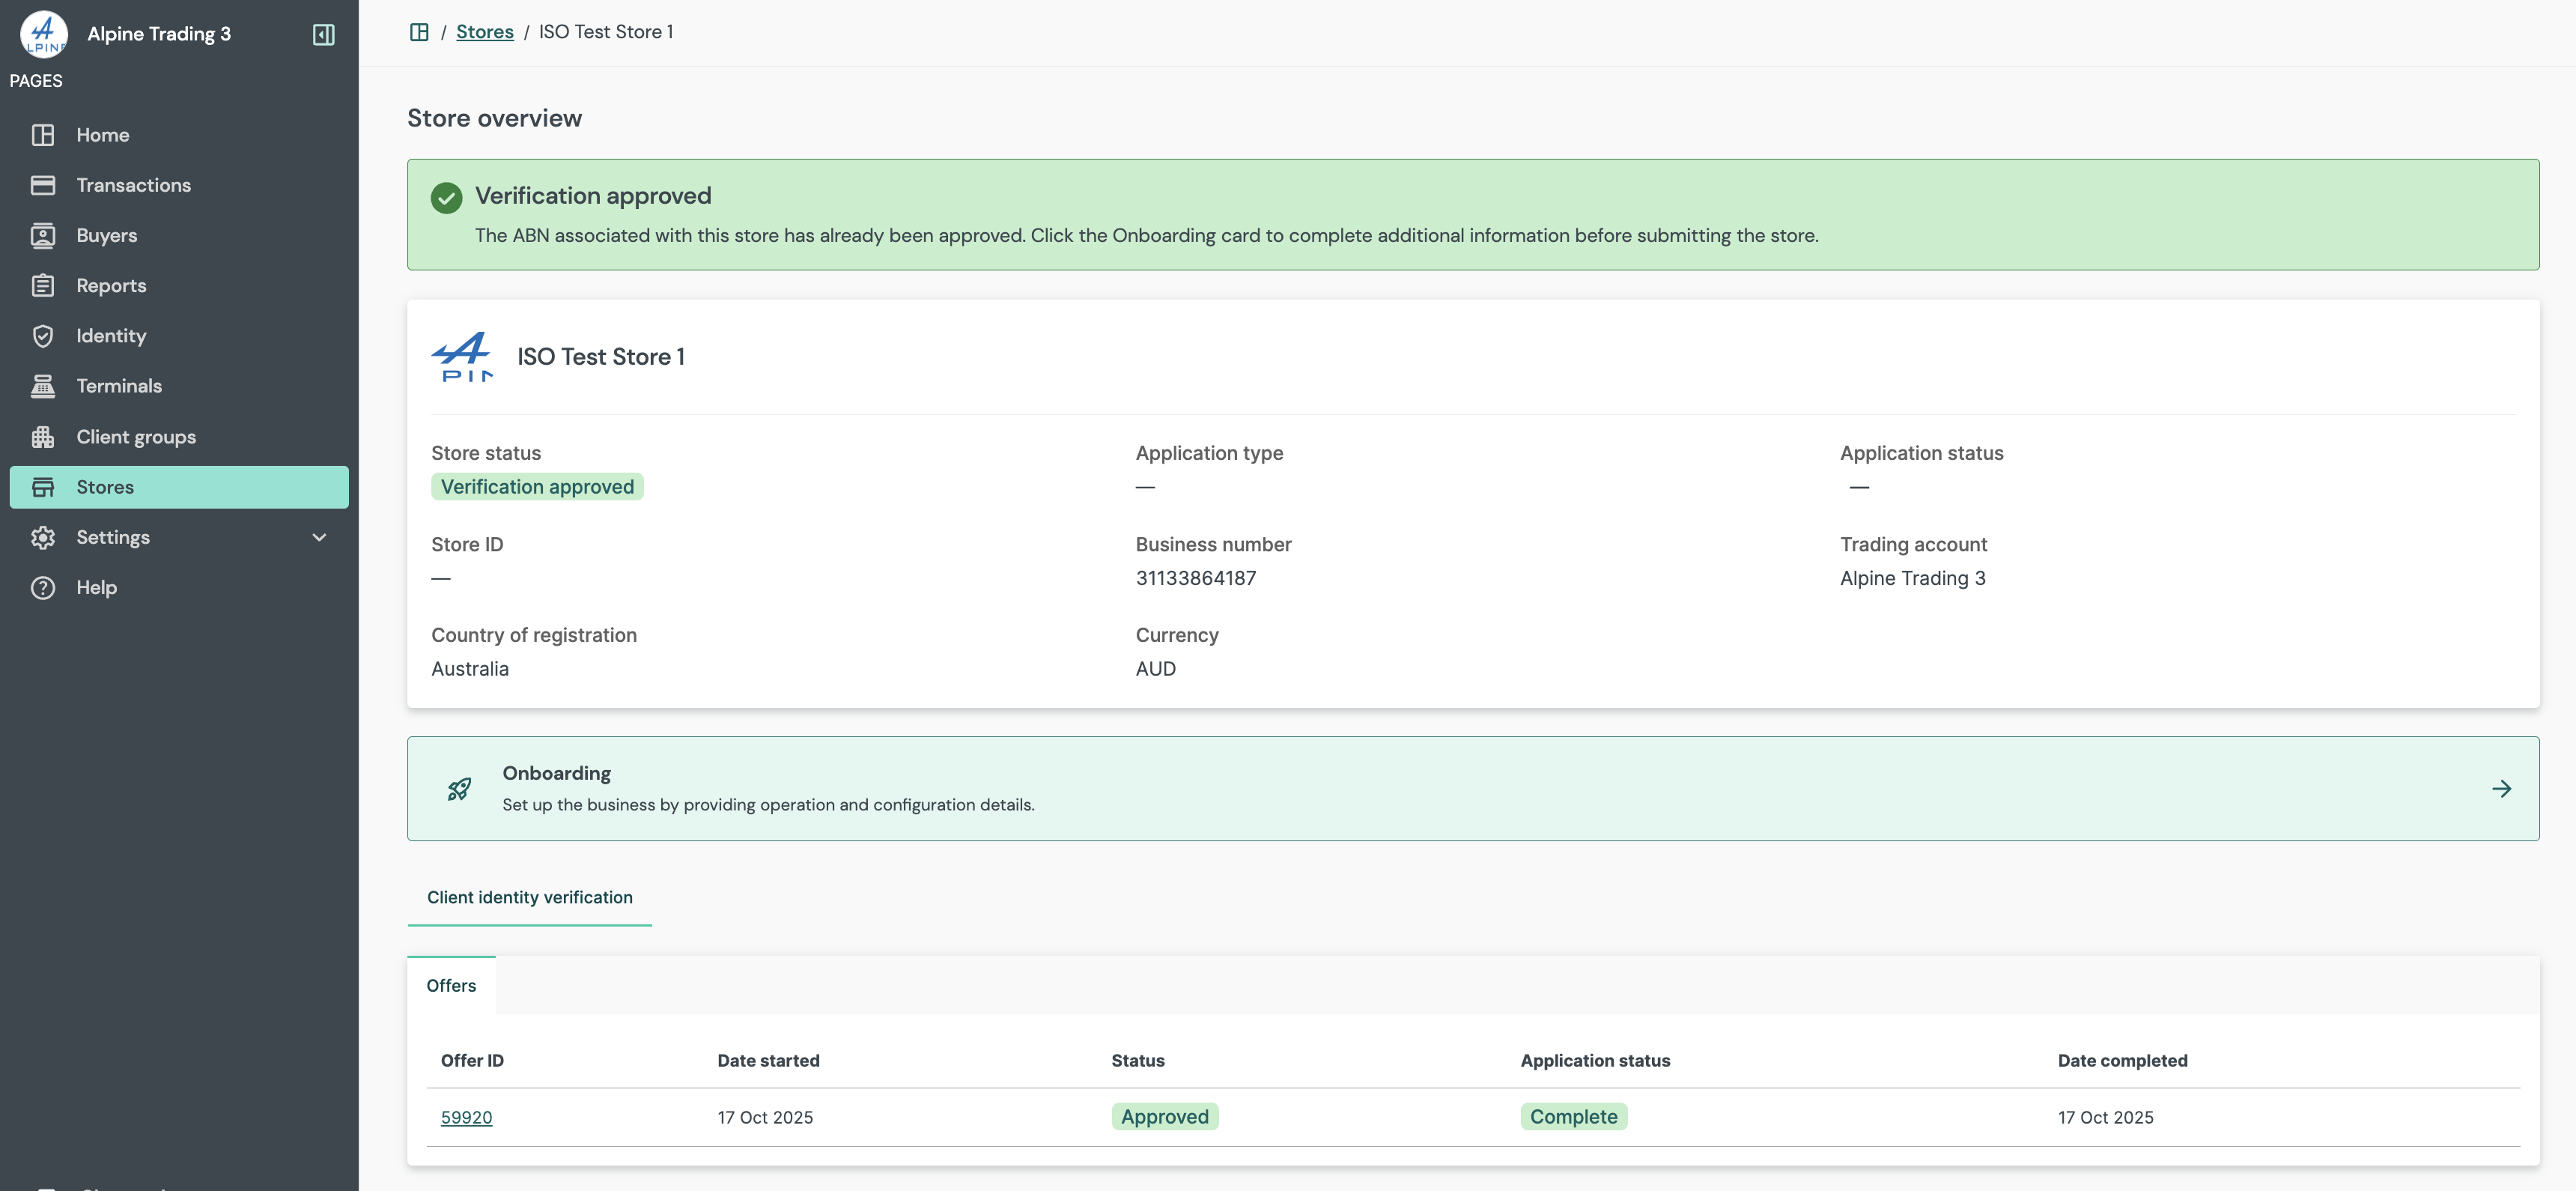
| Store overview | Once the store is created, select the store name in the store listing screen to see an overview of the store and key information. Locate the store using filters available. Any completed or in-progress offers in MVSI will appear under the Review existing offers panel. Select an existing offer to link up the MVSI offer to the store in Wpay Connect, and select the ‘Submit for KYC’ button. |
| Store overview | When an in-progress offer is selected, the store’s status will show as ‘Verification In Progress’. When a completed offer is selected, the store’s status will show as ‘Verification Approved’. Select the 'Onboarding' panel to bring up the onboarding forms in the store onboarding screen. |
To view real-time KYC progress after the offer is linked, navigate to Identity (in the leftmost menu). Locate the store using its unique business number, and double-click the business number hyperlink to open the workflow view. For more information refer to this guide Identity.

Store overview: review and link existing offer
Store overview: store status displays 'Verification approved'
Form population
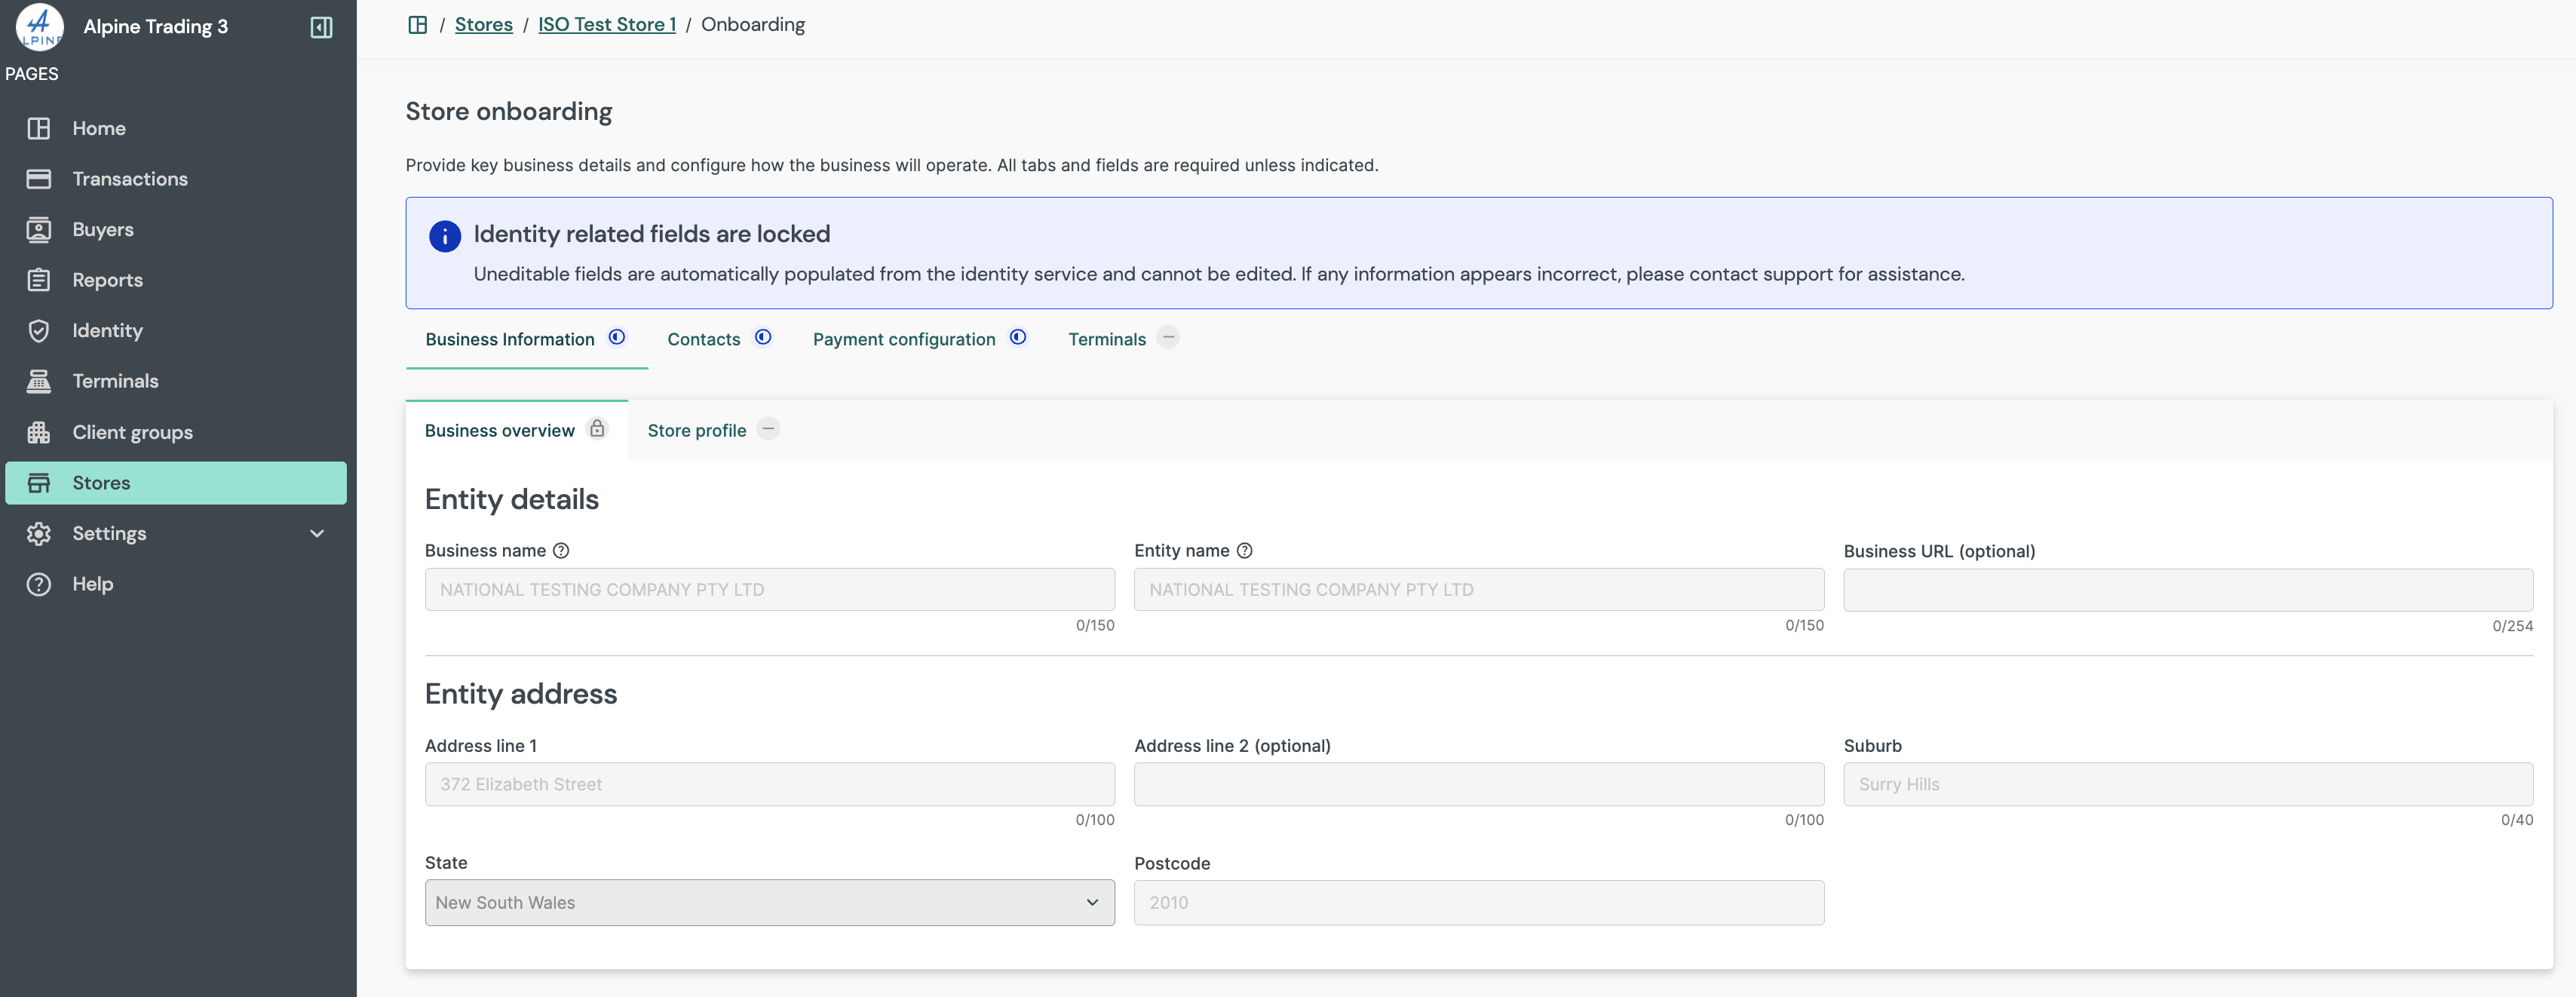
Following MVSI Offer Linkage, users will be required to work through and populate the fields across the Business Information, Contacts, Payment Configuration and Terminals tabs.
Note
Identity related fields are locked and will automatically populate once identity verification within MVSI is complete.
| Screen name | Description |
|---|---|
| Business information | Populate the required fields in the Store profile tab and hit ‘Save'. Note: Tabs with a ‘lock' icon pull data directly from MVSI and gets auto populated when Identity Verification in MVSI is complete. |
| Contacts | Populate the required fields in the Business contact(s) tab and hit ‘Save'. Note: The same contact can be entered across the business, store and finance sections by selecting the ‘Copy key business contact’ button on the bottom right. |
| Payment configuration | Populate the required fields in the Settlement details, Payments schemes and Merchant service fees tabs and hit ‘Save'. Note: Refer to the form population rules as stipulated in the training guide. |
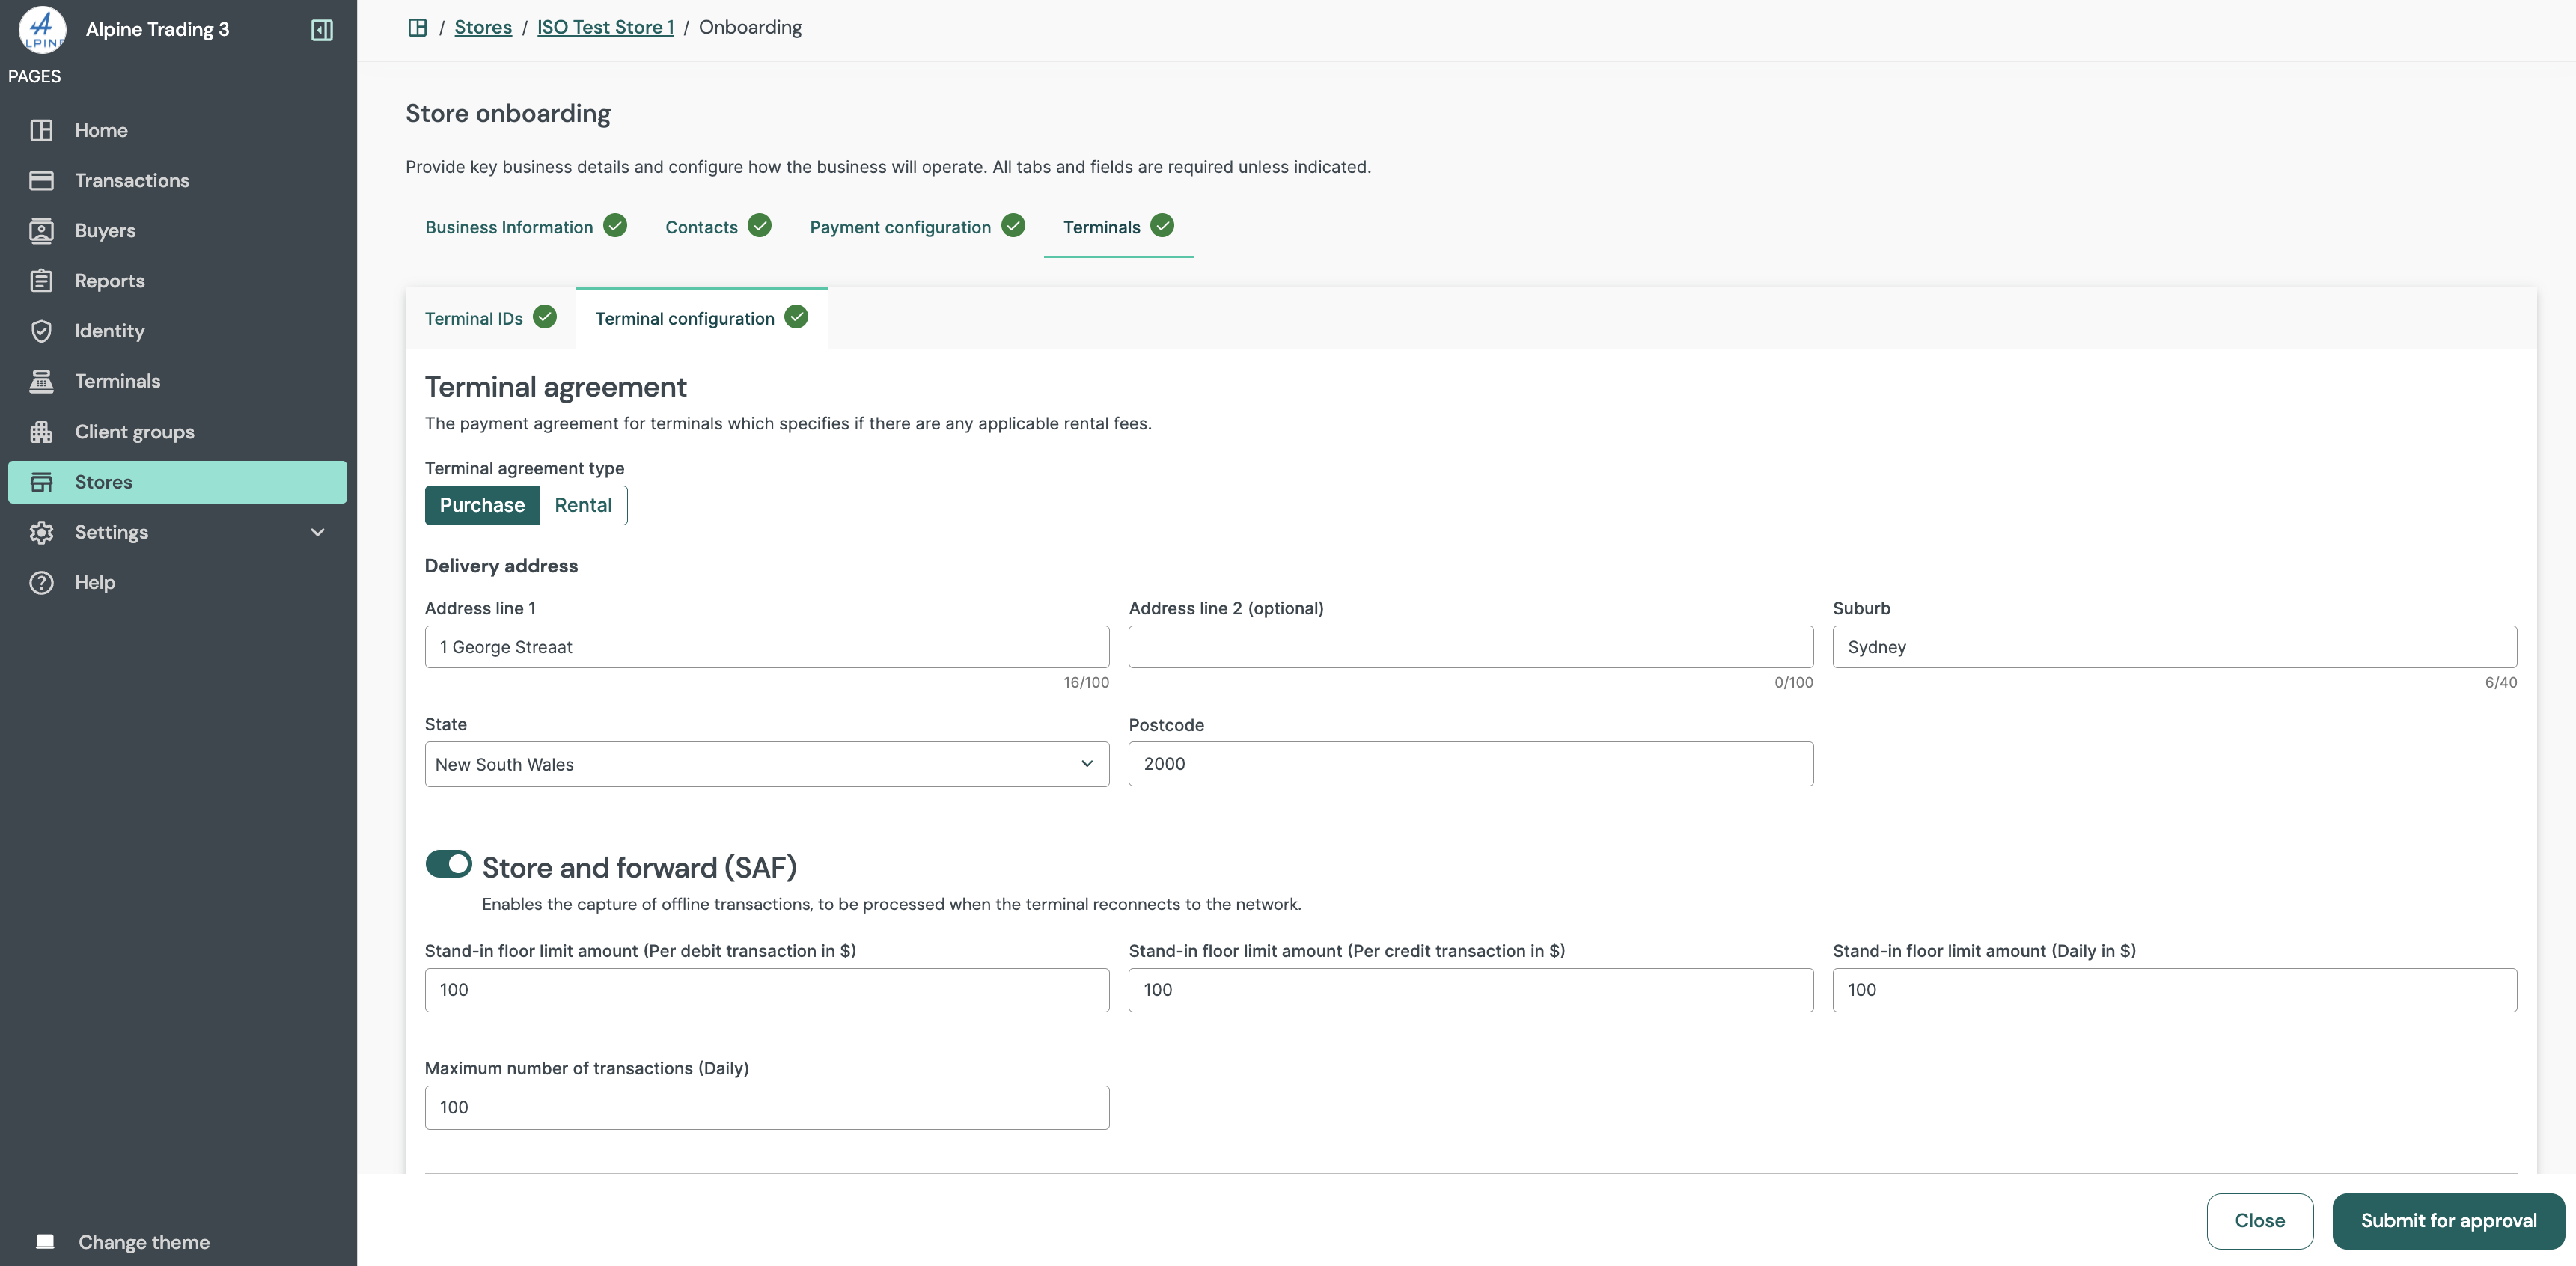
| Terminals | Populate the required fields in the Terminal IDs and Terminal configuration tabs and hit ‘Save'. Note: Refer to the form population rules as stipulated in the training guide. |
Store onboarding: identity related fields
Store onboarding: form population complete
Store submission
Once the form has been populated, hit ‘Submit for approval’ and then ‘Proceed’. Back in the store overview screen, the application's status will show as ‘In review'.
Note
The Onboarding SLA clock begins upon application submission. Should an application be rejected however, the SLA clock will stop and said application will be considered as ‘Out of SLA’ until the point of resubmission.
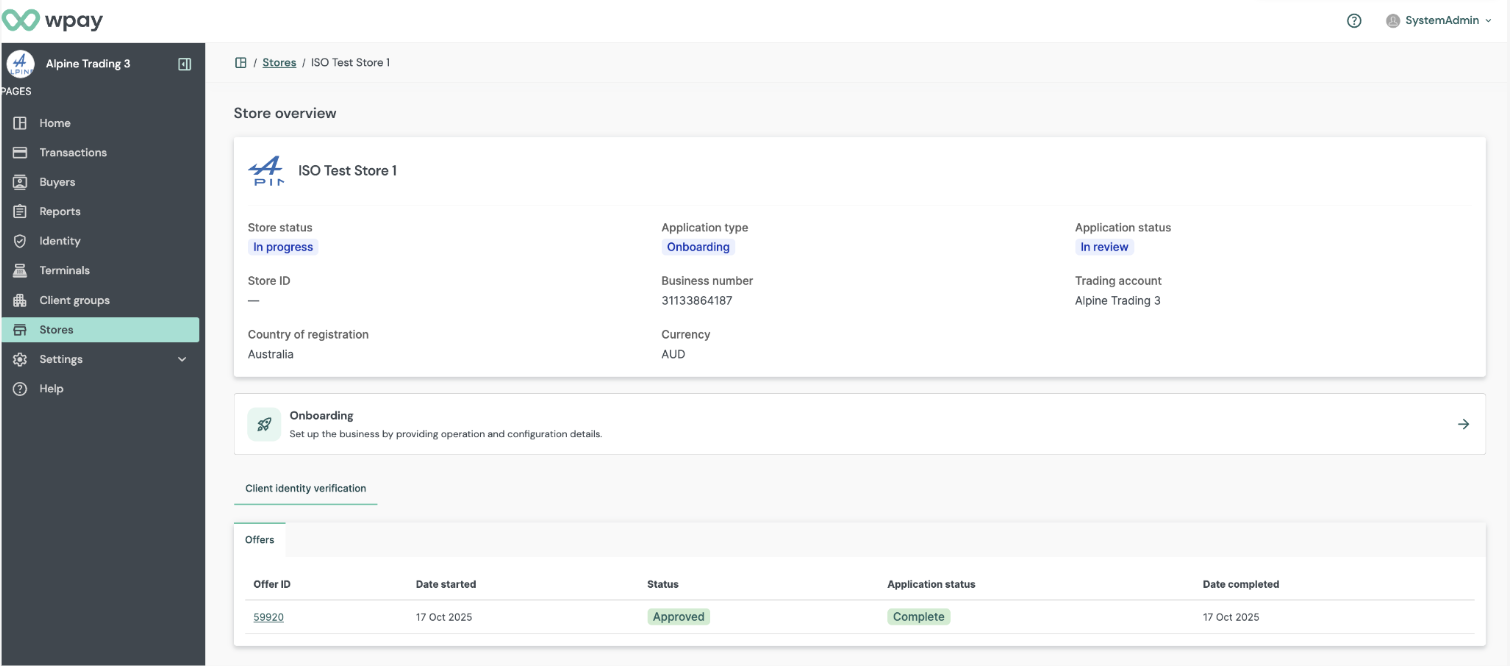
Store overview: application status displays 'In review'
Updated about 1 month ago