How to make payment transactions on P630 terminal?
Learn more about making transactions on a P630-A terminal device.
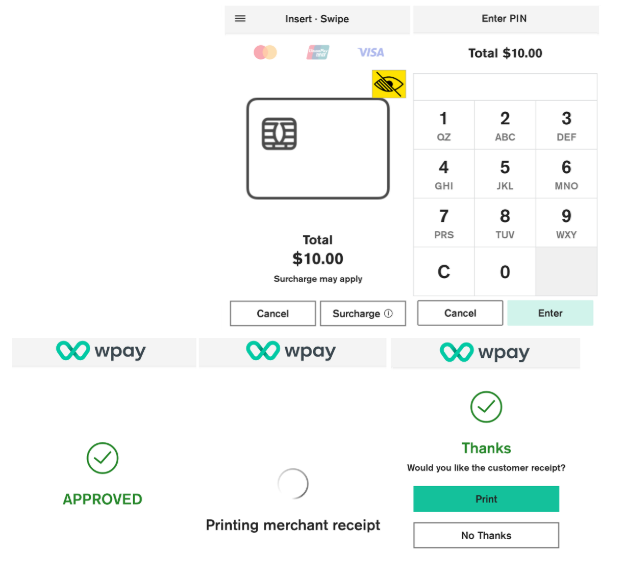
Purchase
To process a Purchase transaction:
- POS sends the transaction amount
- Tap Purchase
TIP: Tap the backspace key to delete a single number, or the Clear key to clear the whole amount entered. - Your customer presents their card or device and enters their PIN (if required).
- Graphic on-screen shows customers how to present their card:
- Tap (contactless cards or wallets) - Customer taps their contactless device or card on the contactless symbol on the printer roll cover
- Insert (chip cards) – The customer inserts their chip card into the slot at the bottom of the terminal. The card should be inserted at the chip end first with the chip facing up.
- Swipe (magnetic stripe cards) – The customer swipes their card through the magstripe reader on the side of the terminal.
- Select account type & enter PIN if applicable.
- Terminal processes the transaction and then displays Approved or Declined
- If a card is inserted, the terminal prompts to remove the card from the chip card slot
- Merchant receipt prints
- Prompts for customer receipt options. Select PRINT to print the customer receipt, or NO THANKS to continue back to the payment screen.
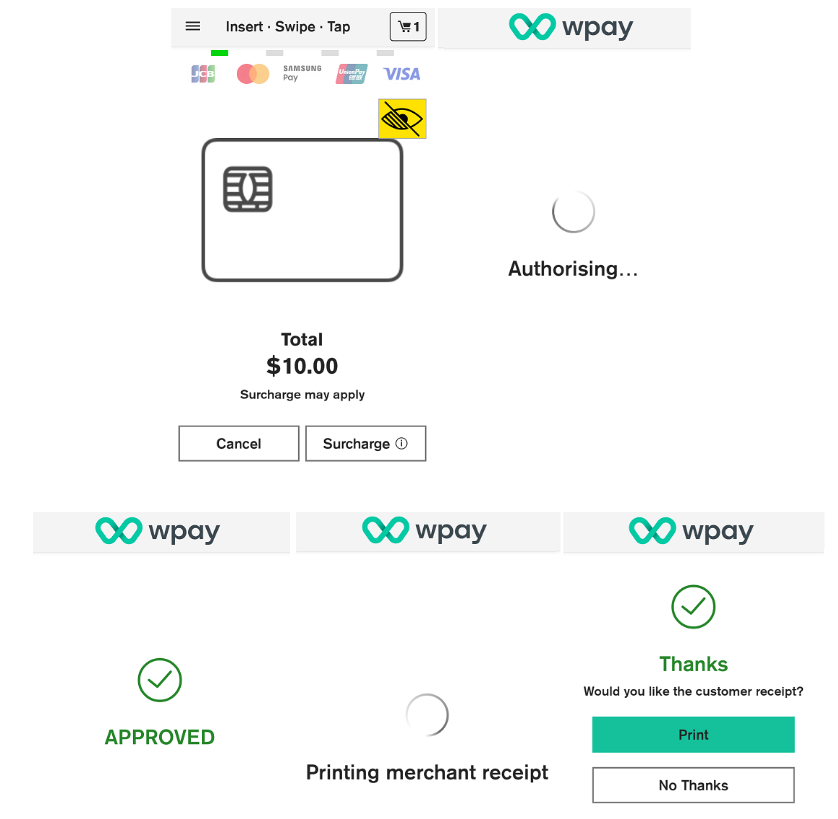
Purchase Transaction
Purchase + Cashout
To process a Purchase transaction with Cash out:
- POS sends the purchase + cashout amount.
- Select the cash-out amount from the list or tap Other to enter a custom amount
NOTE: If you select No Cash-Out the transaction will proceed with no cash-out amount added. - Total transaction amount is displayed on-screen. Your customer presents their card and enters their PIN.
- The graphic on-screen shows customers how to present their card.
Customer taps their contactless device or card (Apple Pay, Google Pay, contactless cards) on the contactless symbol on the printer roll cover, inserts their chip card into the slot at the bottom of the terminal, or swipes the magstripe on their card through the magstripe reader on the side of the terminal.
NOTE: For Cash-Out transactions, Magstripe method is available only in NZ. - Your terminal processes the transaction and then displays Approved or Declined
- If a card is inserted, the terminal prompts to remove the card from the chip card slot
- Customer selects preferred receipt option
- Purchase + Cash-Out summary screen is displayed. Tap DONE to continue back to the
- Payment screen
- Present approved cash-out amount to the customer
To process Cash out:
- POS sends the transaction amount
- Tap Cash Out Only
- Cash-out amount is displayed on-screen. Your customer presents their card and enters their PIN.
- The graphic on screen shows customers how to present their card.
NOTE: For Cash-Out transactions, Magstripe method is available only in NZ. - Your terminal processes the transaction and then displays Approved or Declined
- If a card is inserted, the terminal prompts to remove the card from the chip card slot
- Customer selects preferred receipt option
- Cash Out summary screen is displayed. Tap DONE to continue back to the Payment screen.
- Present approved cash-out amount to the customer.
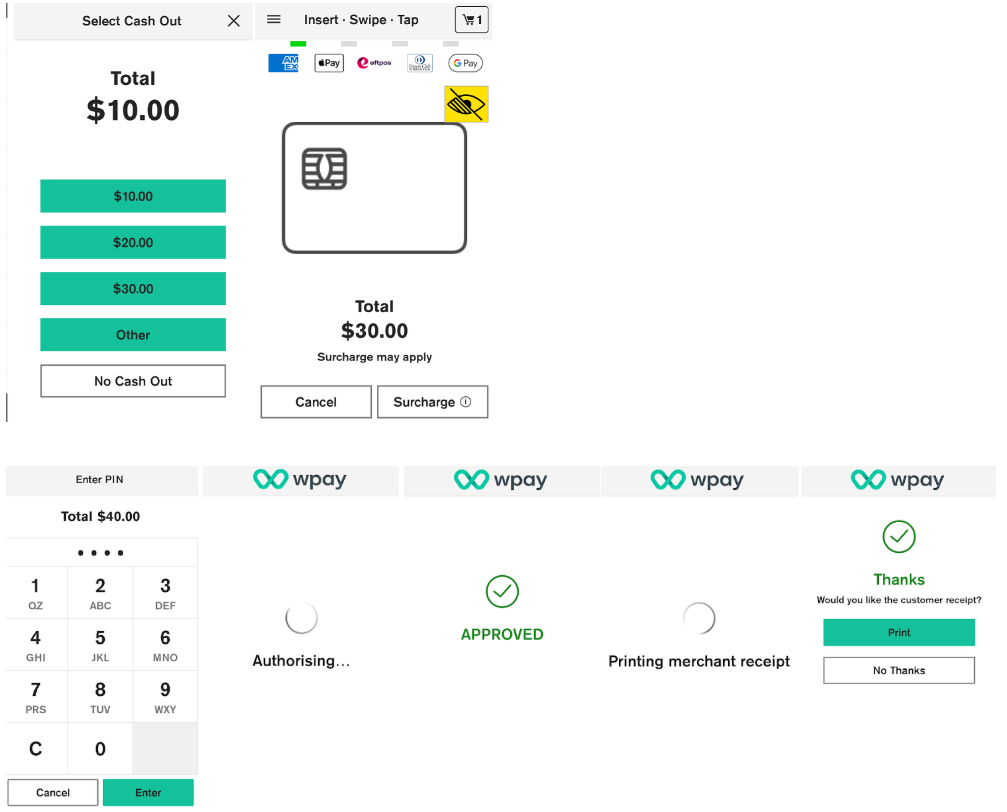
Purchase + Cashout Transaction
Purchase + Tip
Tipping offers your customers the option of adding a tip to their purchase.
To process a transaction with a tip added:
- Initiate transaction by entering the transaction amount.
- Terminal prompts to select tip amount. Customers can select a predefined amount, enter a custom amount, or opt not to add a tip.
Note: Tip can be entered from the POS directly. You will be prompted to enter in the terminal PINPAD if not provided in POS. - Terminal will prompt to present card (graphic on screen shows customers how to present their card)
- If contactless, present the card or device on the contactless symbol on the printer roll cover, alternatively insert their chip card into the slot at the bottom of the terminal or swipe the magstripe on their card through the magstripe reader on the side of the terminal.
- Select account type & enter PIN if applicable.
- Terminal process transaction and then advises if transaction has been approved or declined.
- If a card is inserted, the terminal prompts to remove the card from the chip card slot.
- Prints Merchant receipt.
- Prompts for customer receipt option.
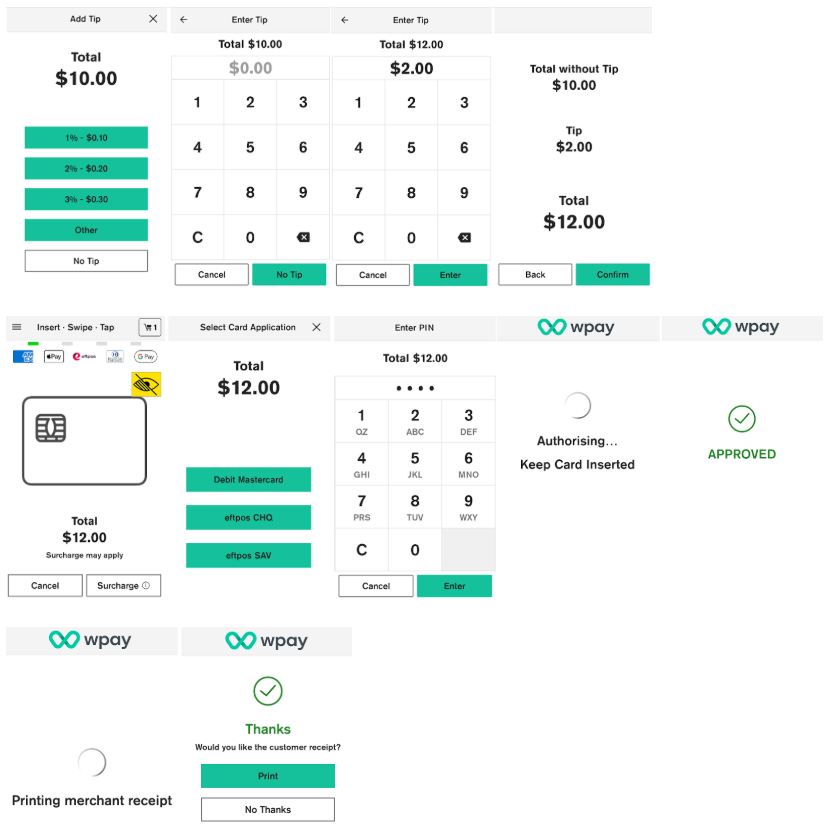
Purchase + Tip Transaction
MOTO
To process MOTO - your customers don’t need to be in your store to pay you. You can process card-not-present ‘MOTO’ (mail-order, phone-order) transactions on your Android terminal.
To process MOTO transactions, you will need your manager or cashier passcode (if applicable).
- Enter the transaction amount
- Tap Other
- Tap Manual Card Entry
- Tap Mail Order or Phone Order
- Enter the card number, tap Enter and then tap Confirm
NOTE: For your customer’s security, your terminal won’t display the full card number on screen while you type it in - Enter the card expiration date in the format MM/YY
- Your terminal processes the transaction and then displays Approved or Declined
- Select PRINT to print customer receipt, or NO THANKS to continue back to the payment screen.
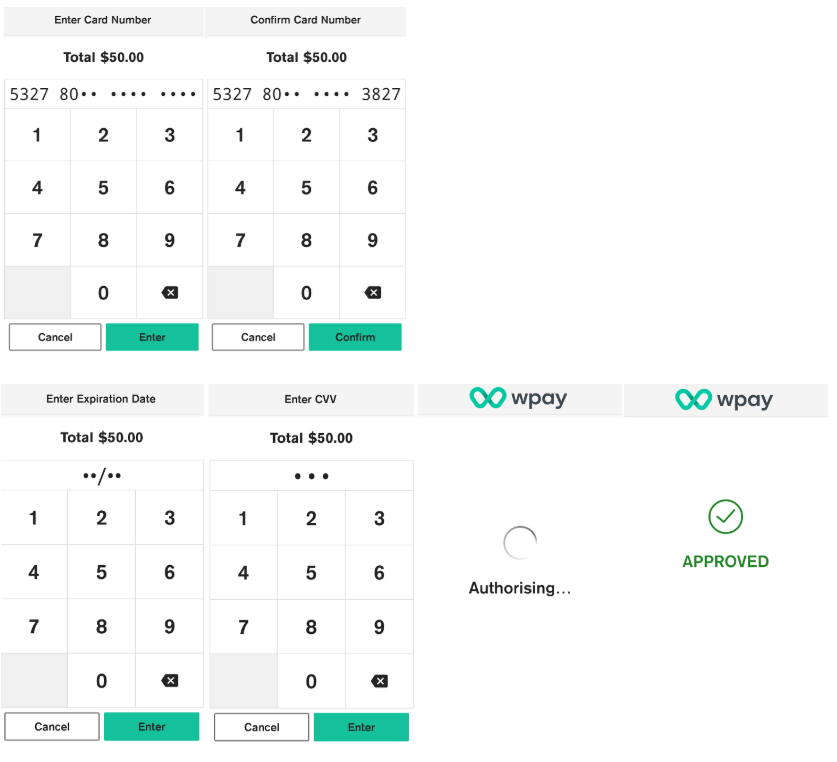
MOTO Transaction
Refund
To process Refund
- Enter the refund amount into the POS
- Terminal will display the refund amount
- Enter a passcode
- Customer presents card or device and enters their PIN (if required)
- Your terminal processes the refund and then displays Approved or Declined.
The terminal may prompt for signature. - If a card is inserted, the terminal prompts to remove the card from the chip card slot
- Merchant receipt prints
- Customer selects preferred receipt option
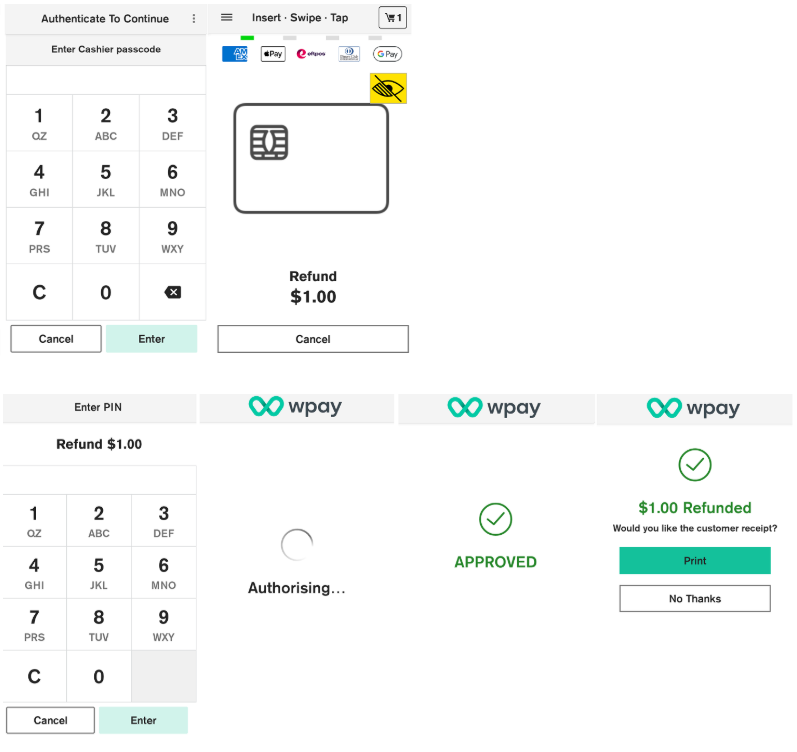
Refund Transaction
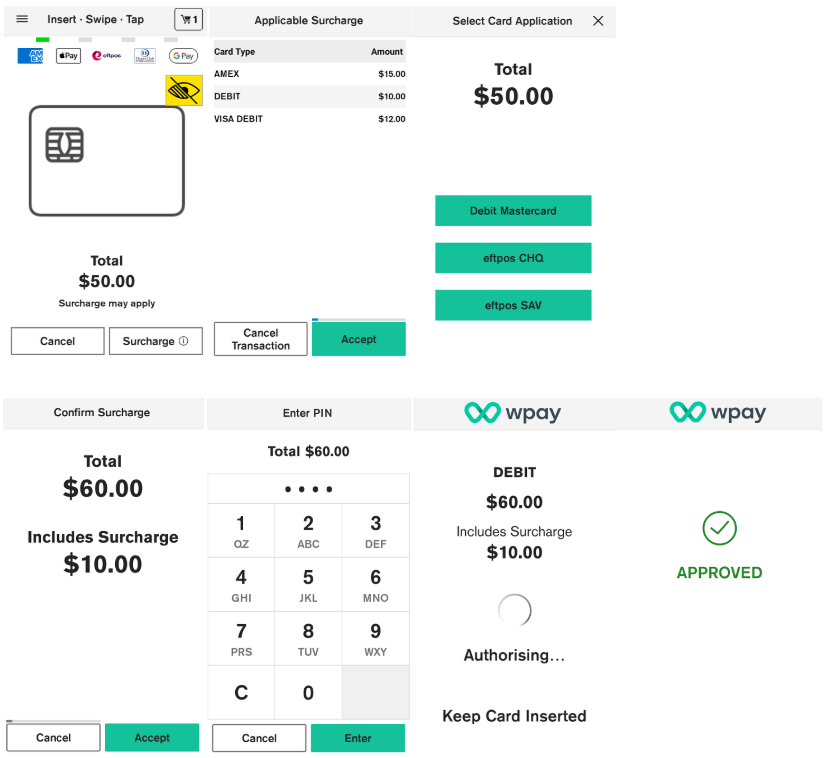
Surcharging
When surcharging is enabled on the terminal, your terminal will automatically detect when the transaction is a 'Scheme transaction' and apply a surcharge. If your terminal has contactless surcharging enabled, contactless transactions will also incur a surcharge.
Note: If surcharge is enabled on the terminal, the card presentment screen will display a note that says "Surcharge may apply" for all your surcharge enabled transactions.
To process a purchase transaction with a surcharge added
- Enter the transaction amount in POS
- The purchase amount is displayed on the screen along with the note ‘Surcharge may apply’ and Surcharge (i)button beside cancel button on card presentment screen.
- When the Surcharge button is clicked, a preview of applicable surcharges per product are displayed. NOTE: currently disabled
- Customers are prompted to confirm the surcharge amount.
- Customers enter their pin if required.
- Terminal processes the transaction and on Authorising screen Total amount along with Surcharge is displayed then displays Approved or Declined
- If a card is inserted, the terminal prompts to remove the card from the chip card slot
- Merchant receipt prints
- Customer selects preferred receipt option
Note: The options may vary slightly depending on the POS provider.
Surcharging
Pre-Authorisation
Pre-Auth provides a mechanism to allow merchants to be able to authorize the future debiting of a customer account/card. This feature is primarily used in hospitality or other reservation environments. Pre-authorisation transactions can only be performed on scheme credit & debit cards only where you have been authorised to do so.
To process Pre-Auth transactions
- Enter the pre-auth amount in POS
- Customer presents card
- Enter PIN if applicable.
- Merchant receipt prints
- Customer selects preferred receipt option
- Pre-Auth transactions are accessible in the Order History screen.
Pre-Authorisation Transaction
Pre-Authorisation Completion
Completion is used to complete an earlier pre-authorisation transaction and charge the cardholder with the final amount transaction.
To process Completion with same amount
- Initiate the pre-auth completion from the POS.
- Select Same Amount or New Amount ( Max variance is 10%)
- Once a transaction has been processed, the customer selects the preferred receipt option receipt.
- After the Pre-authorisation operation is completed, the Order detail screen is shown with only the Receipt option.
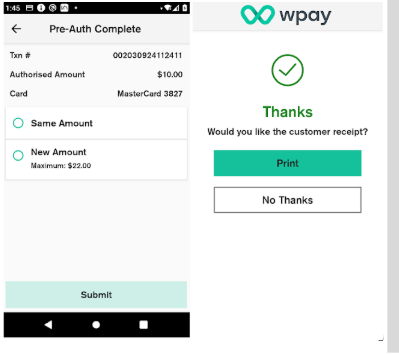
Pre-Authorisation Completion
Delete a SAF transaction and error reversal
There may be rare scenarios where an Offline transaction or reversal cannot be successfully cleared after exhausting all retry attempts. These transactions may need to be deleted to unblock any transactions remaining in the Offline queue.
The option to delete can be found in either the Send Offline error notification or the Send reversal error notification in the status bar. When an operator selects the notification, the transaction details will be displayed, along with a delete option. The delete option is protected by the Admin password.
SAF Diagnostic
There is a Diagnostics menu from the Launcher screen, “SAF Diagnostics” menu available to see current status and force push pending transactions in the queue.
- Pending - Lists the number of offline approved transactions which are pending for upload to the host Declined - Lists the number of offline approved transactions which were declined when uploaded to the host Reversals - Lists the number of reversals which have failed.
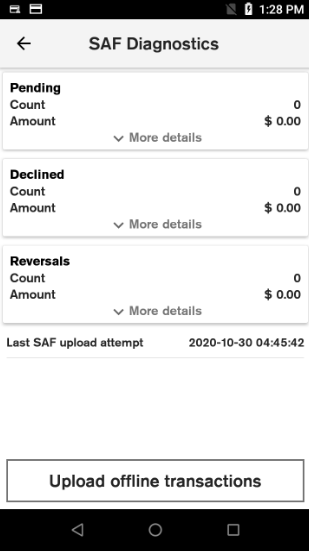
SAF Diagnostic
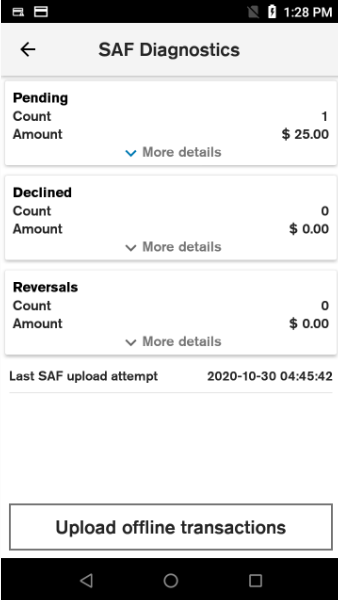
- Any section with at least 1 transaction will have a blue arrow next to “More details” which can be pressed to view additional details.
SAF Diagnostic - Additional Details
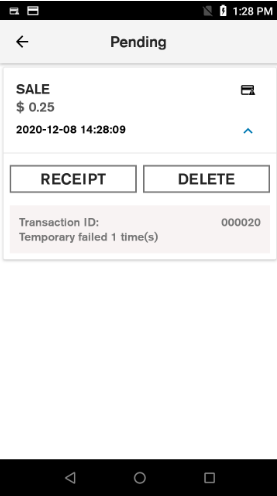
- SAF diagnostic detail view contains all transactions for the section selected.
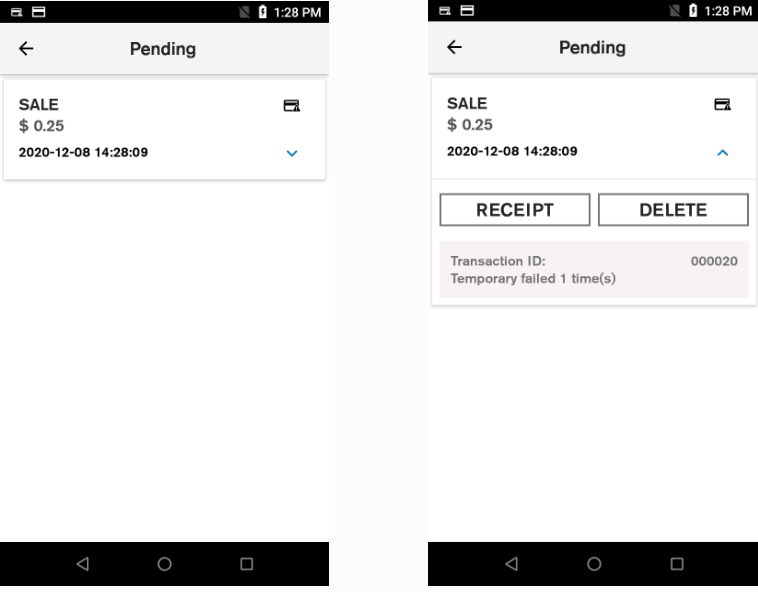
SAF Diagnostic - Detailed View
- Provides options for printing a copy of the receipt, or deleting the transaction.
An additional option to “Upload” the transaction is available for declined transactions.
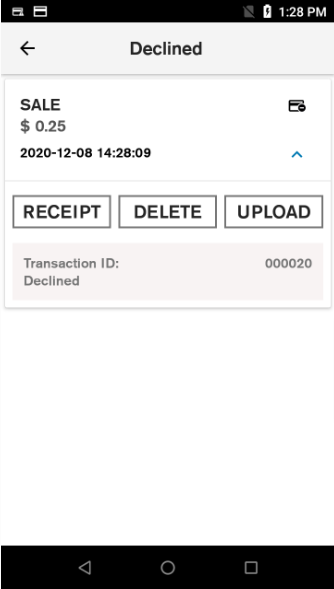
SAF Diagnostic - Options
Delete error offline transaction
- SAF diagnostics detail view is the entry point to trigger the deletion flow.
SAF Diagnostic - Delete Transaction
- The operator is asked to enter the Admin password.
User Operation: If the operator clicks Cancel, the Delete failure screen will display. If authentication is successful, the Delete confirmation screen will display.

SAF Diagnostic - Admin Password
- The operator will be asked to confirm deleting the transaction.
User Operation: If the operator clicks Confirm, the transaction will be deleted from the SAF queue and the terminal will print a receipt.
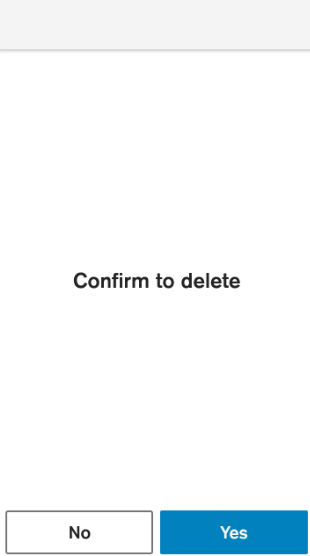
SAF Diagnostic - Confirm to Delete
- The delete transaction operation result will be displayed, success or failure. A customer receipt will be printed upon successful deletion.
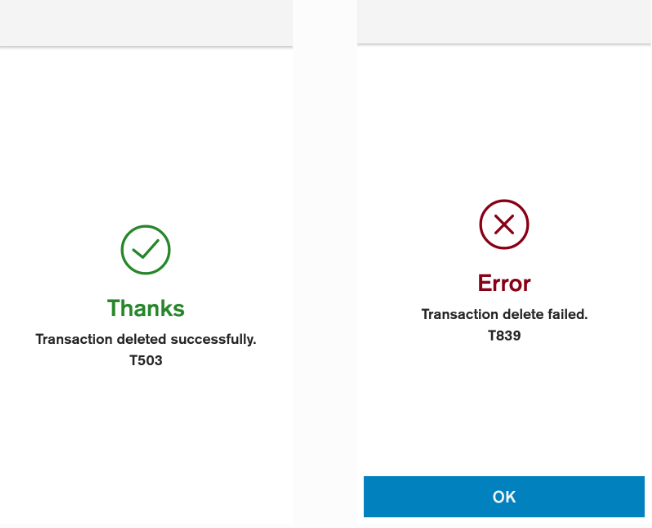
Confirmation Alert
Updated 3 months ago