How to setup the P630-A device?
Learn about the setup process for P630-A device supported by Wpay.
Charging
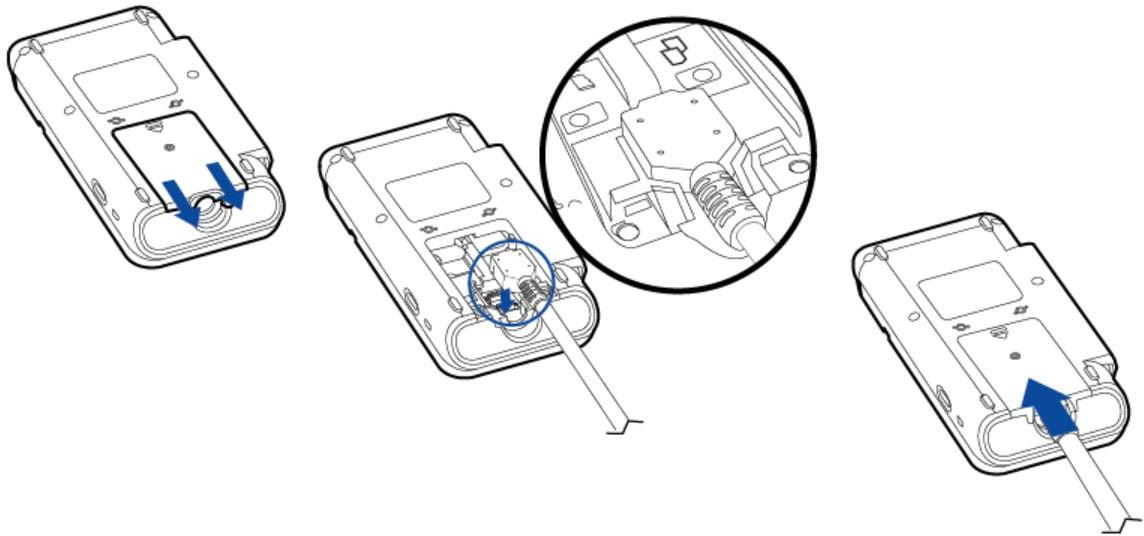
Attaching a Cable Connector to the P630-A
The cables first have to be attached to the P630-A. To attach a cable to the terminal, follow the below steps:
- Release the screw.
- Slide out the cable cover.
- Attach the 28-PIN connector of the cable to the terminal.
- Slide in the cable cover.
- Fix the screw.
Charging Connectors
Turning the terminal on: Press and hold the power button (located on the left-hand side of the terminal) for approximately 3 seconds until the start-up screen appears.
Turning the terminal off: To shut down the terminal, press and hold the power button for about 3 seconds, then tap the on-screen ‘Power off’ button. Alternatively, press and hold the power button for 10 seconds to force the terminal to turn off.
⚠️ Important: Ensure the terminal is connected to a power source before attempting to power it on.
Configure DeviceID
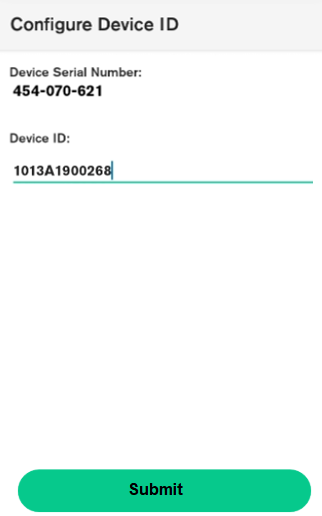
Once the device has connected to a Wi-Fi network, you will be prompted to configure the Device ID. Tap on the grey line to open the keyboard to enter the TID into the Device ID Field, and press Submit.
NOTE: once a device is at the Configure Device ID stage, it is locked to this screen until the configuration is complete.
In case you have issues with the terminal configuration, please use the “Reset Wizard” option in the “Device Manager”.
Terminal Device ID
Terminal Configuration
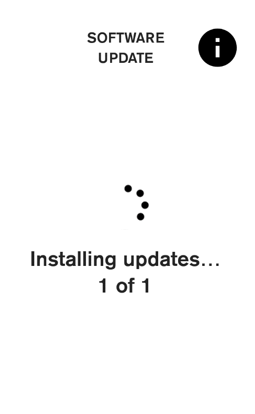
Once the device ID is entered, the terminal will contact VHQ and commence its configuration download, including checking for, and installing software updates if required.
Device ID must be prefixed with “1013”.
For example: TID “SP056789” should be entered as “1013SP056789”
NOTE: If a software update is required, the device will reboot several times during the update. Ensure the device has a constant power connection during this process.
The screen may continue displaying “Checking for updates” for an extended period if no updates are available for the device. You can exit this screen by tapping the four corners in a clockwise sequence (1,2,3,4).
Terminal Configuration - Status
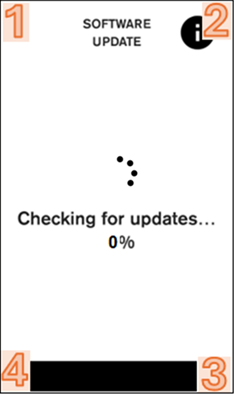
Steps to Exit the Screen
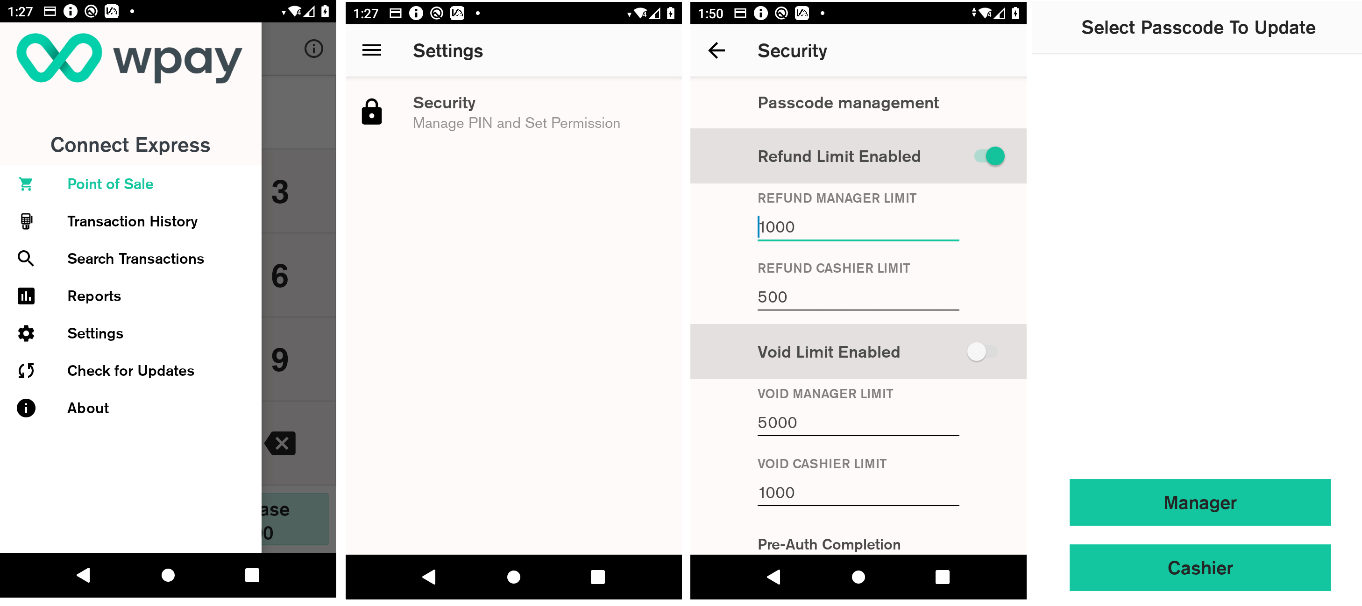
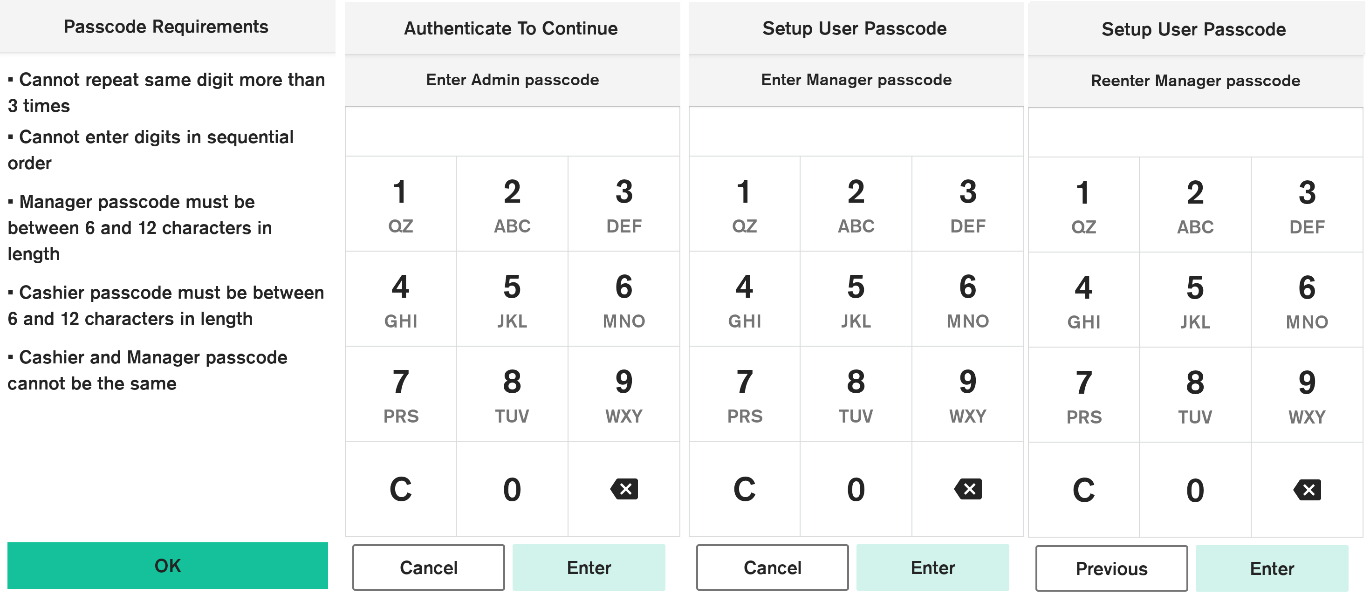
Setting up Passcodes - Manager and Cashier
To update the passcodes for either the Manager or Cashier roles, follow these steps:
- Make sure the terminal is unlocked.
- Swipe down from the top of the screen to access the launcher menu.
- Open the Device Manager application.
- Tap on Passcode Management.
- When prompted, enter the current Manager passcode and tap Enter.
- Choose which passcode you want to change — Manager or Cashier — and follow the on-screen prompts.
- Re-enter the Manager passcode when requested, then press Enter.
- Enter the new passcode for the selected role and press Enter.
- Confirm the new passcode by entering it again and pressing Enter.
Note: You would need the admin passcode to set up the passcode. Please contact Wpay support or your POS provider to get the admin passcode.
Setting up Manager and Cashier Passcodes
Setting up Wi-Fi Connection
For setting the Wi-Fi connection with P630 device, follow these steps:
- Ensure POS application is installed to the window device.
- On the POS device, make sure you are connected to Wi-Fi network.
- On the P630 terminal: Swipe up from the bottom of the screen to access the launcher menu.
- Go to Settings and then select “Network and Internet”.
- Connect to the same Wi-Fi network where the POS application is connected to.
- Update the POS IP address if required
- Logon from the POS application
- Terminal should display POS Connected message.
- Once the POS is connected, initiate a transaction, and ensure the terminal is receiving the request.
Setting up Ethernet Connection
For setting up Ethernet connection with P630 device specifically for using the IP Dongle cable setup, follow these steps:
- Ensure POS application is installed to the window device
- Unplug the ethernet cable from the wall socket.
- Plug that ethernet cable into the IP Dongle.
- Use another ethernet cable to connect the dongle back to the wall socket.
- Plug in the dongle’s power supply.
- On the P630 terminal: Swipe up from the bottom of the screen to access the launcher menu.
- Go to Settings and then select “Network and Internet”.
- Go to Advance Options and then on Ethernet, ensure the setting as DHCP and save.
- On the PC, Go to Control Panel > Windows Defender Firewall
- Inbound Rules > New Rule, select Port, enter 2012, and choose Allow the connection.
- Outbound Rules > New Rule, select Port, enter 2012, and choose Allow the connection.
- Once the POS is connected, initiate a transaction, and ensure the terminal is receiving the request.
Setting up RNDIS Connection
Pre-requisite:
On the Windows machine, make sure you are sharing a network with Ethernet (that has Verifone RNDIS) RNDIS connection is enabled and active.

Ethernet for RNDIS Connection
For setting up RNDIS connection with P630 device, follow these steps:
-
Ensure POS application is installed on the window device
-
On P630 Terminal:
Go to Settings and then select “Network and Internet”.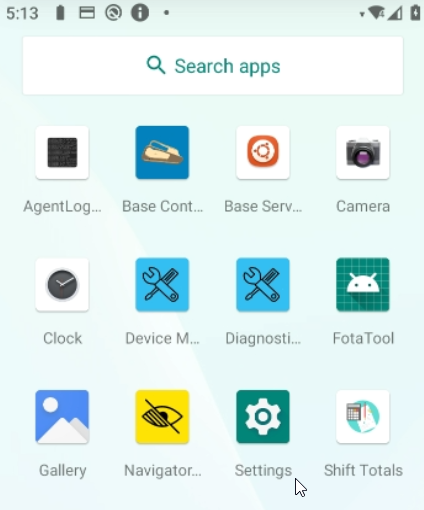
Settings
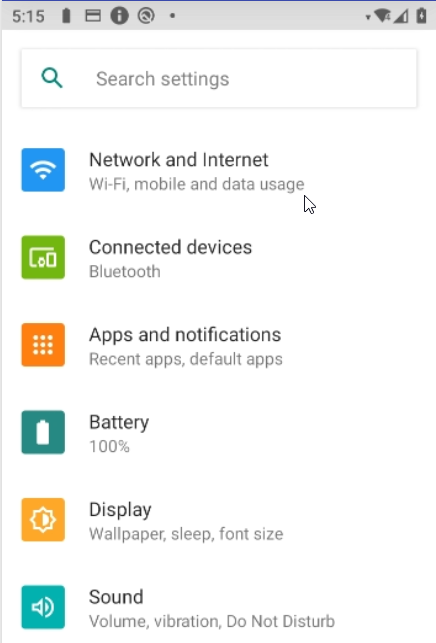
Network and Internet
- Select “Advanced Options” and click on “IP Over USB”. Current IP over USB config will be displayed
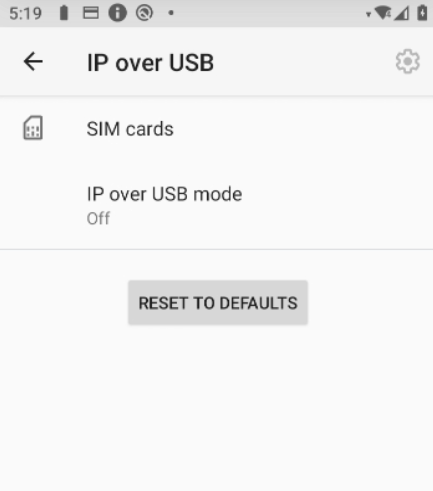
IP over USB
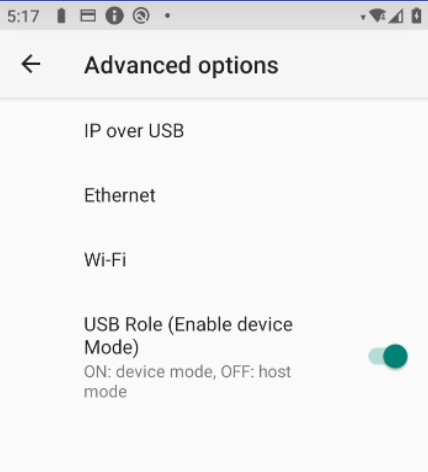
Advance Options
Click “RESET TO DEFAULTS” will clear pre-defined RNDIS settings.
- Click on the “IP over USB mode” option to enable RNDIS as the connectivity mode.
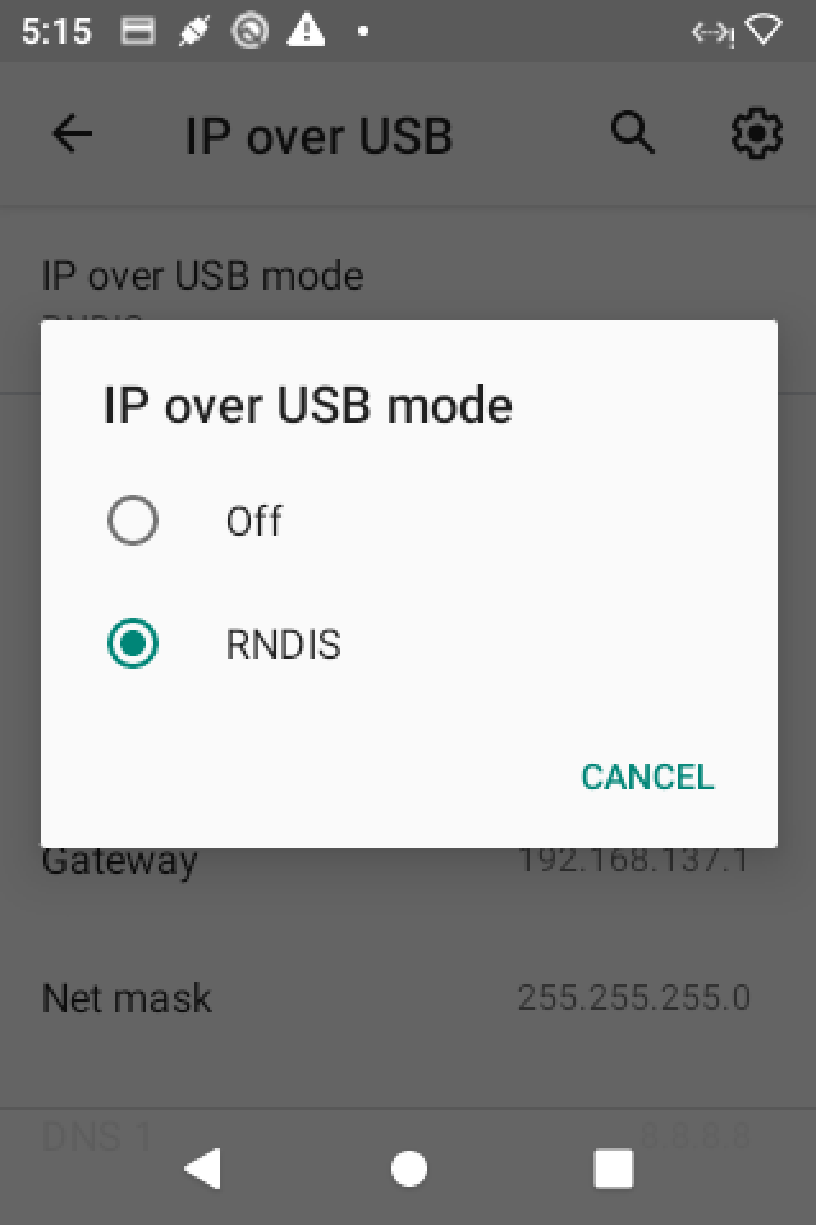
Enable RNDIS
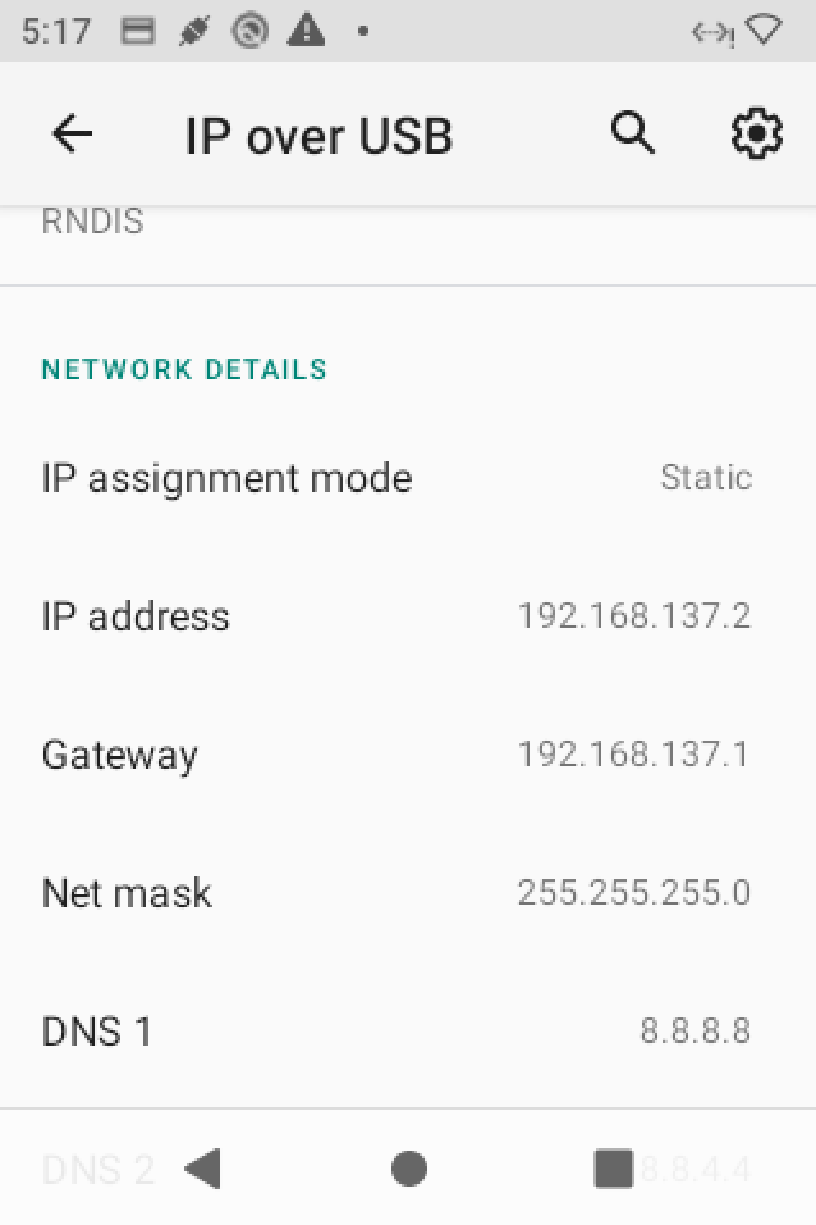
- Once selected, the default RNDIS settings defined in the backend gets applied.
Perform a transaction or a logon and make sure RNDIS connection is working.
IP over USB
- Resetting of RNDIS:
To change the default settings or to manually configure RNDIS settings:
- Go to Settings and then select “Network and Internet”
- Select “Advanced Options” and click on “IP Over USB”
- Click on the settings button on the Top Right panel
- Update the details and click Save.
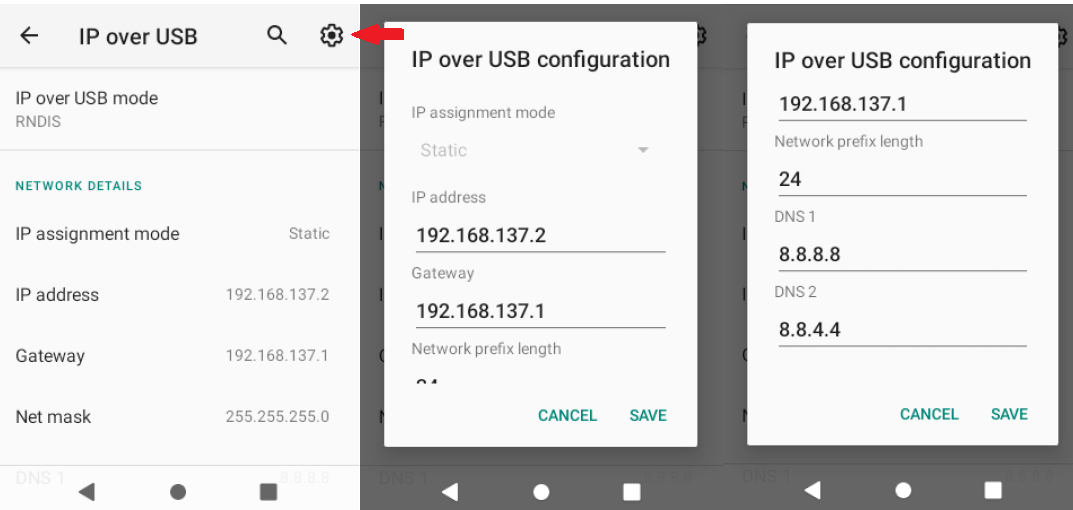
Resetting of RNDIS
Updated 4 months ago