Client Groups
Allow your merchants to view all of their store's transactions and report data.
Introduction
This guide helps Wpay Connect Portal users enable their end merchants logins to the platform and see restricted data based on a Client Group’s configuration. To use the Client Group capability the store must first be onboarded via the Wpay Connect onboarding process as outlined in this guide Store onboarding.
Key Definitions
- In the context of Wpay Connect the terms merchant and store are used interchangably
- A Client Group is one or more stores.
Client Group Features
A Client Group has acess to the following core capabilities in Wpay Connect but the data is filtered down to the stores which belong to the Client Group.
- Home Page - Wpay Connect Portal landing page with quick links to key modules.
- Transactions - See all of the Transactions which have been processed against a particular store
- Report - Reports which have been provisioned to the Client Group
- Settings - User Management
- Help - Link to the Wpay Connect Help section which references key contacts and links to documentation. You can also find our contact information at Contact us.
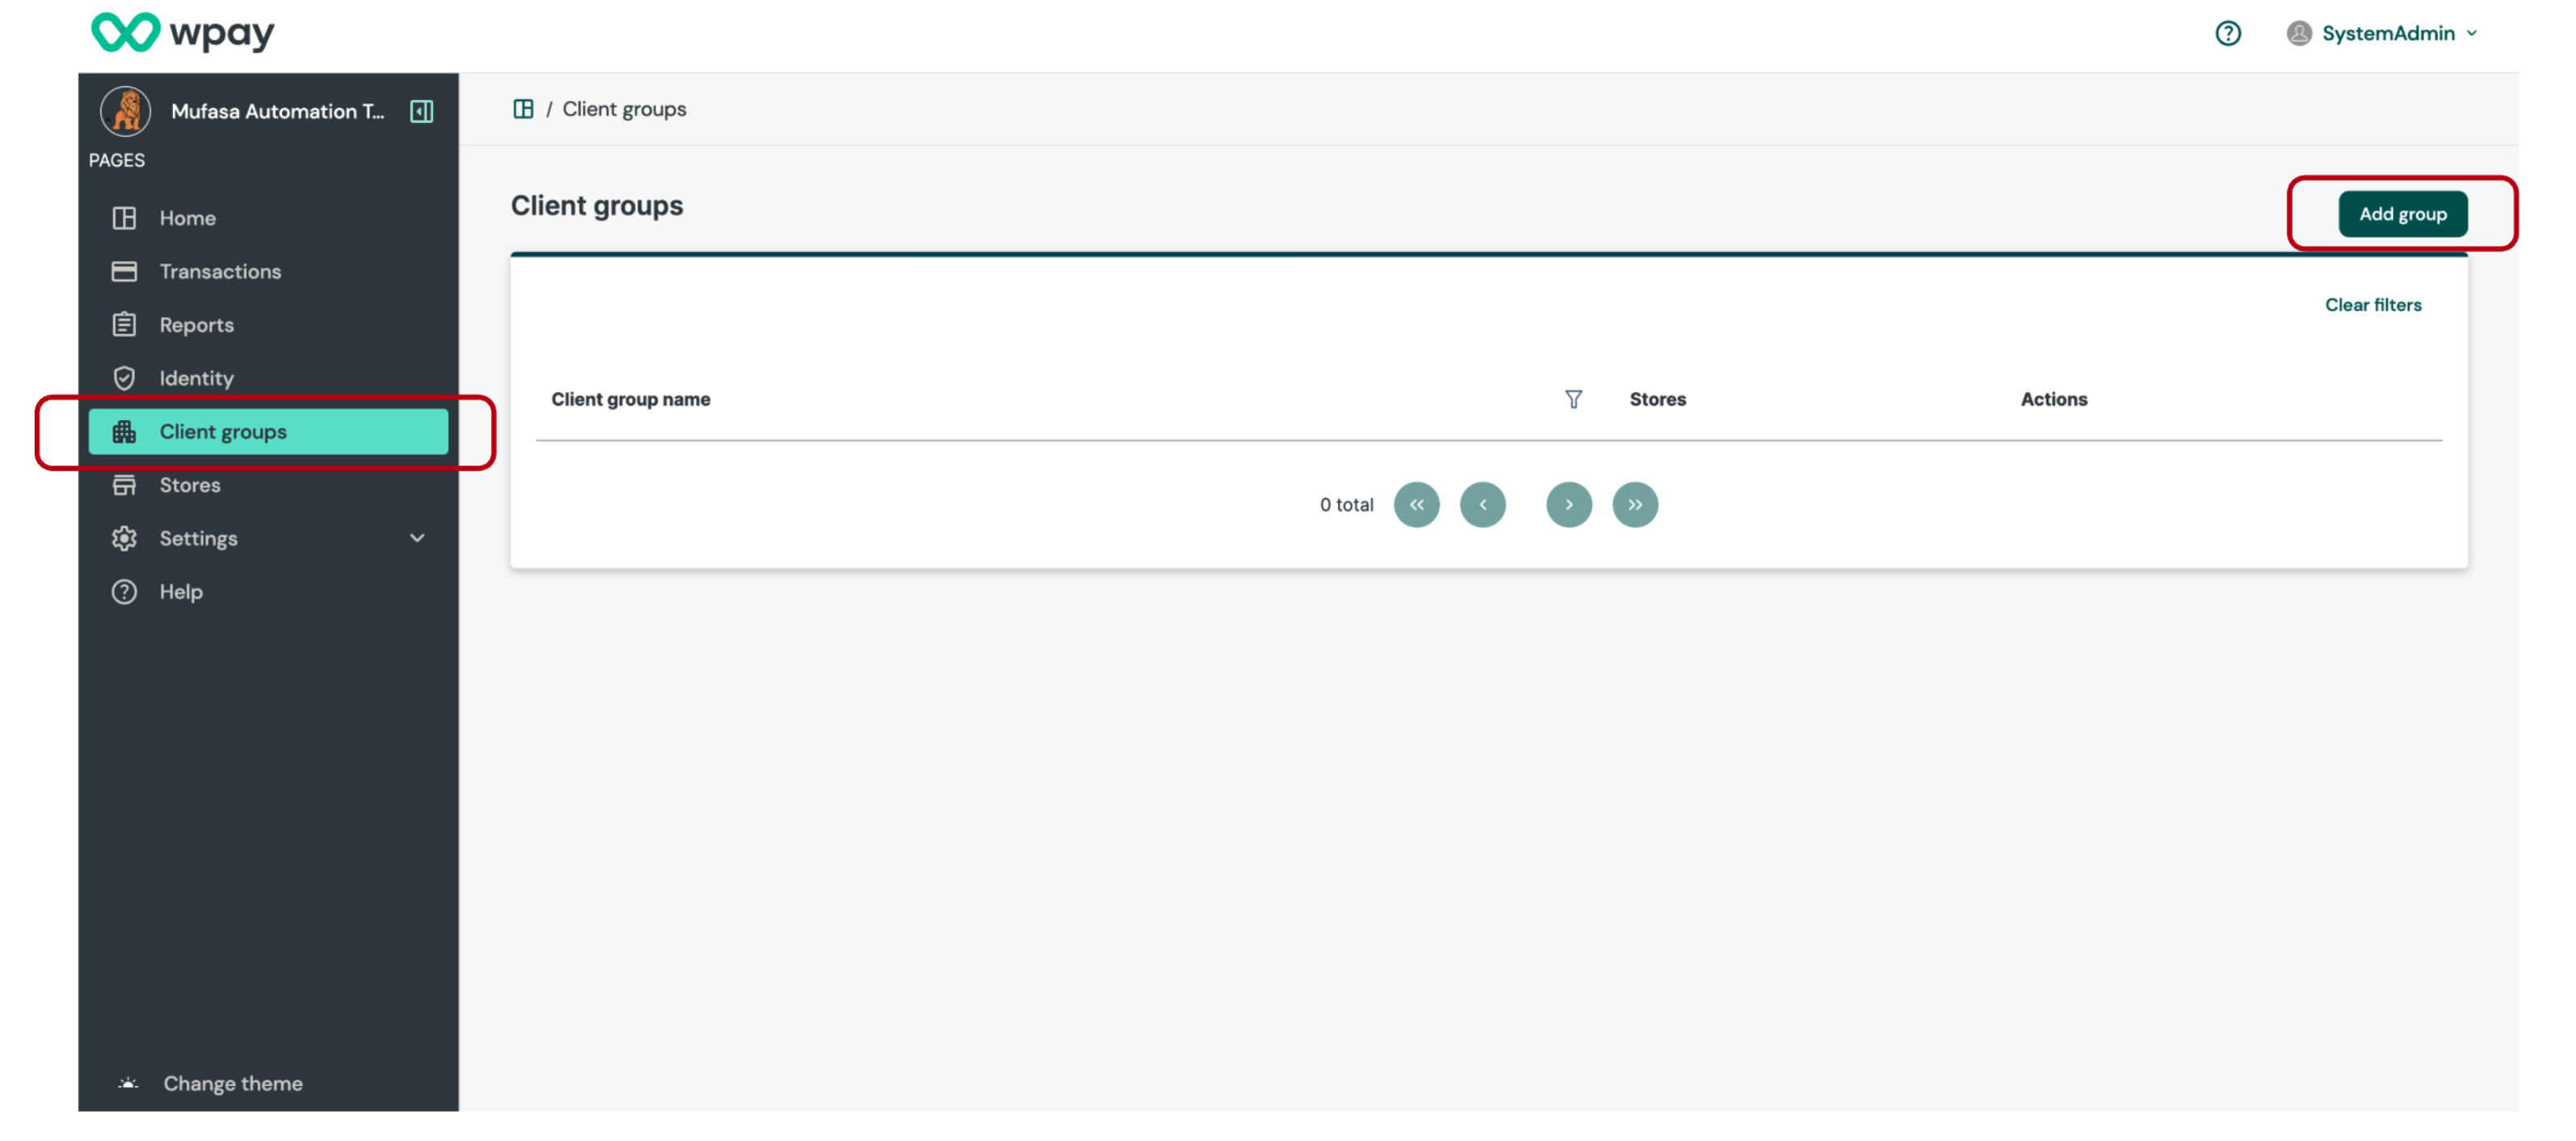
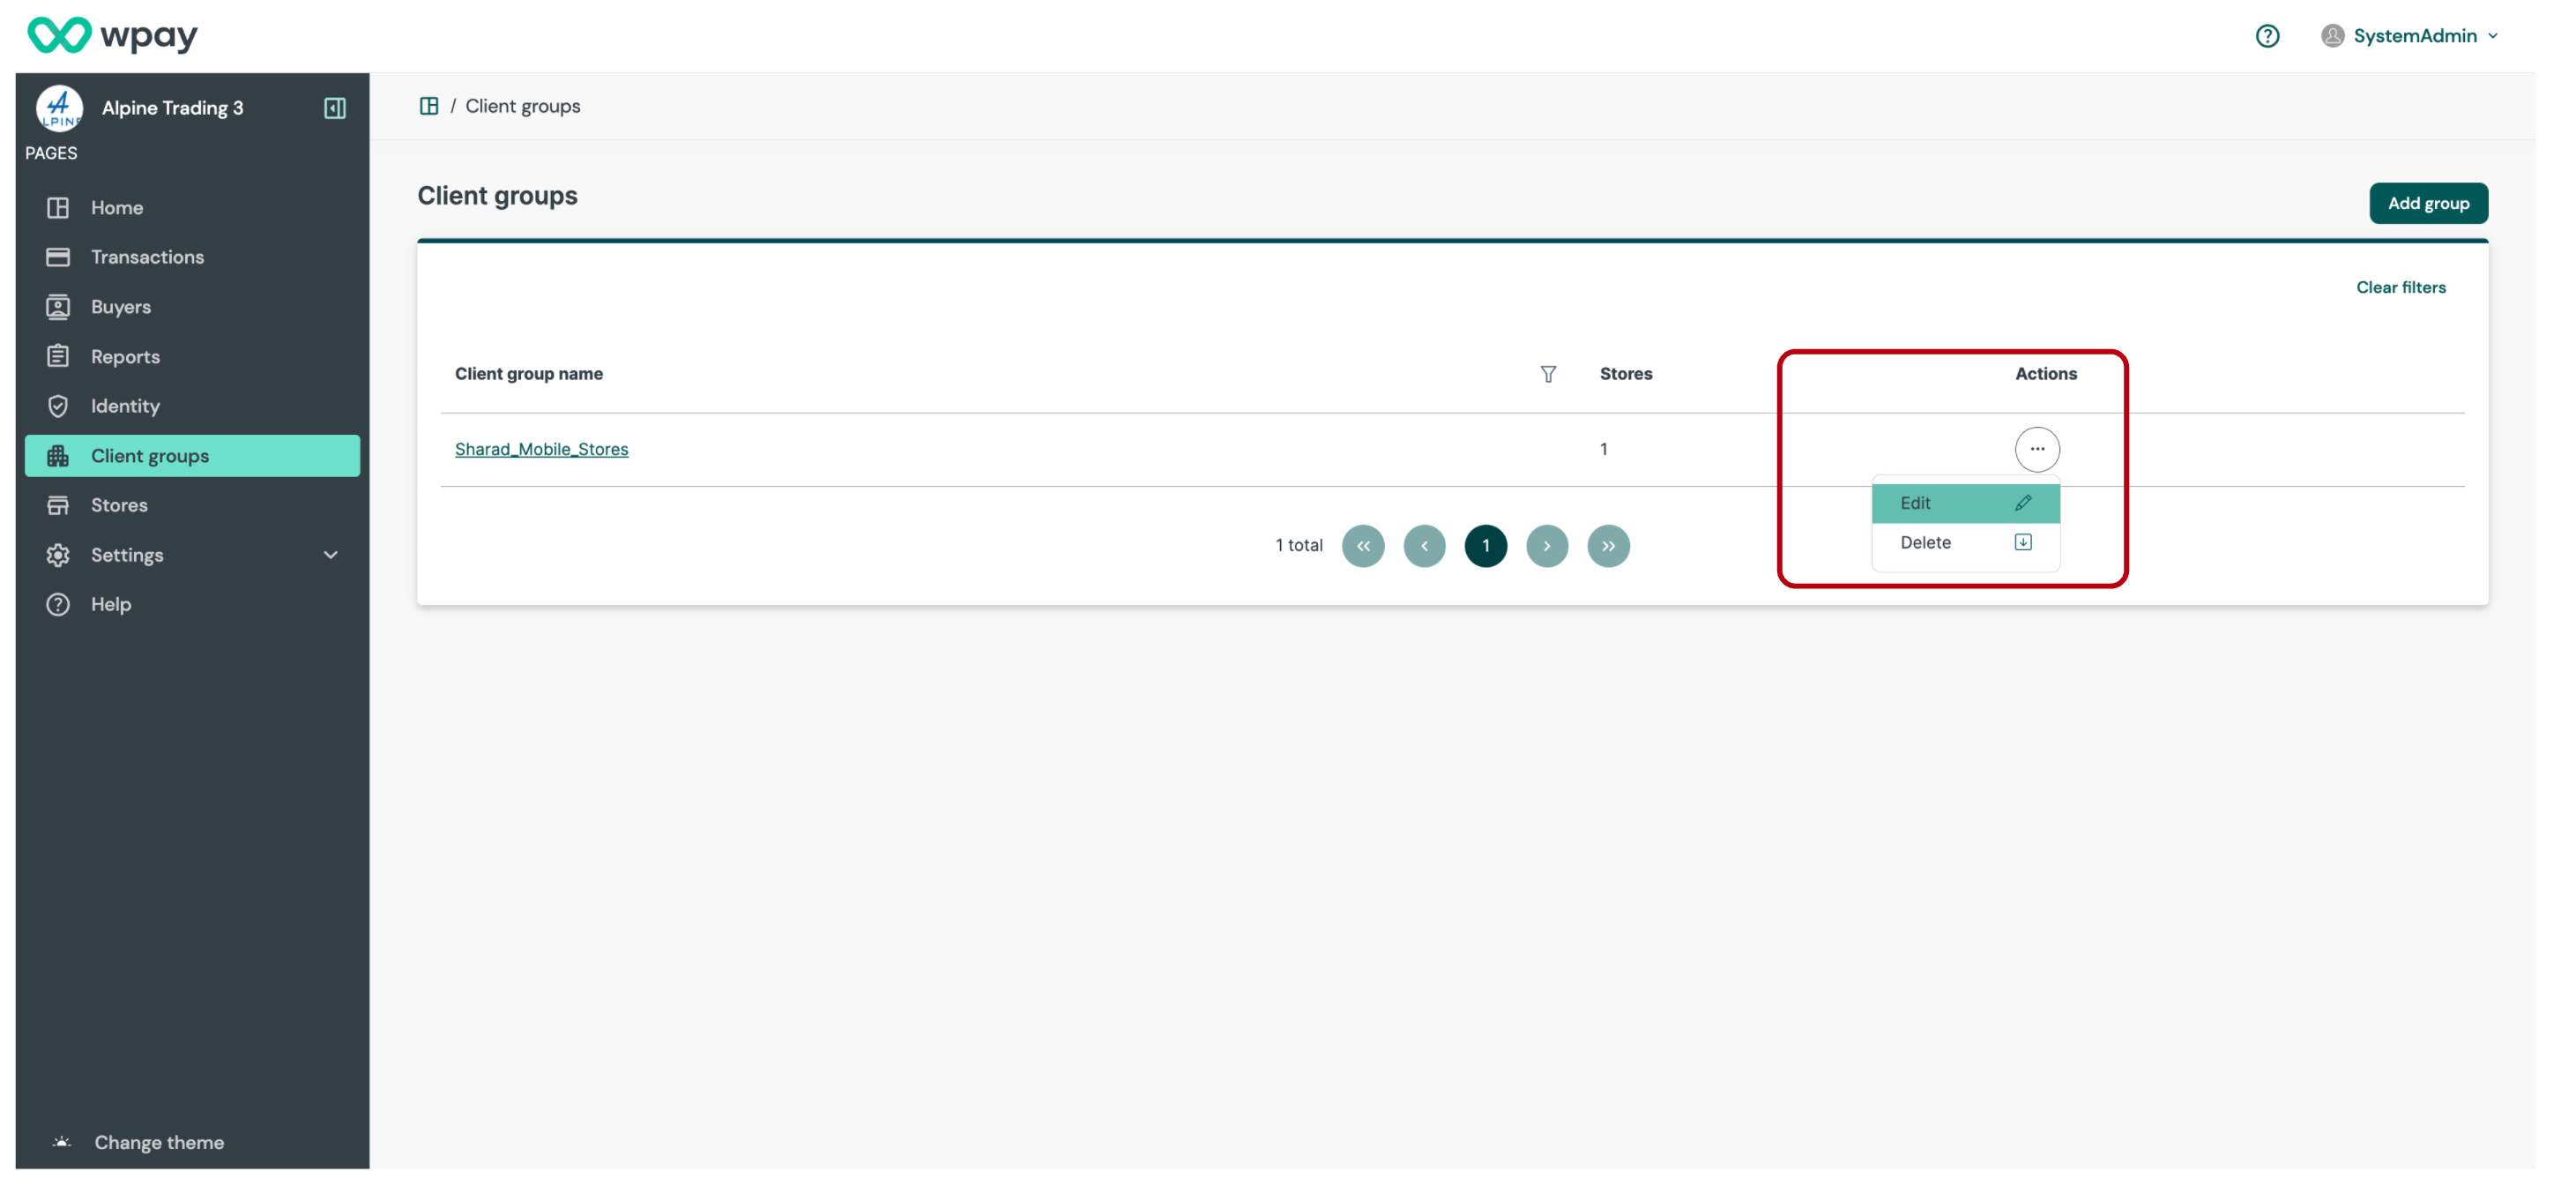
Viewing your Client Groups
To view the Client Groups which you have created navigate to the Client Groups menu item in the Left-Hand menu. Once you click on the menu item you will see the Client Group listing screen as shown below.
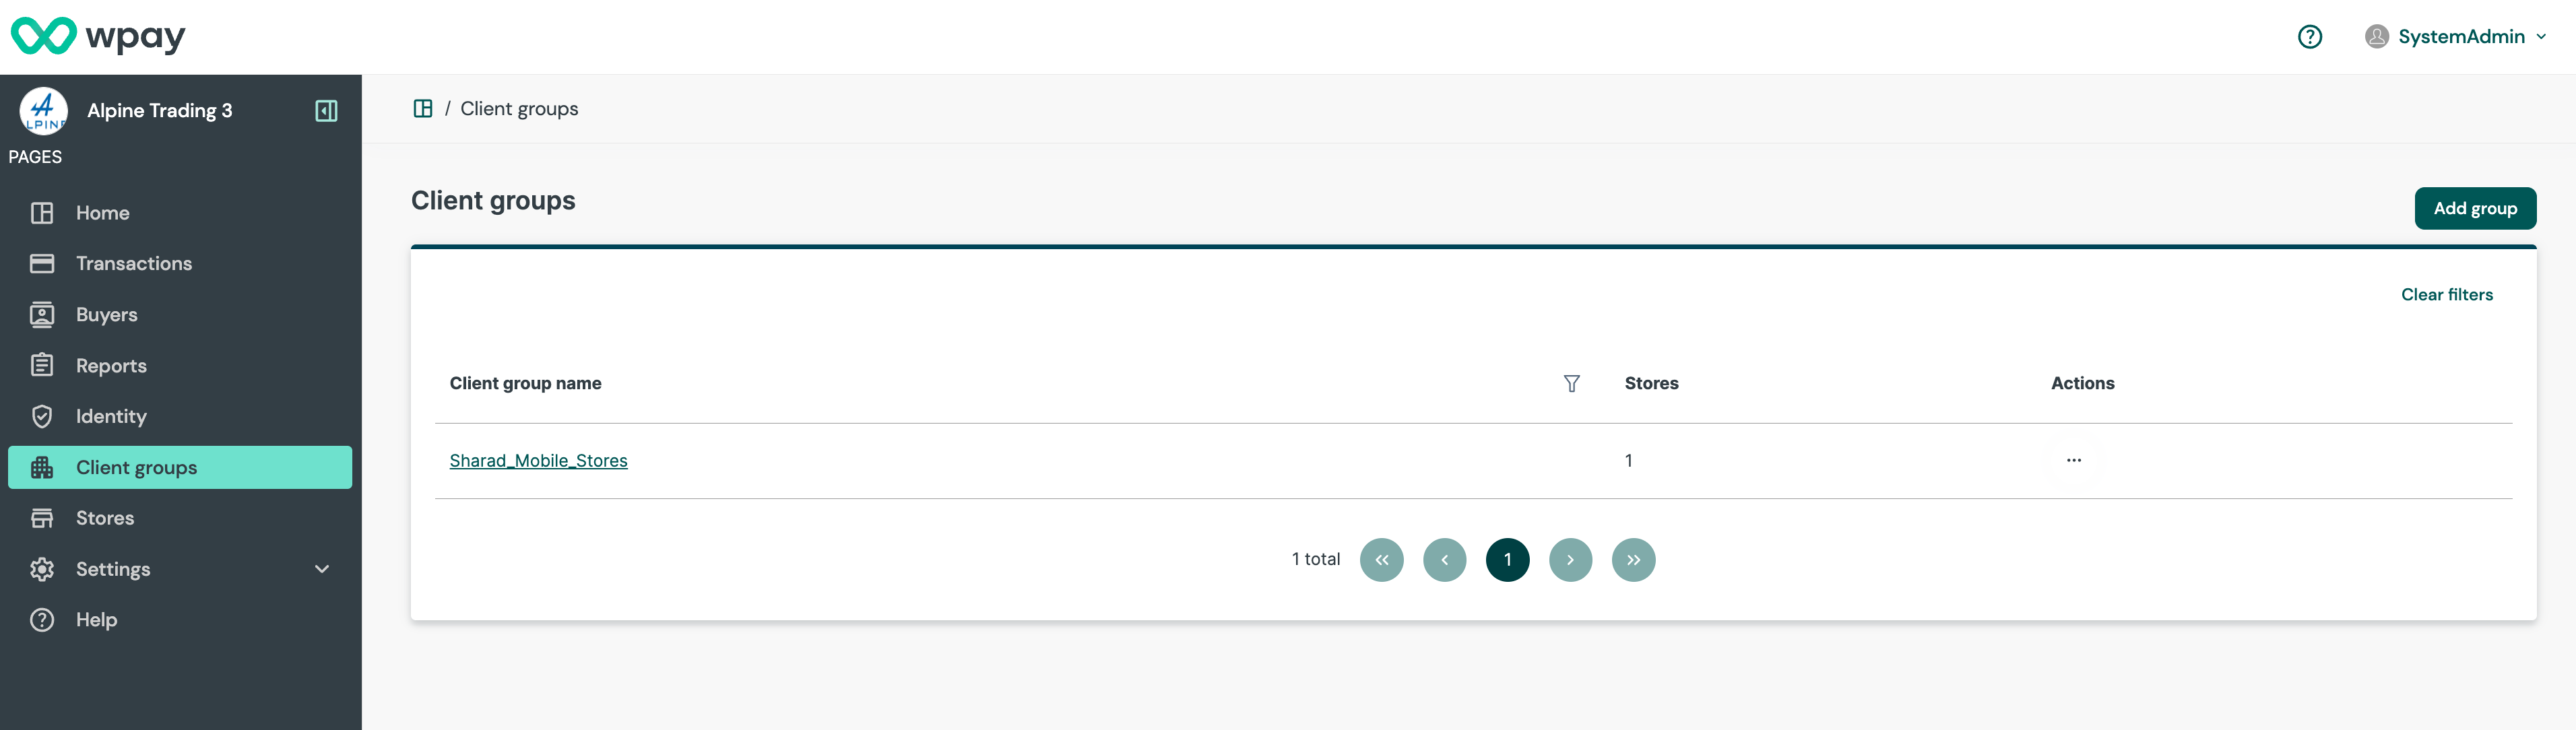
Client Group listing page
If you would like to see the details of that Client Group, click the hyperlink under the Client Group Name. This will show key details specific to the Client Group such as:
- Overview - Shows the name of the Client Group as specified when it was created.
- The Technical Adminstrators - Essentially the owners of the Client Group and they have the highest level of access to perform tasks such as user provisioning
- Stores - These are the stores which below to the Client Group and essentially is the data which the Client Group is authorised to display.
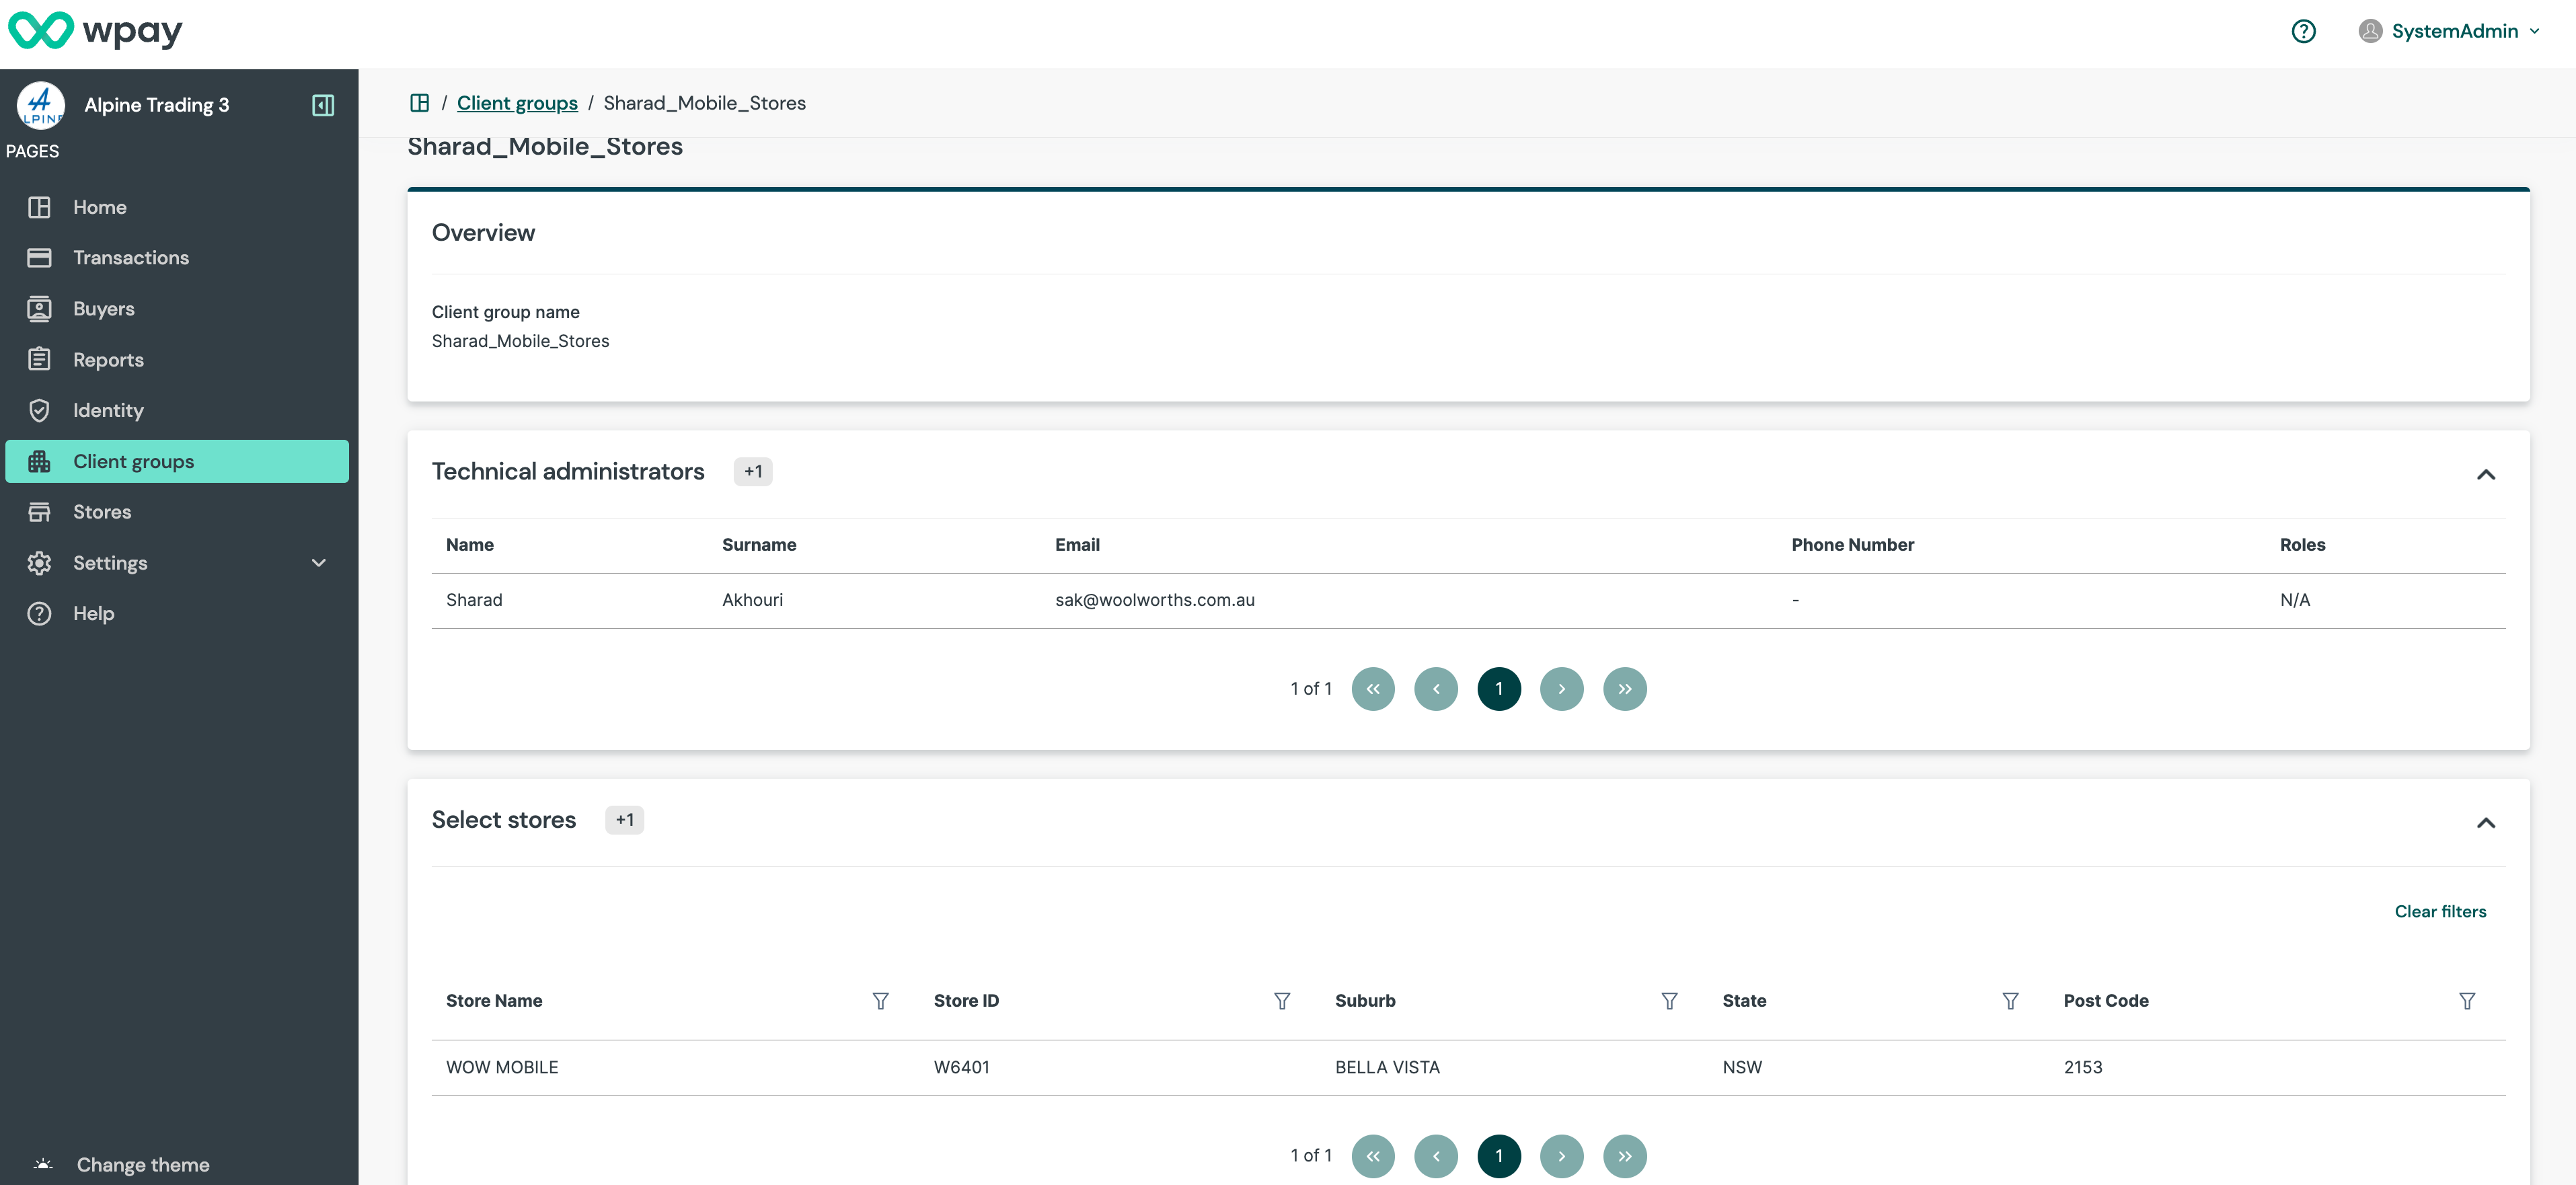
Client Group detail page
Creating a Client Group
Creating the Client Group is an efficient process but is extremely important to ensure only the correct users have access to the store level data.
- Client Group Name - This is the name which will show in the Client Group listing page so some thought should be given to the naming convention to make searching easy.
- Technical Administrator Name - This is the owner of the Client Group and is responsible for user management.
- Technical Administrator Email - This is the email address of the Technical Adminstrator which is required to setup the Client Group.
- Selecting Stores - These are stores which will be part of the Client Group and their data will be visible in the other Wpay Connect modules.
Once the above is populated click the “Submit” button to create the Client Group or the “Cancel” button to discard the changes. Once the submit button is clicked the Technical Administrator should keep an eye out for the Wpay Connect welcome email that will allow them to login to the platform. During the login process please they need to accept the Wpay Connect T&Cs.
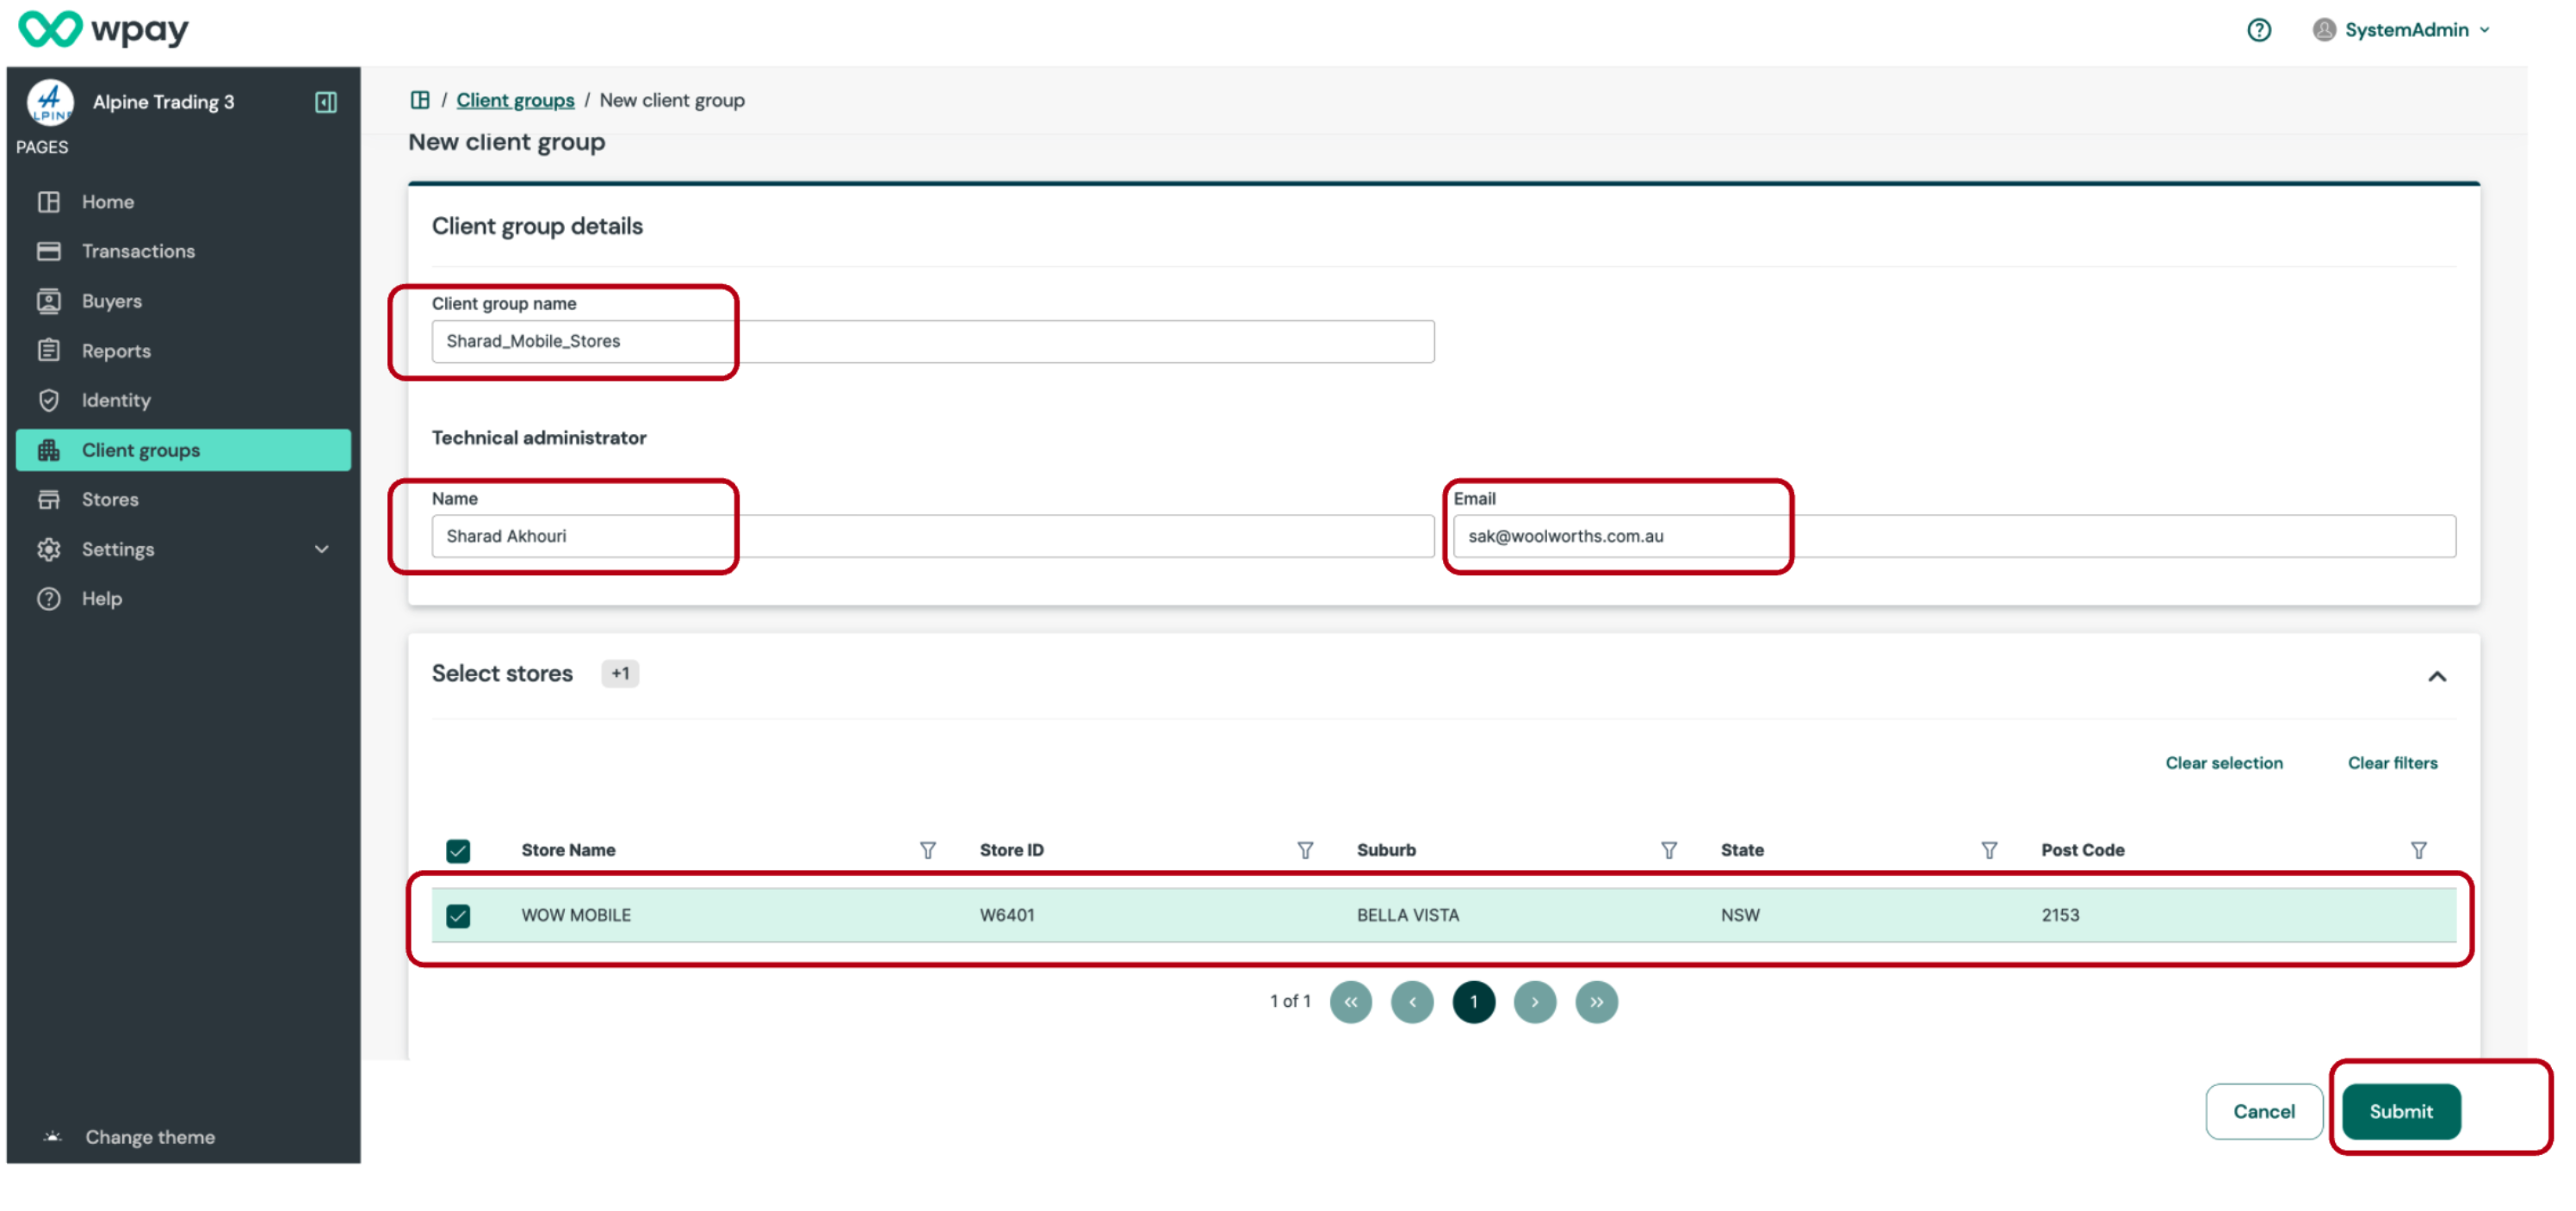
Create a Client Group
Editing a Client Group
Editing a Client Group allows key details about the Client Group to be changed including:
- Client Group Name - This will change the name of the Client Group which appears in the Client Group listing screen.
- Stores - The stores which appear in the Client Group
Edit a Client Group
Note
If the Client Group name changes the remaining data will get reset and will need to be re-entered.
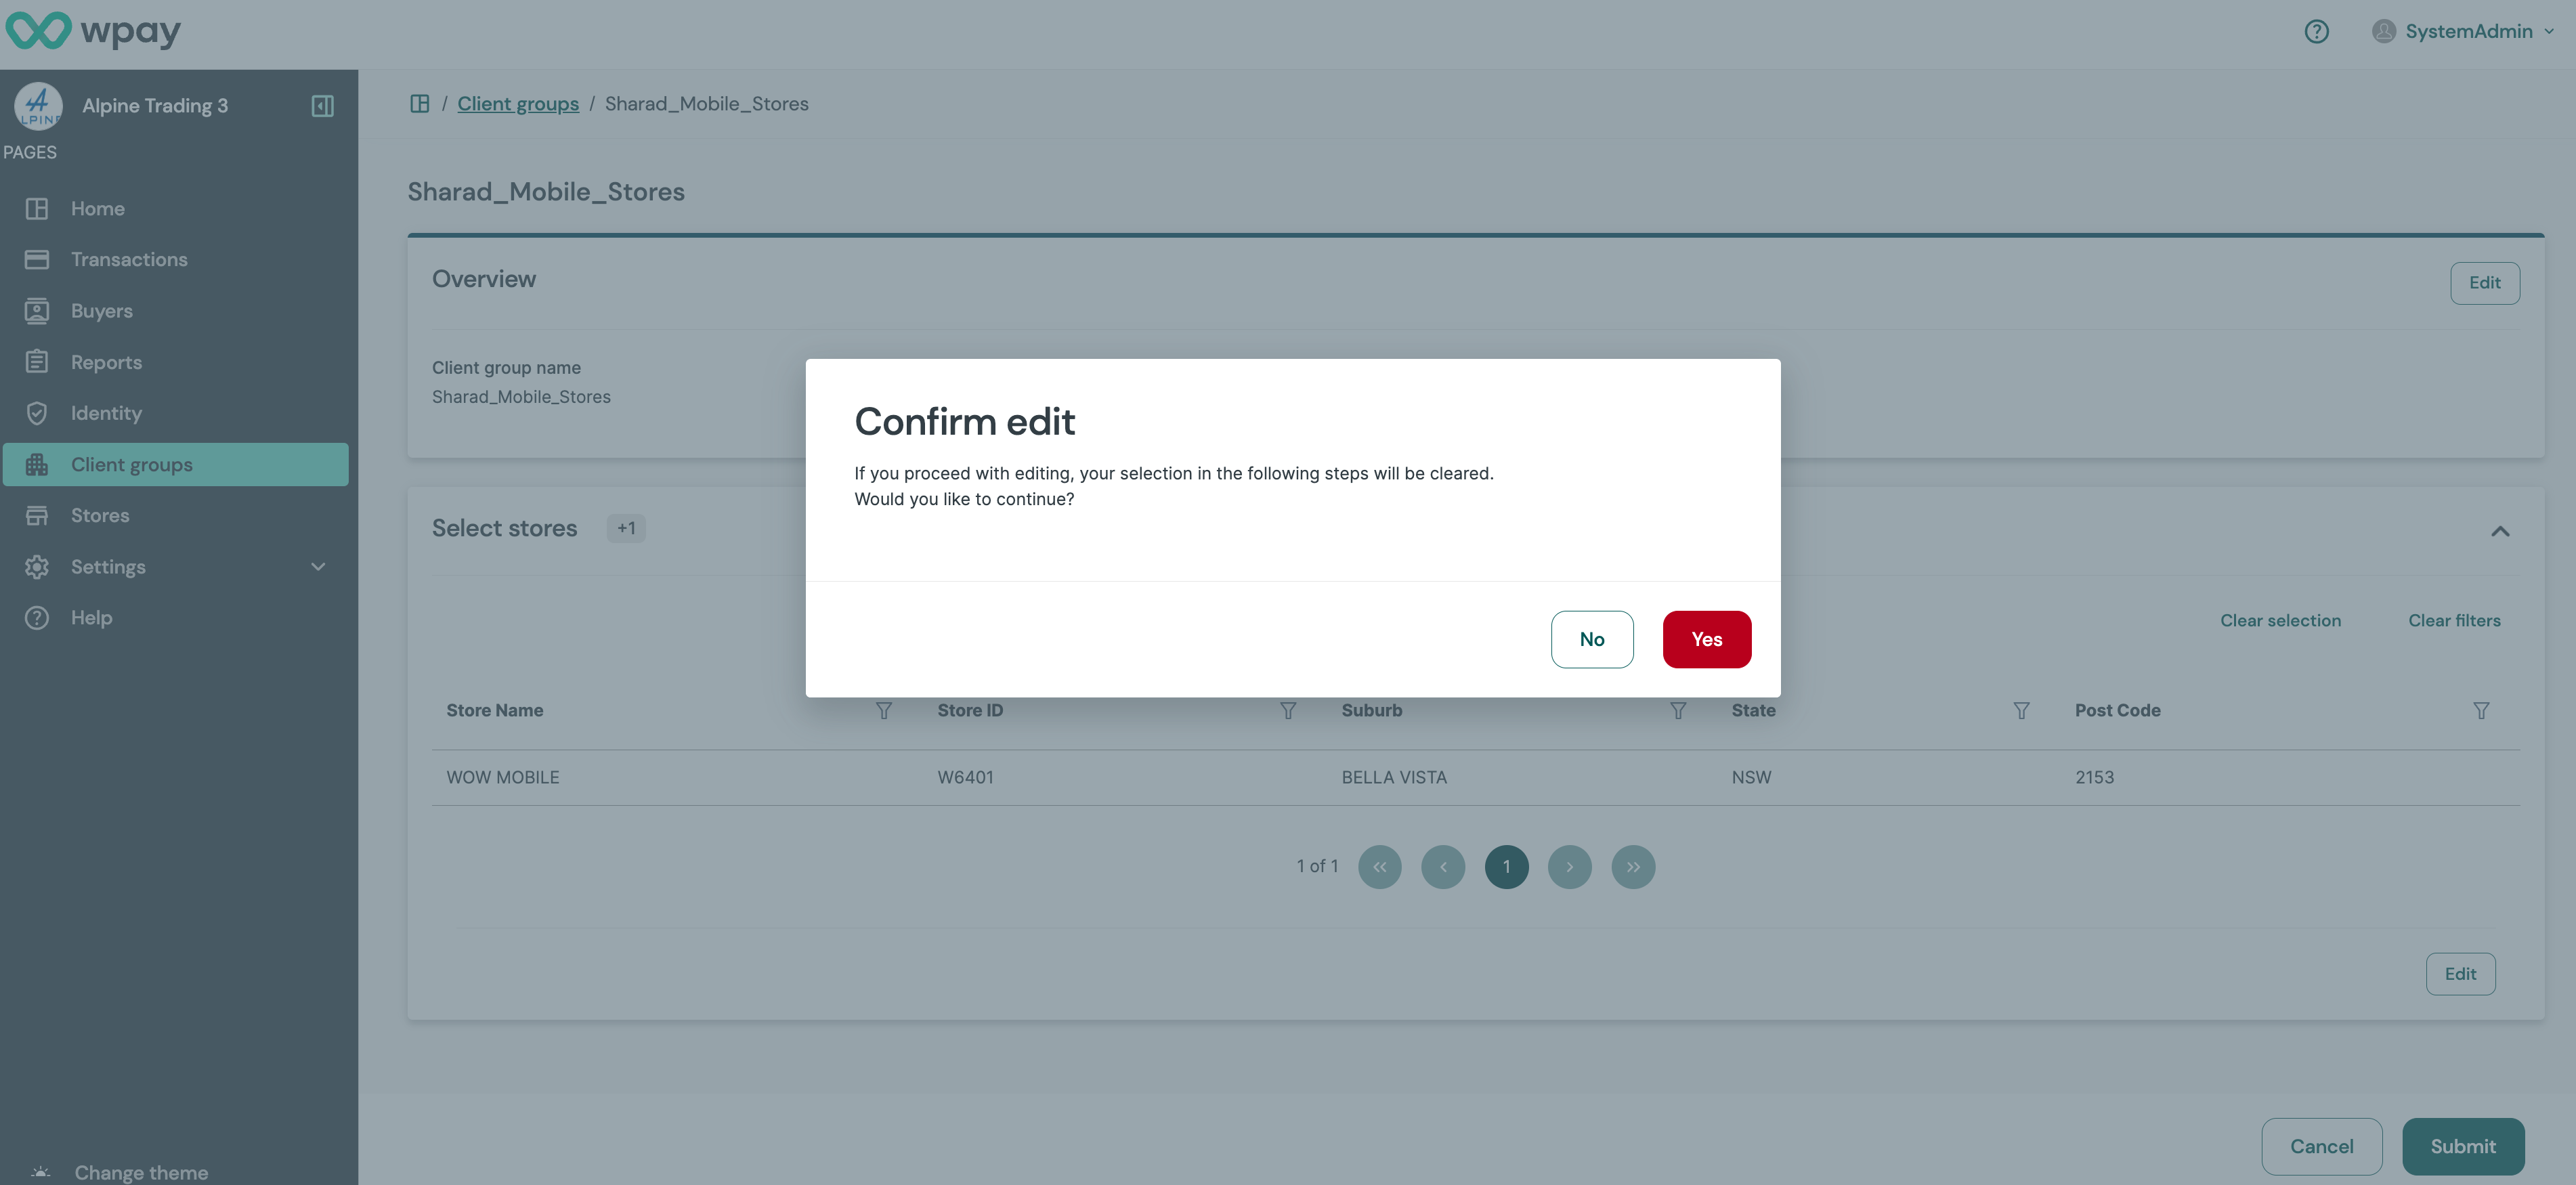
Editing a Client group - clears out the selections
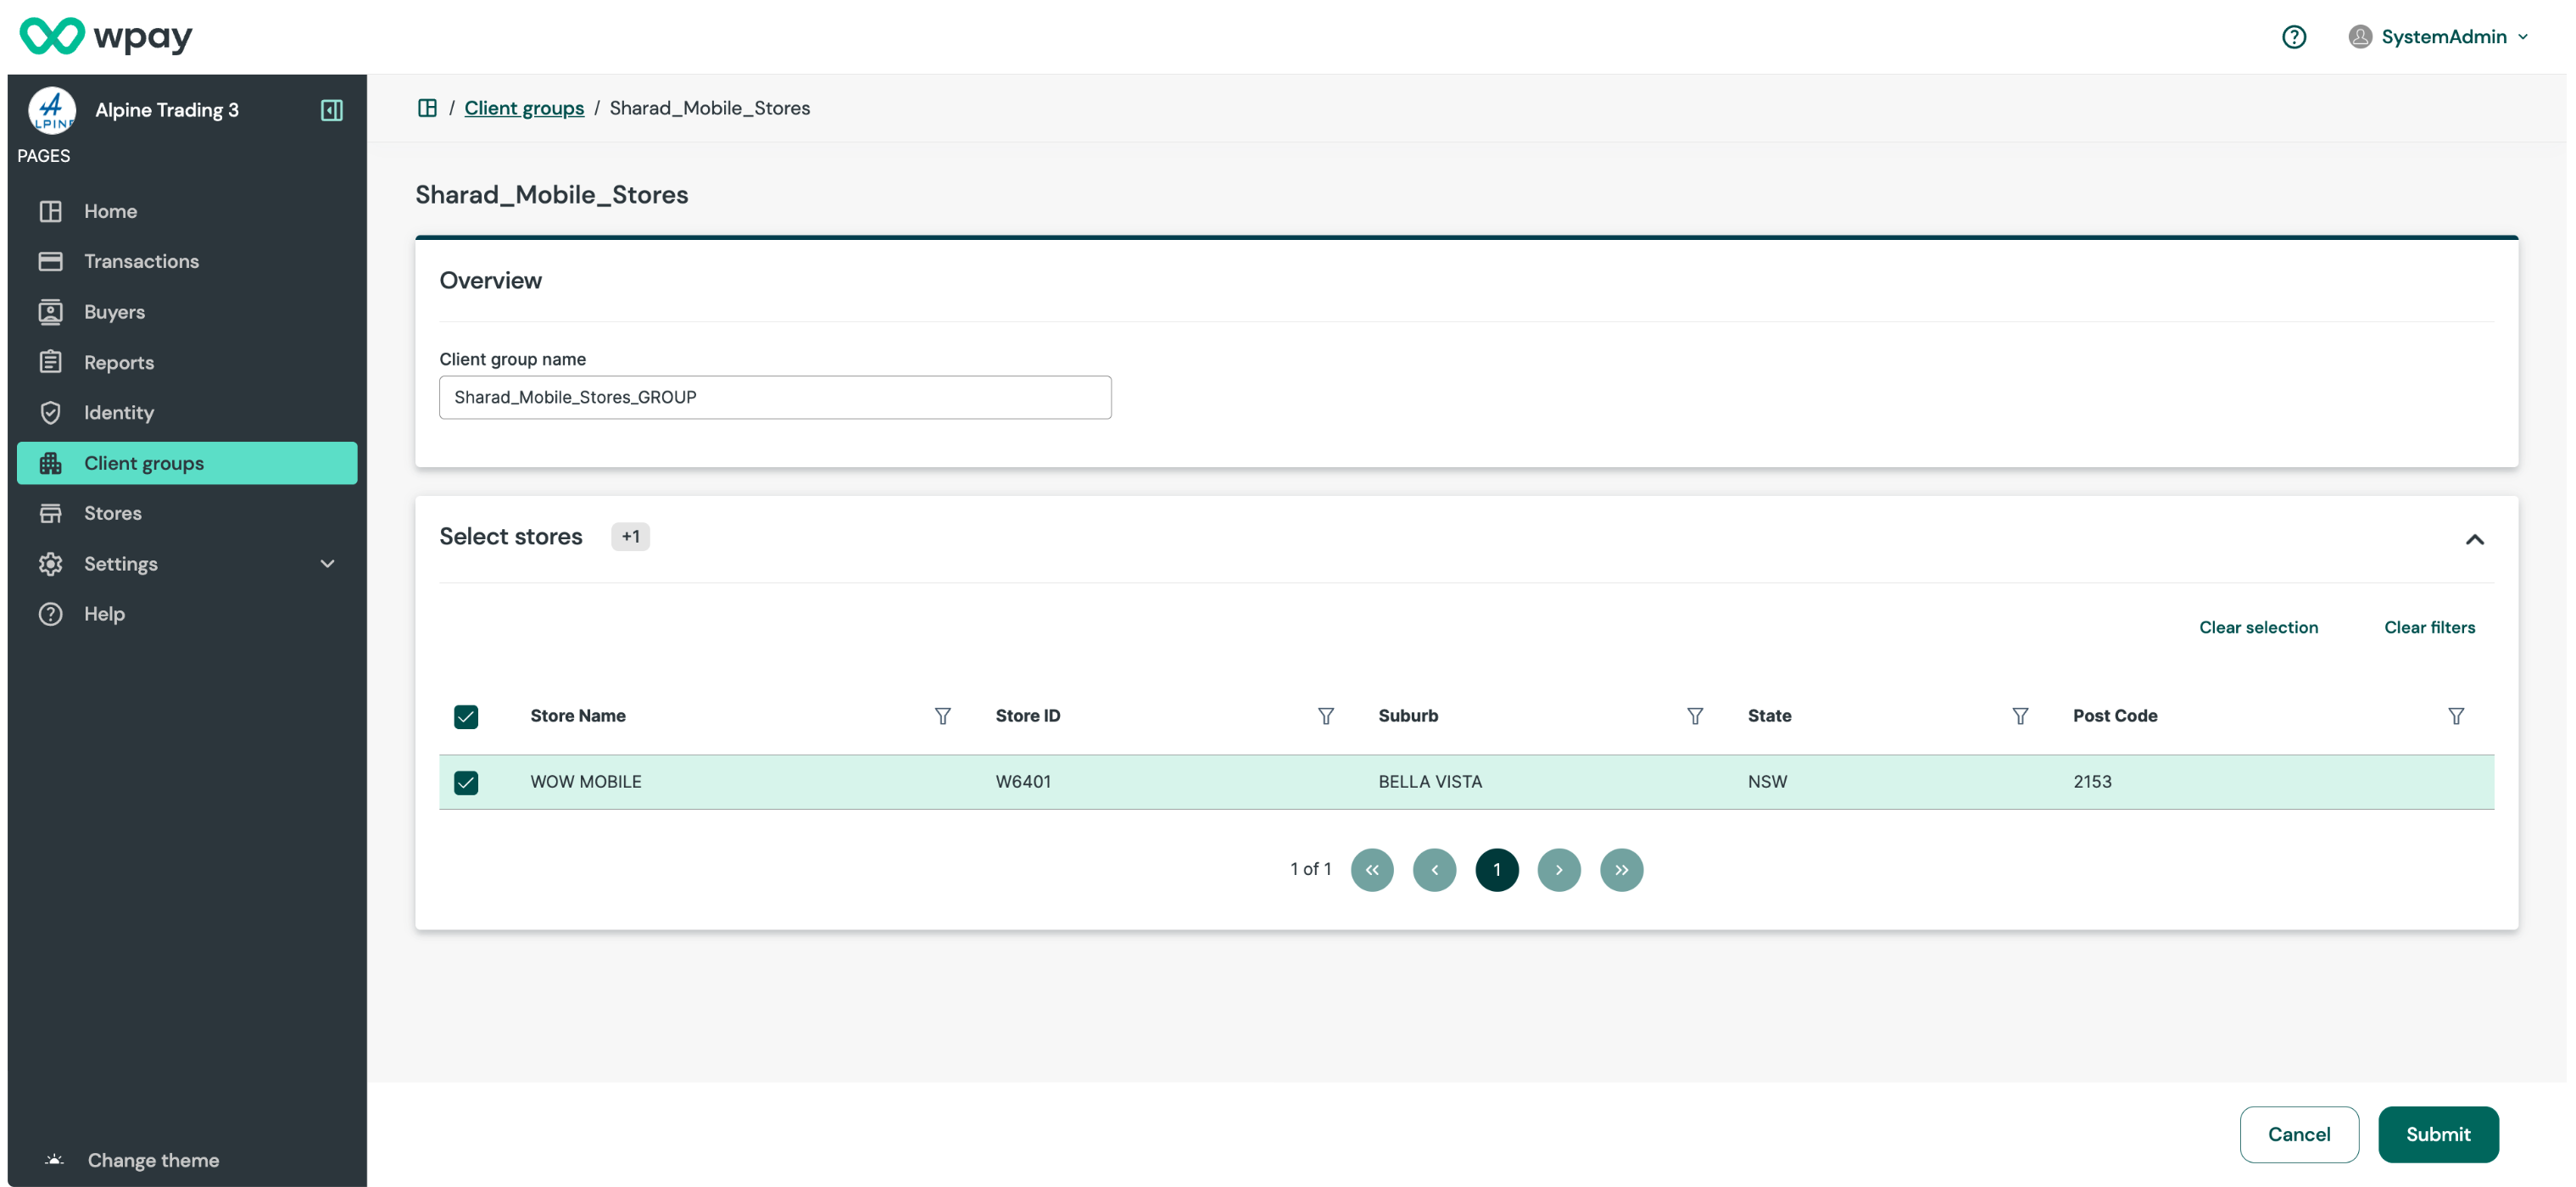
Edit and save a Client Group
Deleting a Client Group
Deleting a Client Group can be done from the Client Group listing screen simply click on the Actions Menu and click the “Delete” menu item.

Delete a Client Group
Note
Once a Client Group is deleted users who previously were able to login will not longer be able to.
Updated about 2 months ago