How to manage parameters on the terminal device?
Learn about managing terminal parameters in VHQ.
Parameter Management includes:
- Configuration - this involves identifying the Parameters (and their values) that need to be managed for specific devices. It includes configuring the parameter values for specific Applications for specific Devices as required.
- Downloads/Synchronize - VHQ evaluates and builds the list of parameters that need to be downloaded in the appropriate format and downloads them to the device.
The VHQ full Parameter downloads take place:
- When a package is assigned to a device for the first time.
- When an existing package is being replaced by a new package (Whenever package assignment is changed, full parameters will be downloaded).
How to edit the terminal parameters?
Editing parameters for all VHQ devices can be done by the VHQ GUI.
To Edit a parameter:
- Device Profile Screen
- click Device Details > Parameter tab > Edit Parameter for Application window
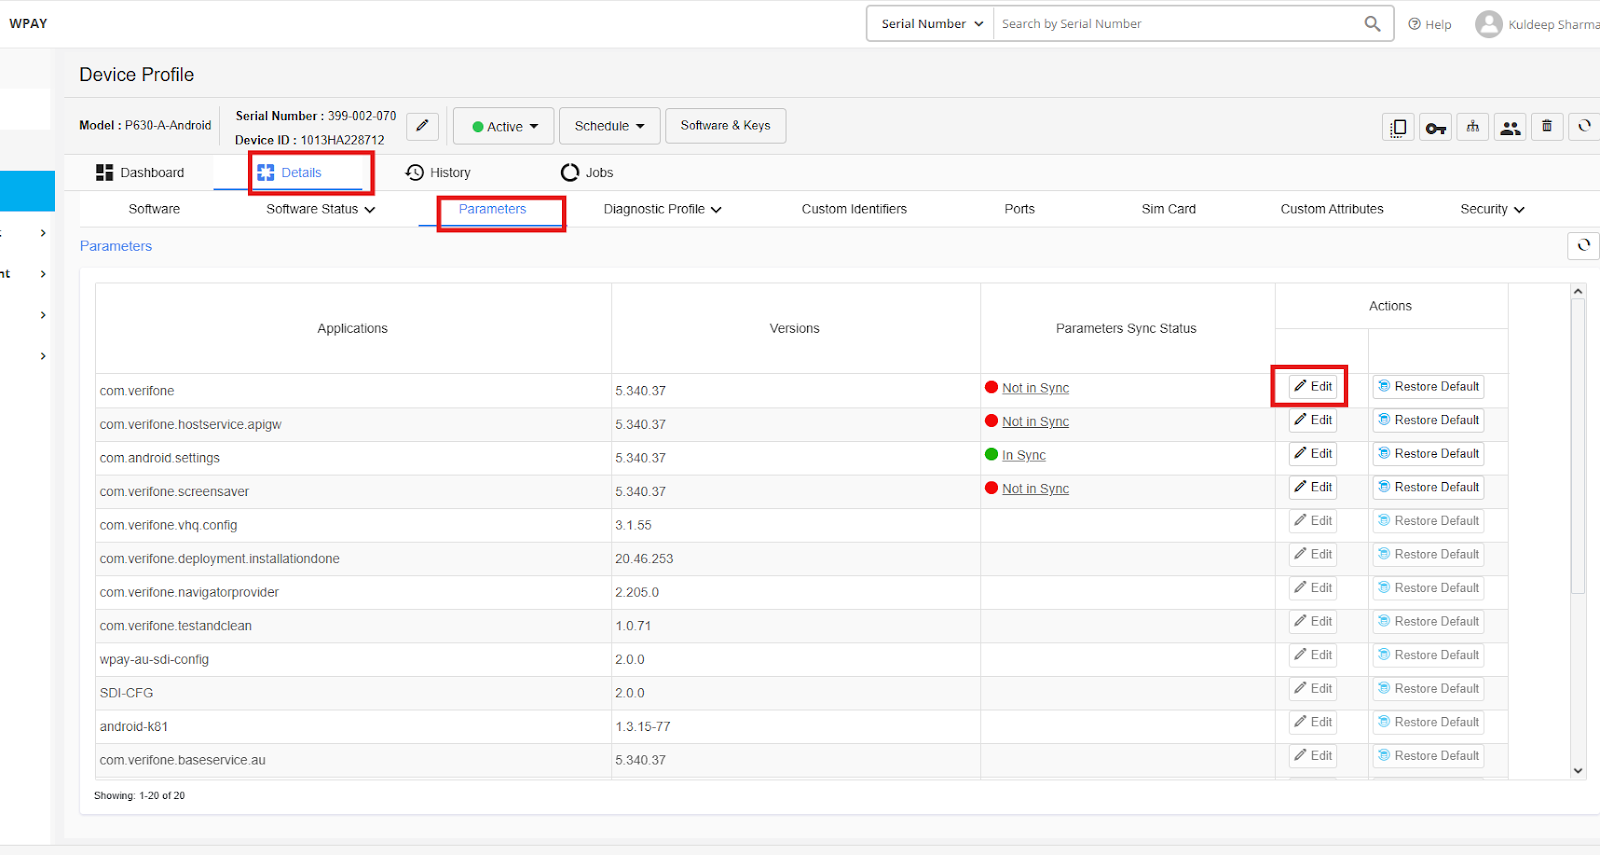
Device Parameters
-
Device Search Screen
-
Search for a device
-
click Device Details > Parameter tab> Edit Parameter for Application window
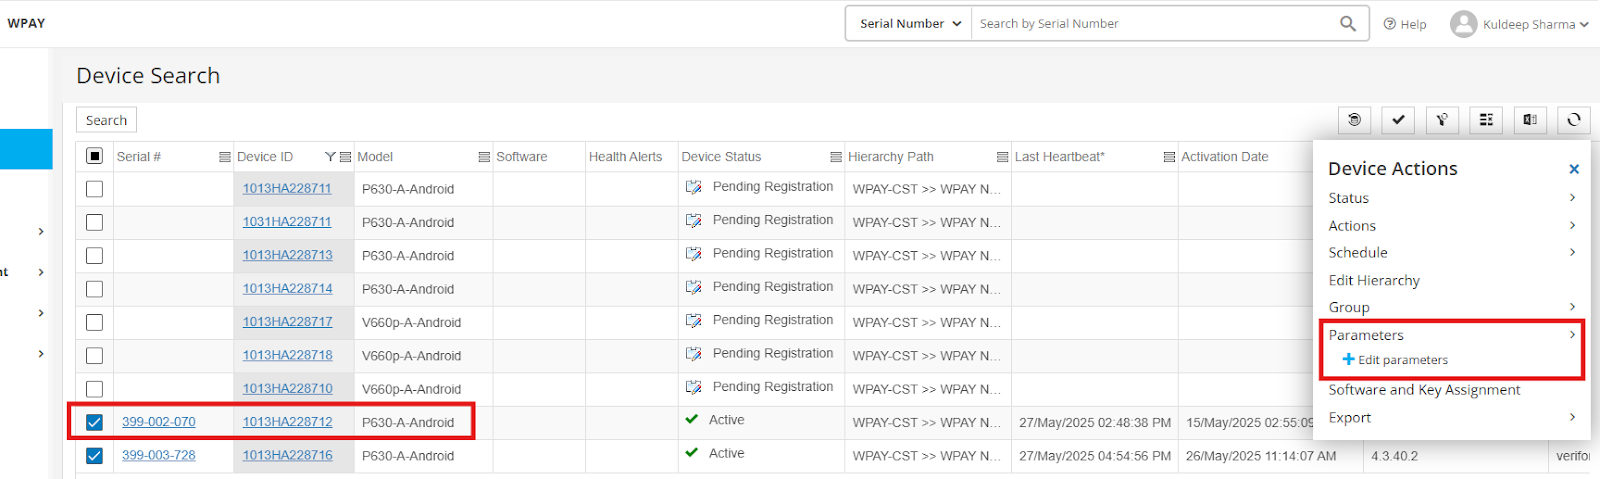
Device Search Profile
-
-
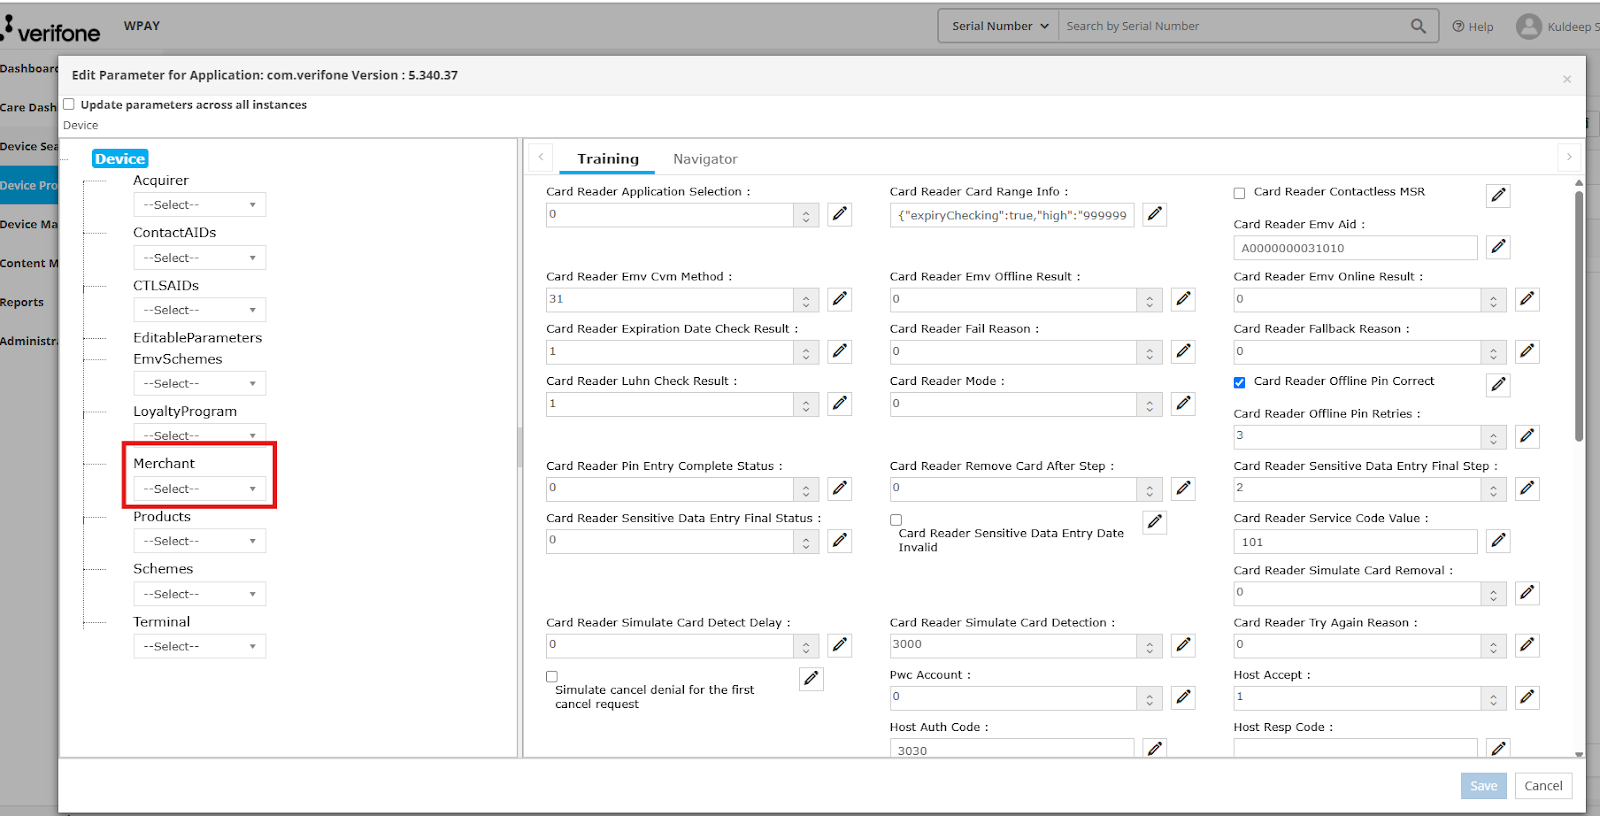
On the Edit Parameter for Application form window, select the value from the drop-down list. The Containers are listed as tabs and the parameters are displayed with the relevant values.
The full screen view and the tooltip features make it easy for the users to view the description with the validation rule or edit the parameters.
- Click to edit the parameters. On the pop-up screen, enter the values. You can either restore the parameter definition file default values or the template value.
- Click Save to apply the changes.
- The changes will be pushed to the device on next contact.
Edit Terminal Parameter
Edit parameter window to update the following parameters in VHQ
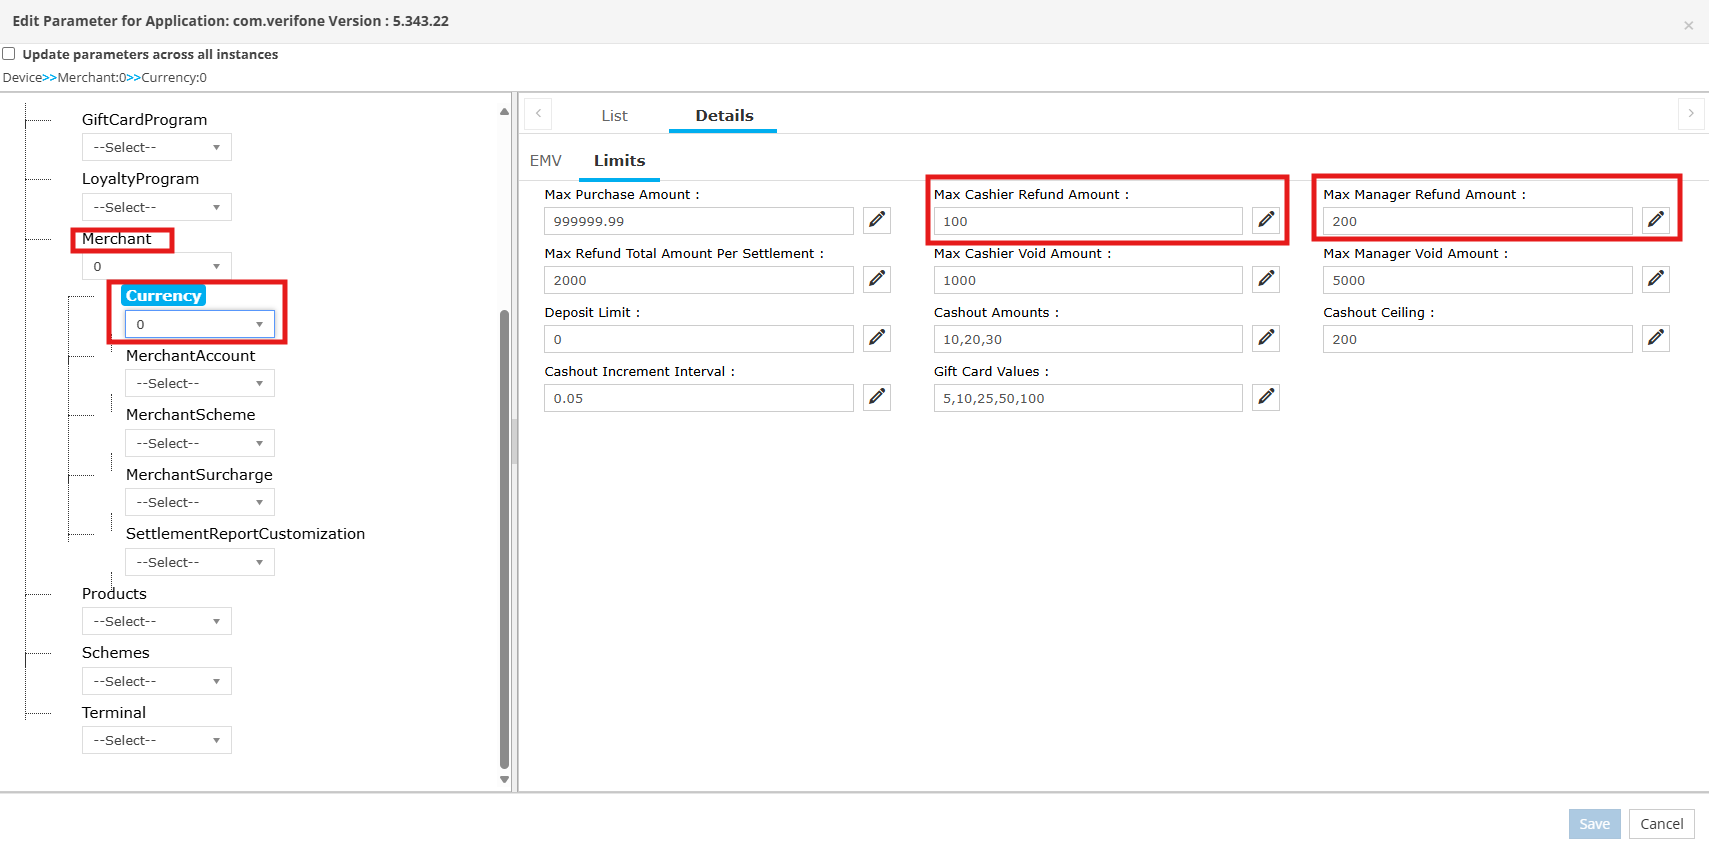
- Cashout Limit
To set the Cashout Limit - this is the maximum cashout amount allowed, in the currency supported by the terminal.
The value should be in a decimal format, e.g. $40 = 40.00
Go to “Merchant” → “Currency” → Limits tab -->Select the record and click on “EDIT”
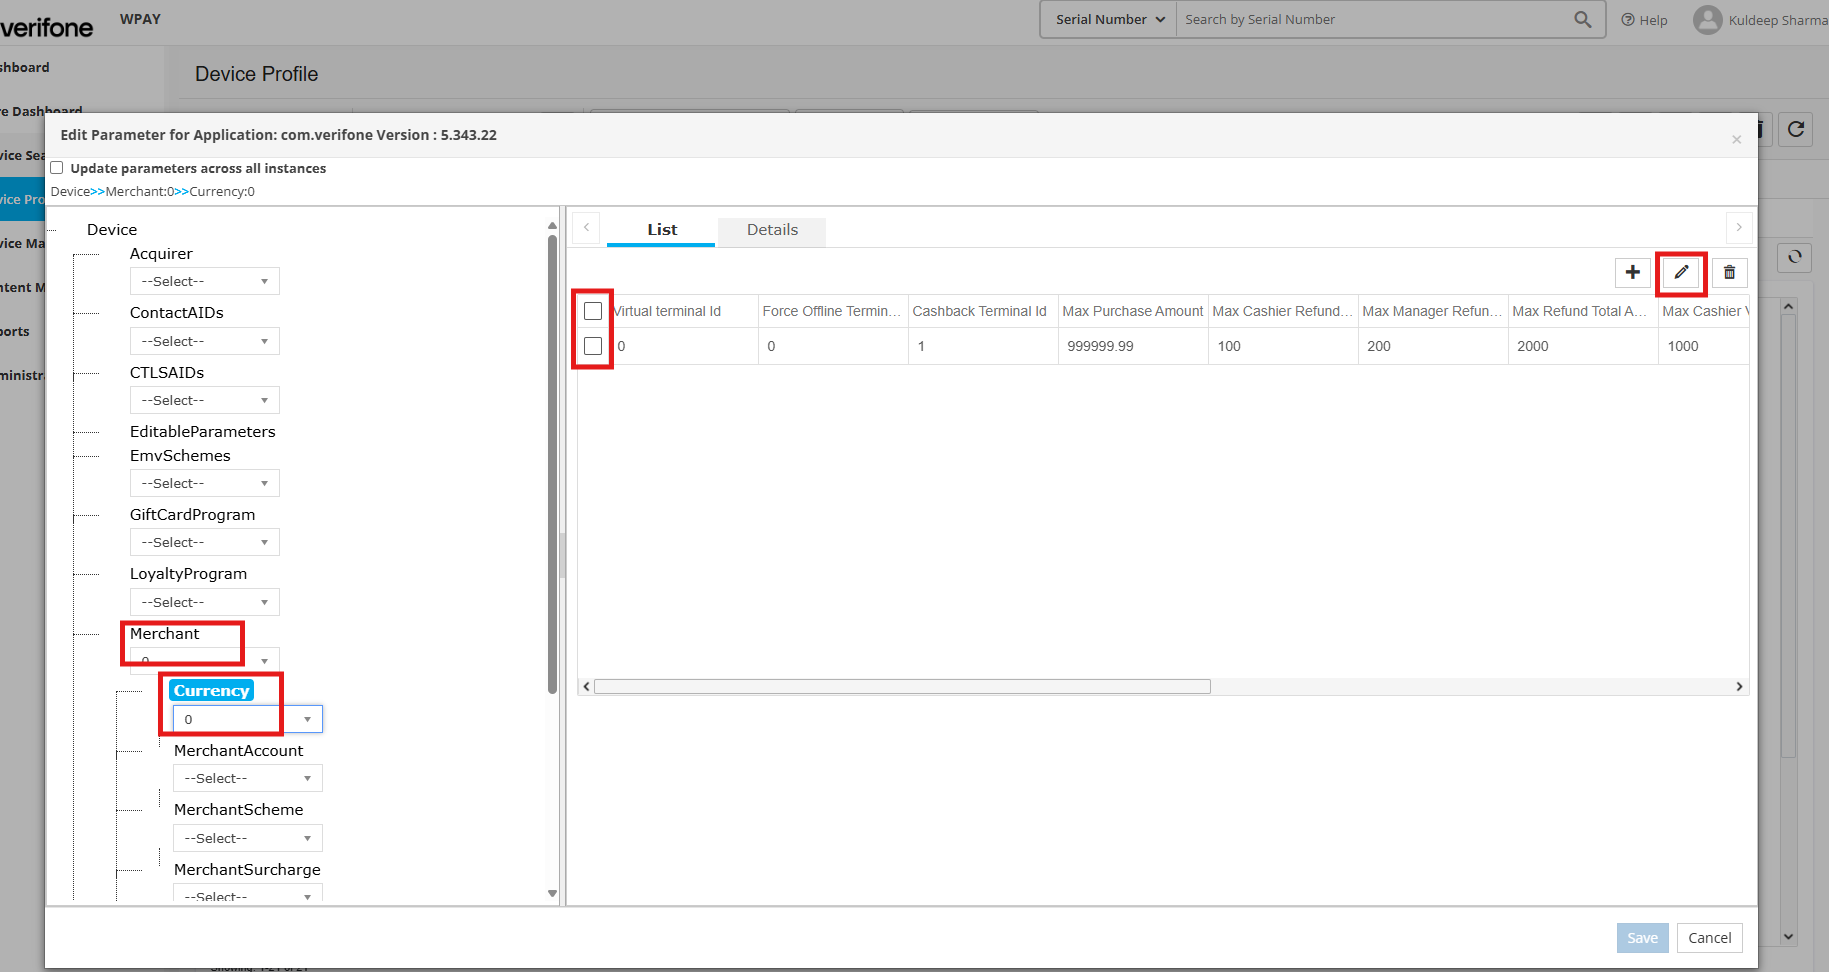
Edit Cashout Limit
Set the limit in the Cashout Ceiling field and click SAVE

Edit Cashout Ceiling
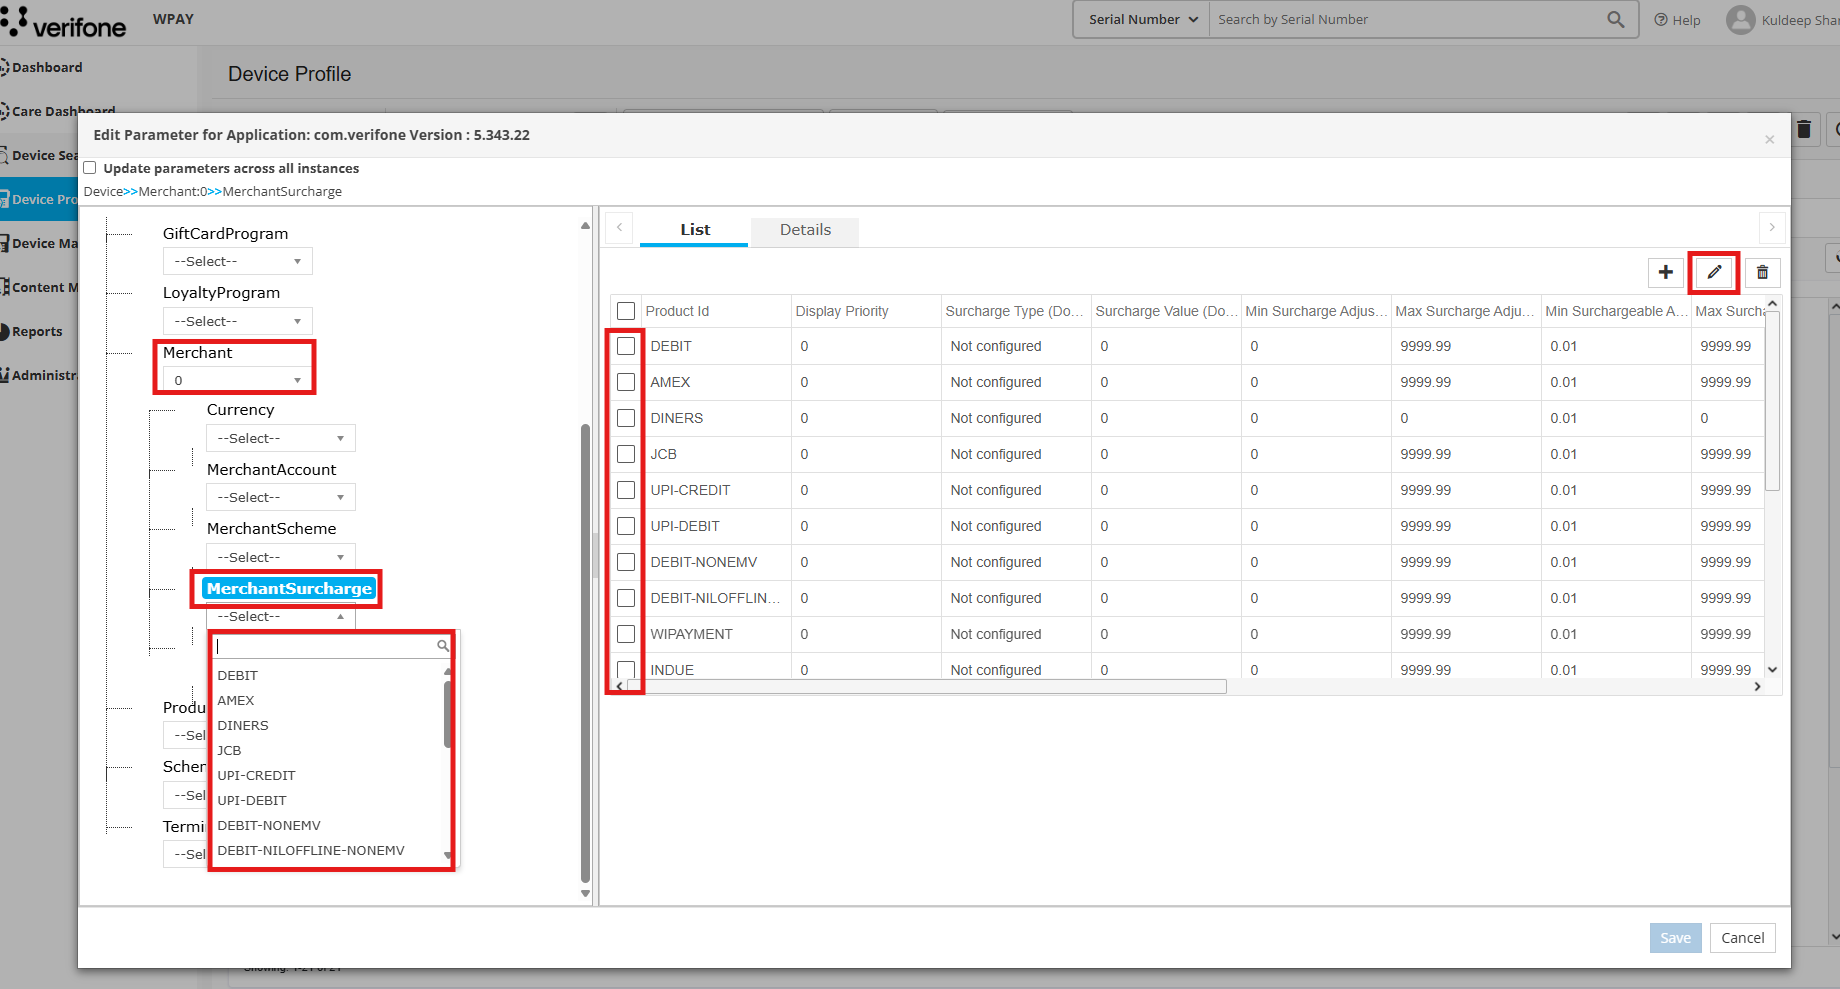
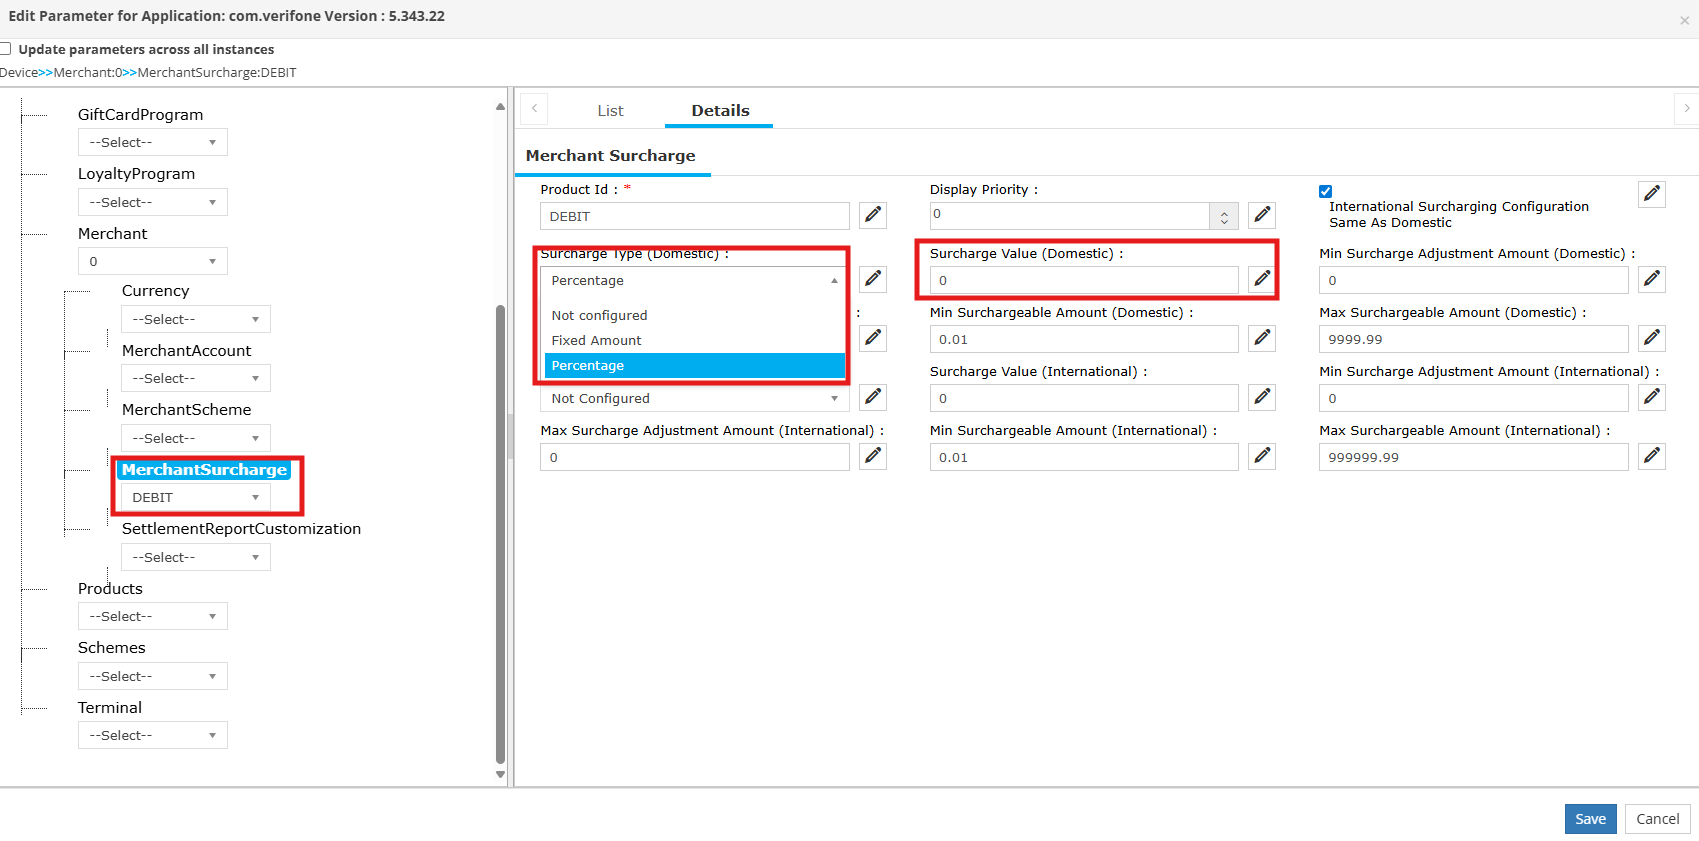
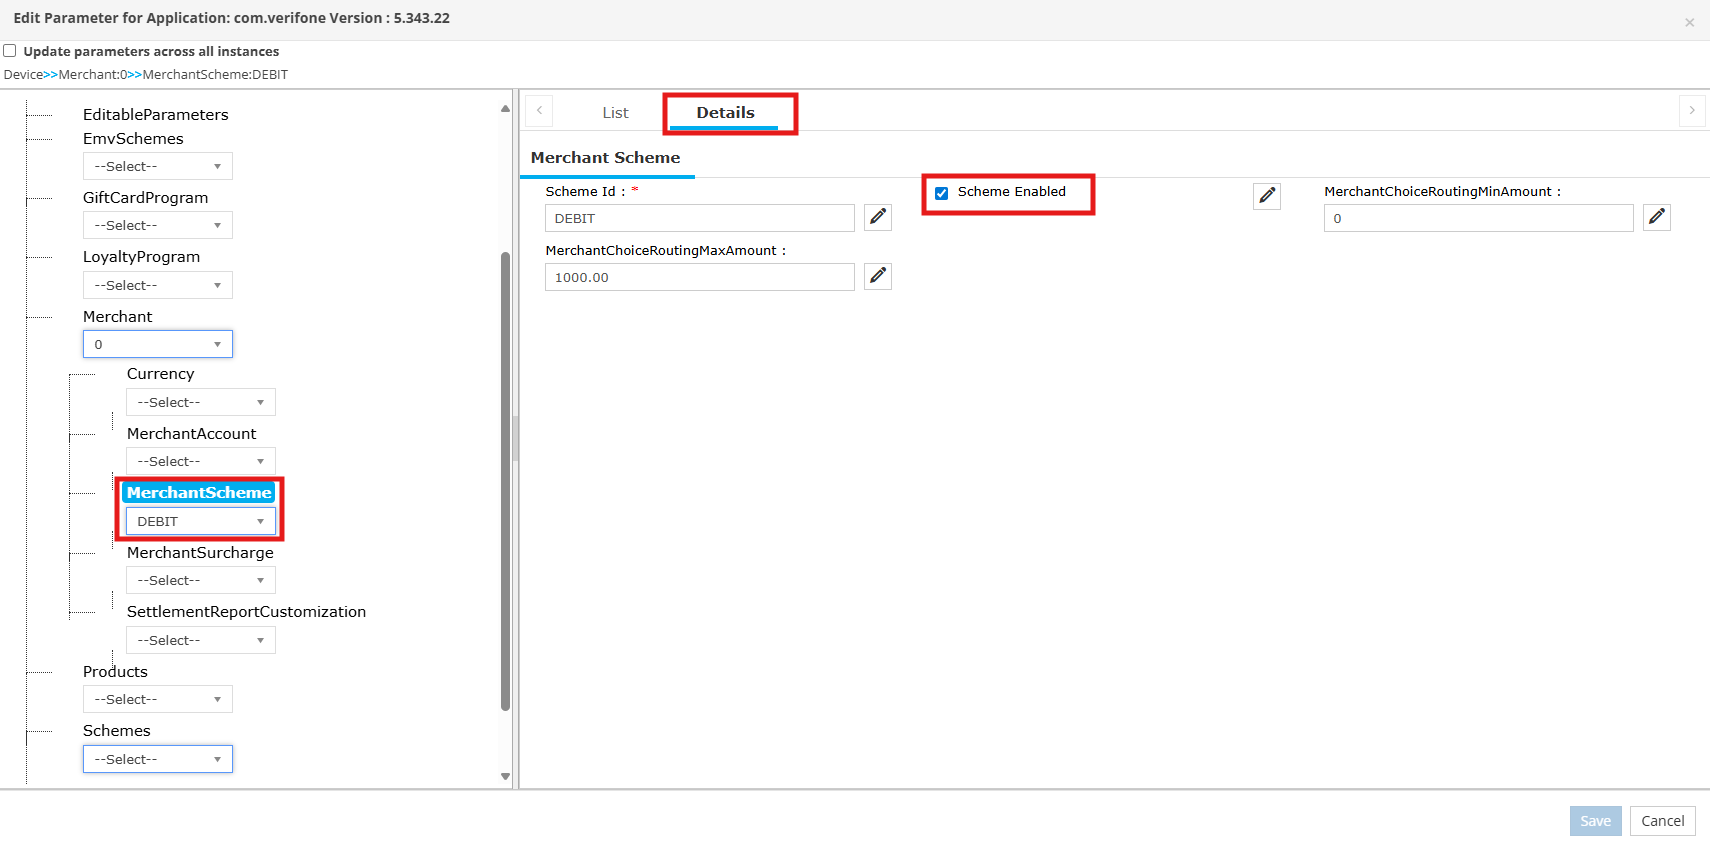
- Surcharge %
To set the Surcharge Value - it needs to be configured per scheme that the terminal is enabled for.
- Go to “Merchant” → “MerchantSurcharge” → Select a Scheme from the dropdown
- “Surcharge Type (Domestic)” = Percentage
- “Surcharge Type (Domestic)” = enter the surcharge value here
- Click SAVE
- Repeat the steps for each scheme.
Edit Surcharge
- Refund Limit
To set the Refund Limit - this is the Maximum refund amount allowed by the cashier and Manager, in the currency supported by the terminal.
The value should be in a decimal format, e.g. $40 = 40.00
Go to “Merchant” → “Currency” → Select the record and click on “EDIT”

Go to “Limits tab” → Set the “Refund Limit Max Cashier Refund Amount” and click SAVE.
- Tipping
Enable Tipping - when enabled (set to true), the payment application on the terminal presents a tip selection screen during a transaction, showing pre-configured tip amounts and/or an option to enter a custom tip amount, as configured.
In setups where the POS collects tip information, the payment application will not prompt for tip selection/entry; however, this parameter must be enabled for the POS-requested tip amount to be allowed. This parameter must be enabled in order for other tip-related parameters to produce effect.
Go to “Merchant” → “MerchantFeatures” → Check “Mail Order/Telephone Order Payment Enabled” → click SAVE
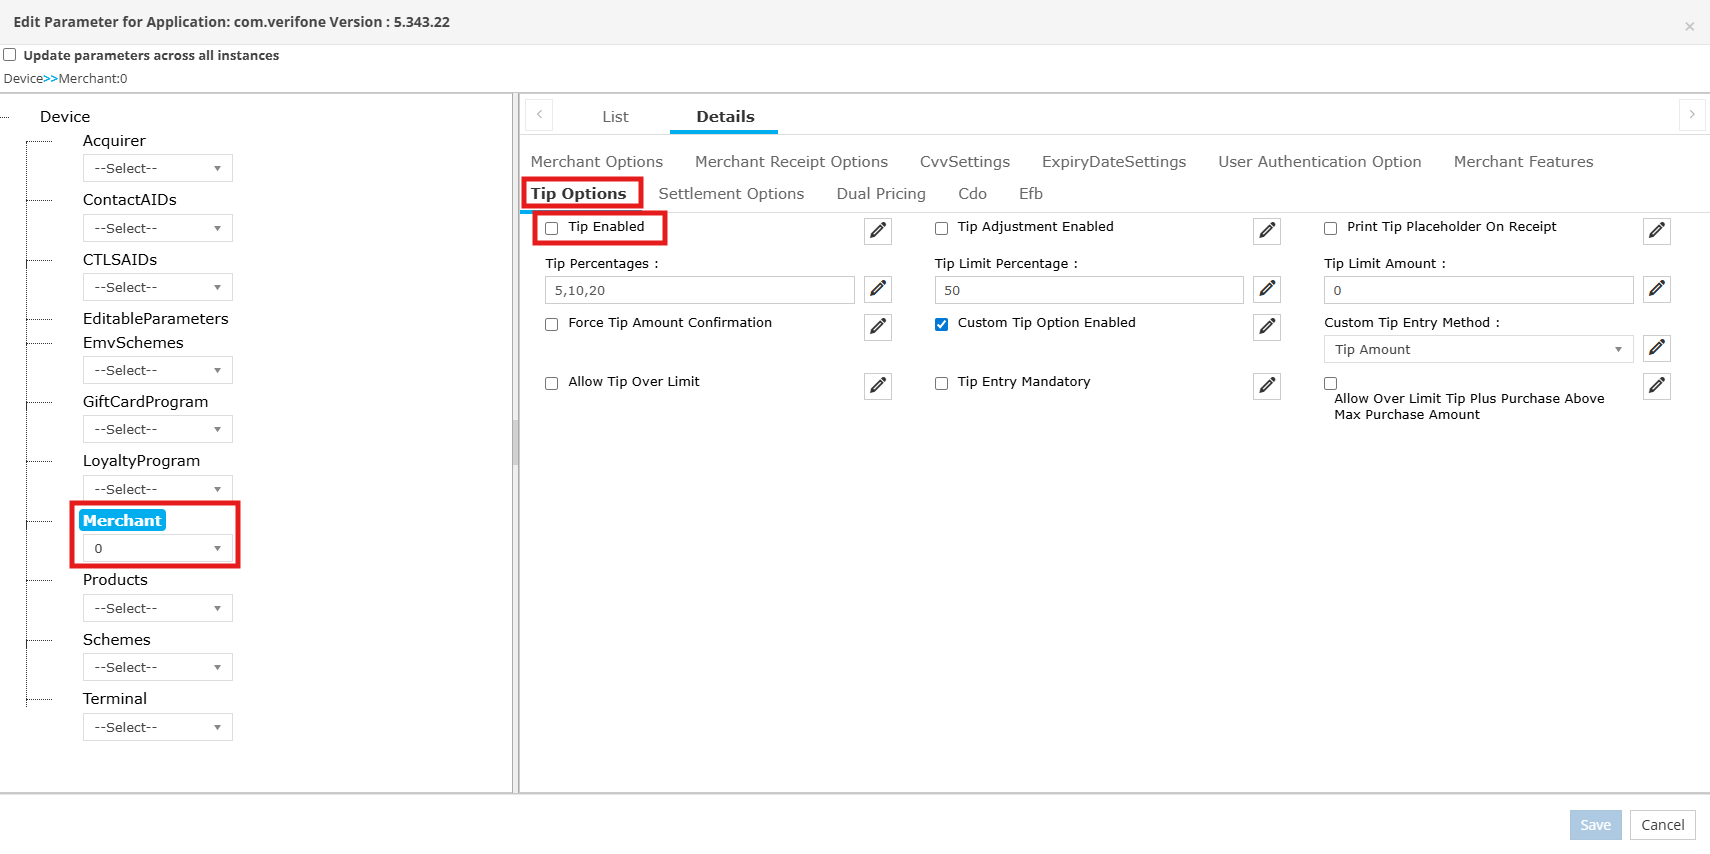
Set Tipping Limits
- Tip Limit Percentage - this defines the maximum percentage of the transaction amount that can be added as a tip. When the tip amount exceeds this limit, a warning is displayed. Any tip amount is allowed when TipLimit set to 0.
- Tip Percentages - this defines up to 3 tip percentage options to be presented for customers to choose from. Enter up to 3 comma-separated whole numbers without the % symbol and without spaces, e.g. ‘10,15,20’ for 10%, 15%, 20%.
Note: TipEnabled parameter must be enabled. - Custom Tip Option Enabled - this enables Custom option on the Tip screen for this terminal.
Amex acceptance (or any other Schemes)
Steps to enable AMEX Acceptance.
- The same steps can be followed to enable/disable other schemes for the terminal.
- Go to “Merchant” → “MerchantScheme” → Select AMEX from the dropdown
- Set “Scheme Enabled” = True or False
- Click SAVE
- Repeat the steps for other scheme as required.
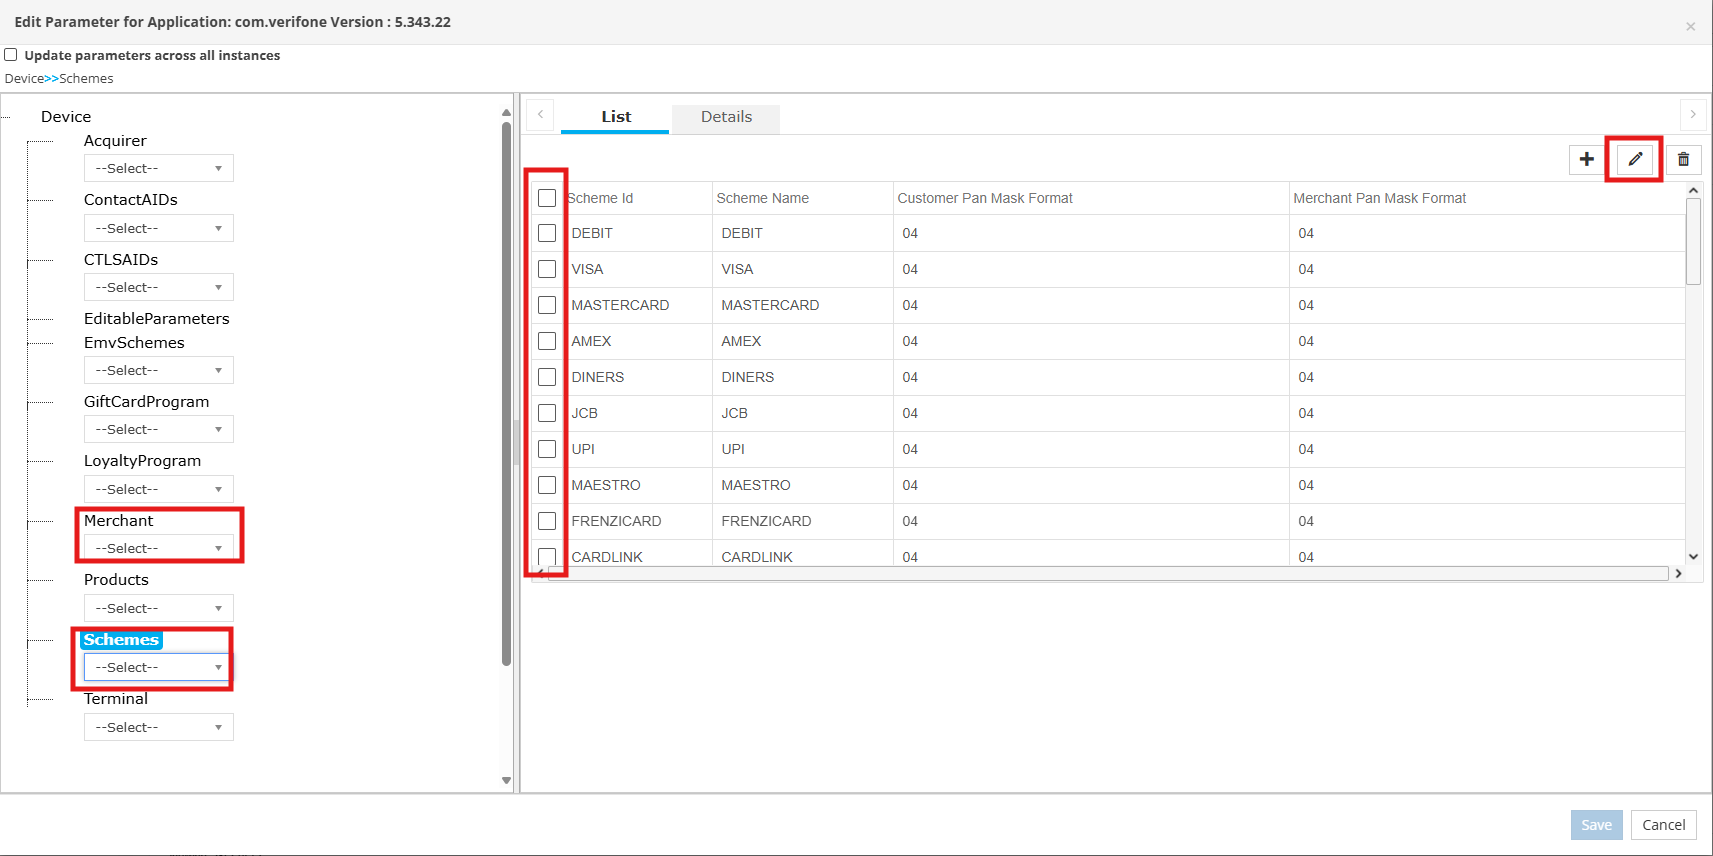
Set Allowed Schemes
- MOTO
To enable mail and telephone order (MOTO) payments.
Go to “Merchant” → “MerchantFeatures” → Check “Mail Order/Telephone Order Payment Enabled” → click SAVE
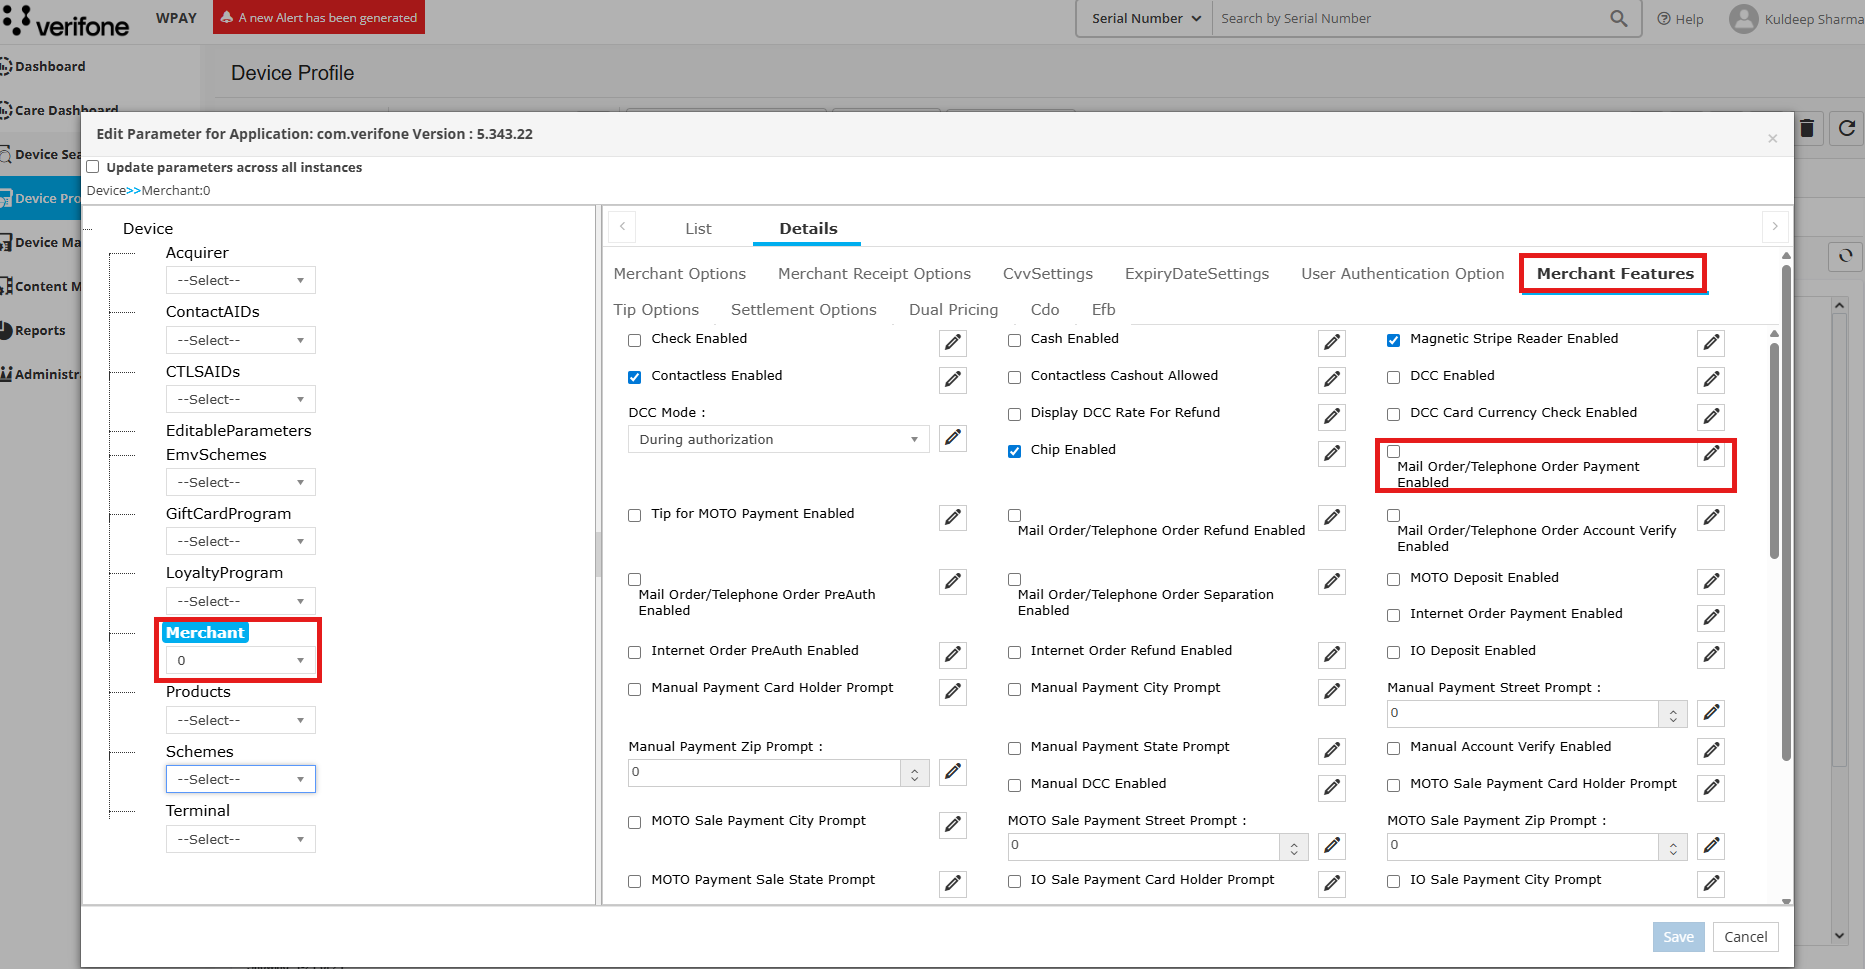
Enable MOTO
Updated 4 months ago