Capturing an authorisation
Learn how to perform a capture on a payment.
Do you have the right role?
You will need to be assigned the following role(s): Operations manager. Capturing an authorisation can only be performed on online transactions.
Capture payments manually
If you are configured to capture funds manually, you can do so on every payment that has Authorised status. The authorisation period for capturing payment varies depending on your payment provider. You can only capture a payment within the authorisation period. After the authorisation period ends, you might be unable to collect any money for the order.
To capture a payment, go via the Payments detail page.
- Search the relevant payment in the Payments list and click into the payment. Note: the payment status must be authorised in order to capture.
- In the top right corner, you will see the Actions button. From the drop-down, select Capture.
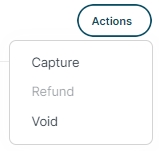
Actions button with refund, capture and void options
- Capture payment screen will be launched. Enter the amount you would like to capture.
You are only able to capture a payment once. The initial amount displayed is the authorised amount of that transaction.
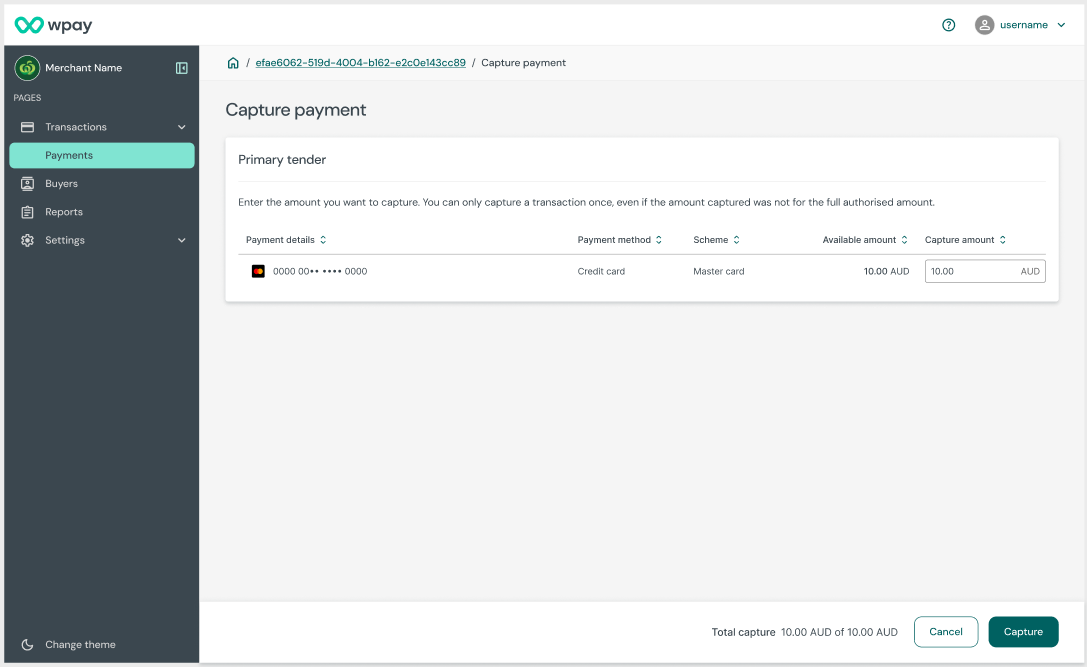
Full capture
If you are attempting to capture more than the authorised amount, then the following message will appear.
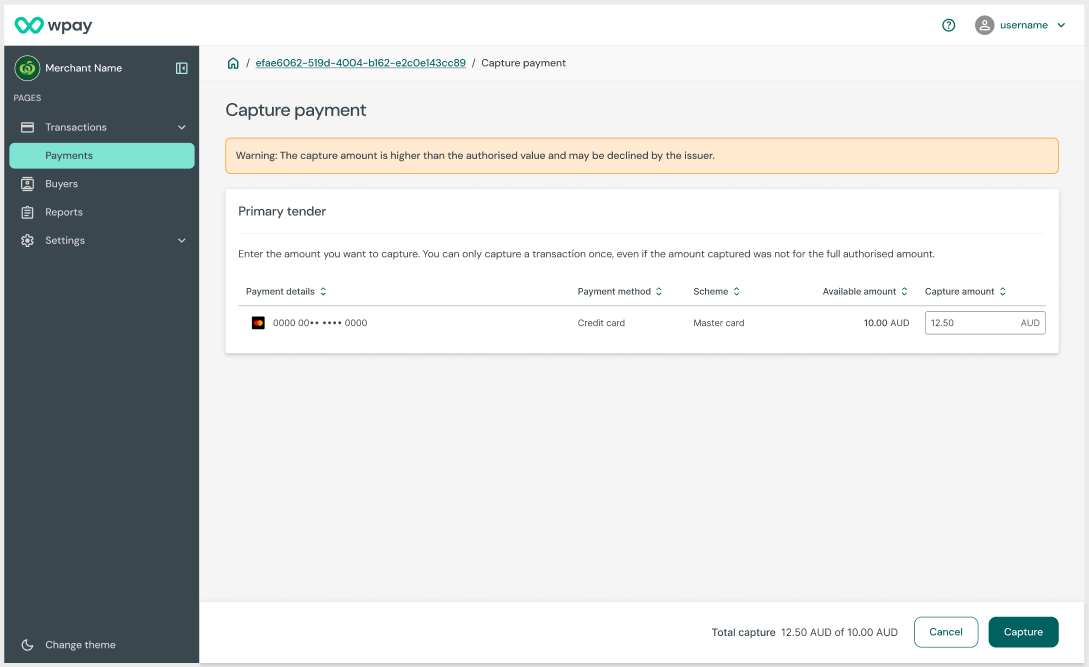
Over capture
- Select Capture. You will see the refund confirmation modal.
If you are performing a full capture (where the captured amount equals the full authorised amount), then the following confirmation will appear.
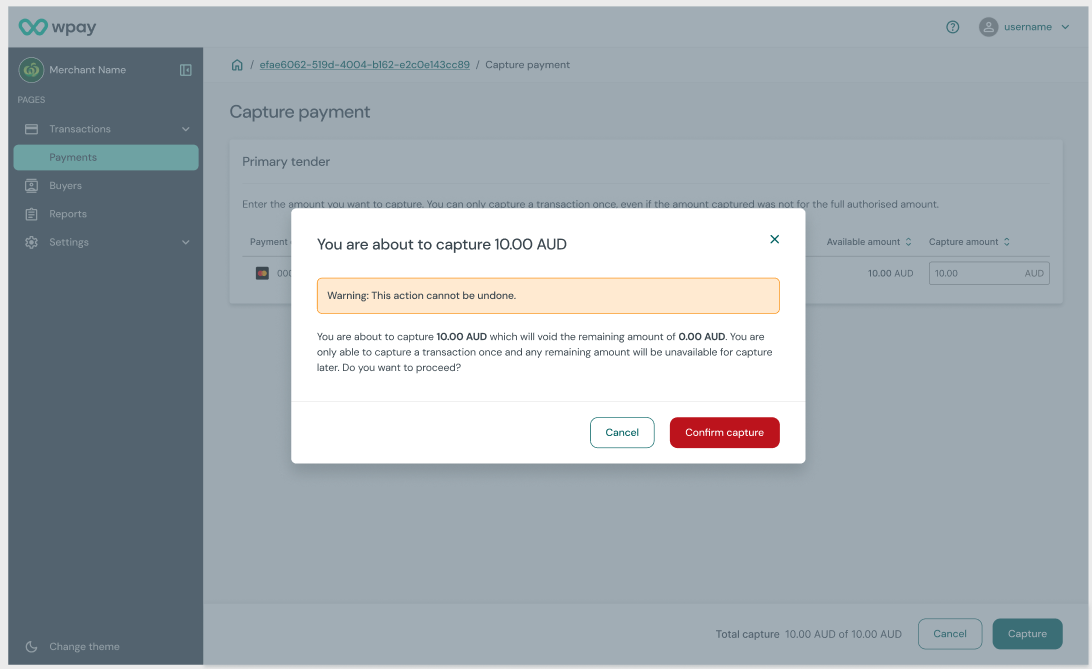
Full capture confirmation screen
If you are performing a partial capture (where the captured amount is less than the full authorised amount), then the following confirmation will appear.
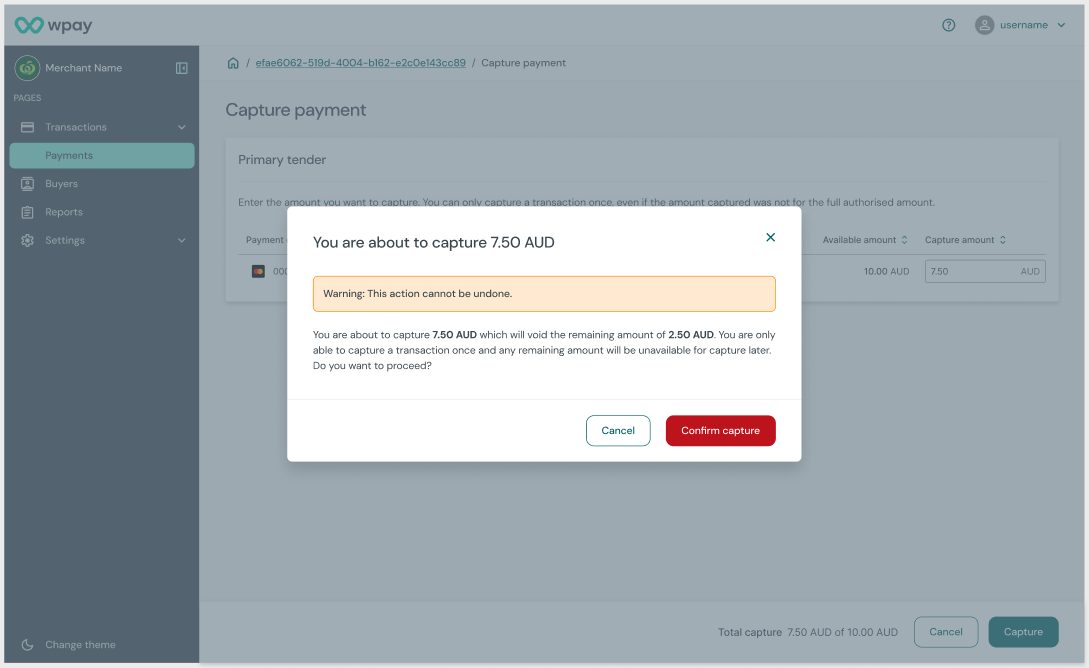
Partial capture confirmation screen
If you are attempting to capture more than the authorised amount, then the following confirmation will appear.
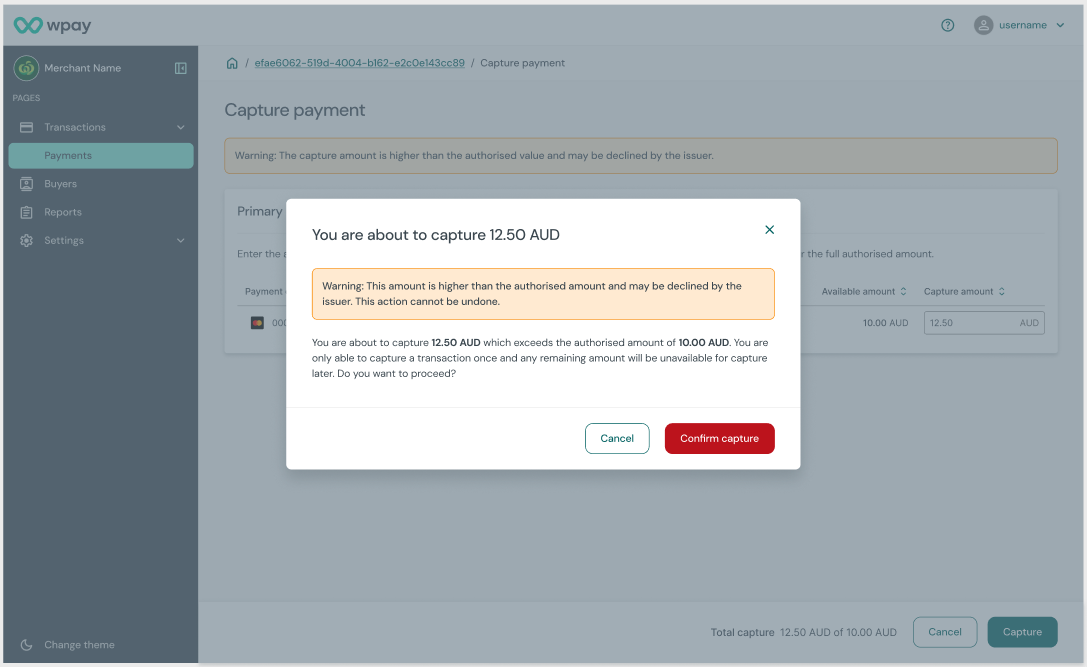
Over capture confirmation screen
- Select Confirm capture.
- If the capture was successful, then a success message will be displayed at the top of the Payment Detail page and the page will be automatically refreshed.
- The Captured amount field will be updated to reflect the captured amount.
- The Payment timeline section will have a new entry to reflect the successful capture event.
Possible reasons you can’t make a capture
If the Actions button is unavailable, or you can’t make a capture, one of the following may apply:
- Your user role doesn’t have capture rights. Reach out to your admin user. They can assign you the Operations Manager role, which lets you make captures.
- The payment method doesn’t support captures.
- A capture isn’t yet possible. A payment must be in Authorised status before a capture is possible.
- Another user is attempting a capture on the transaction. Please check the transaction before retrying.
- The capture amount must be greater than zero.
- You can only capture a payment once.
- If you are attempting to capture an amount that exceeds the authorised amount, then your merchant configuration needs to be enabled for that feature.
Status definitions
Authorised: The payment details of the customer are verified and the funds are reserved.
Captured: The reserved funds are transferred from the customer’s account to yours.
Note: A payment with an immediate capture can’t be voided and would need to be refunded.
Updated about 1 year ago
